by Kate H.
This post is a continuation of our Beginning Crochet Series. Review the previous blogs here: Getting Started with Crochet: Part I and Getting Started with Crochet: Part 2.
Changing Colors
When you’re crocheting and want to change yarn colors, you can do it either in the middle of your row or at the end depending on the look you want.
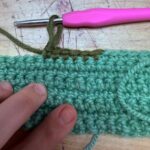
When you want to change colors at the end of your row, stop before you make your last stitch so there are two loops on the hook.
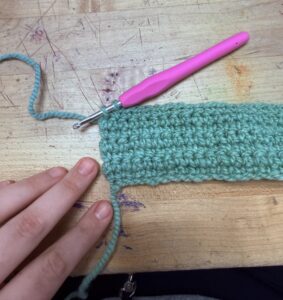
Then, you will drape the new color over your hook so the yarn tail is facing you, so you have 3 loops on your hook.
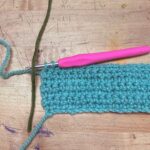
Now, you will continue doing your stitch as normal. I was doing a single crochet stitch, so I will pinch the new color to make a loop as I go through it and complete my final stitch for the row.
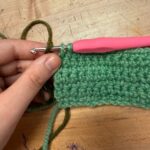
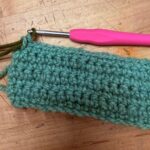
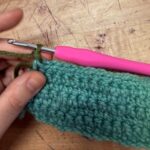
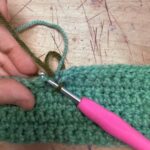
If you are wanting to change yarn color in the middle of your row instead, you will do the same thing by draping the yarn over with the tail facing you.
Understanding Crochet Patterns
When you start a crochet project, you may use a pattern to achieve the desired look. Crochet patterns will normally specify the materials used for the project. This will include information on the yarn, hook sizes, and how much yarn was used in a sample size of the pattern. This can be helpful if you are using a different yarn brand or type, so you will be able to estimate how much material you will be using. The beginning of crochet patterns will usually have a list of the abbreviations used in the pattern.
Written instructions use abbreviations to tell you what to do in every row of a pattern. Below are the most common abbreviations you will see:
| Stitch | Abbreviation |
| Blo | Back Loop Only |
| Ch | Chain Stitch |
| Dec | Decrease |
| Dc | Double Crochet |
| Flo | Front Loop Only |
| Inc | Increase |
| Rep | Repeat |
| Rnd | Round |
| Rs | Right Side |
| Sc | Single Crochet |
| Sk | Skip |
| Sl | Slip Stitch |
| T-ch | Turning Chain |
| Ws | Wrong Side |
| Yo | Yarn Over |
| Yu | Yarn Under |
| ( ) | work everything inside the parentheses into the next stitch |
| [ ] or * | work everything inside the brackets/stars the number of times indicated |
You can go to the Craft Yarn Council website for a more comprehensive list: https://www.craftyarncouncil.com/standards/crochet-abbreviations.
Reading A Crochet Pattern
You will see the instructions written out under the materials and abbreviations list on a pattern. For a single crochet square, you might see a pattern identical to this:
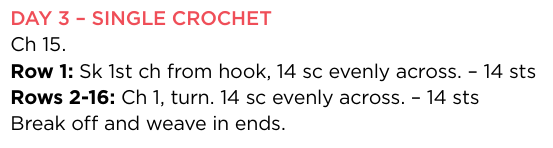
(from CreativeBug)
For this pattern, you’ll start reading it at the first black line which tells us to do a chain of 15.

Next are the directions for row 1: “sk 1st ch from hook, 14 sc evenly across.- 14 sts”.

What this is telling us to do is skip the first chain from our hook, and then do 14 single crochets across our chain. Patterns will tell you how many stitches will be at the end of the row. This pattern indicates that to us by saying “- 14 sts”.
The next step of the pattern reads as follows: “Ch 1, turn. 14 sc evenly across. – 14 sts”.

What this is saying is to make one chain and turn your piece so the yard you are working with is in front of your piece. Then you will continue doing 14 single crochet stitches across that row and repeat these steps 14 more times.

To finish the piece you will “break off” your piece by doing a slip stitch in the last stitch. Leave a tail of about 6 inches before cutting it off the yarn ball. We will cover weaving the ends later in this blog.
Fastening Off
When your project is complete, you will end your project by doing a slip knot as your last stitch unless your project indicates otherwise. Once you make your final stitch, you will have 1 loop remaining on your hook. Then, cut off about 6 inches of yarn that are connected to the yarn ball and thread that tail through the loop so the knot is snug.
Weaving in Ends
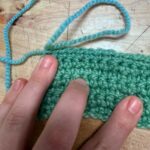
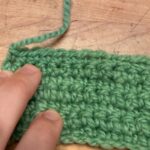
After you have completed your project, you may be left with some yarn tails hanging from your piece. In order to complete our project, we have to weave these tails back in. Start by threading a tapestry needle. Then, take the needle and start weaving in the row closest to the tail. When you do this, you want to be sure you’re going through the front and back of the stitch, so your tail can’t be seen from either side.
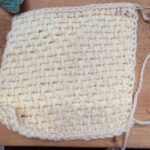
Next, pull the yarn all the way through, making sure to not tug too hard. Too much tension could make the corner cave in.
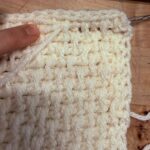
Then, use the tapestry needle to go back through the stitches again, skipping the last stitch you went in between. Depending on the length of the tail, you may go through another row or just stop there. Then, tug to make the yarn taut and cut the yarn so that when the piece is flattened out, the tail disappears.
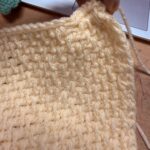
Project Curling
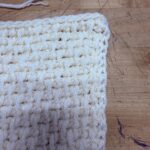
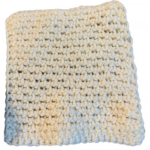
Occasionally a finished piece may curl at the ends or on the sides. This can happen for a number of reasons, like too much tension, incorrect yarn or hook size, or the stitches you used are just prone to curling. You may also have slanting issues from tension or from incorrect increasing or decreasing at the end or beginning of the rows.
Take the above square for example. I made this about 4 years ago, and due to a tension issue at the beginning of the project, it has started to slant. Additionally, it has also started to curl on the bottom row.
The good news is that there are ways to combat this by using something called a blocking board. These are usually made of foam or wood and have holes to hold pins or pegs to hold your piece as the fibers relax so the project can straighten out. There are 3 methods to blocking your piece, wet blocking, dry blocking, and cold blocking. This site can give you more information on how you could do either method.
I used our 3D printer to make my own crochet board for my future projects. The print I made also had pegs so I could connect multiple boards together for a larger project.
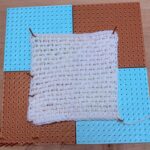
You can get started with your certification process to make your own blocking board on the 3D printer by following this link.
Next time you’re in Ignite check out our Knitting and Crochet Kit to give these stitches a try. Join us on the 2nd Thursday of every month for Fiber Friends to work on your crochet projects and get advice from your neighbors. Post your makes to the Ignite Community Discussion Board on Facebook, and Happy making!