by Kate H.
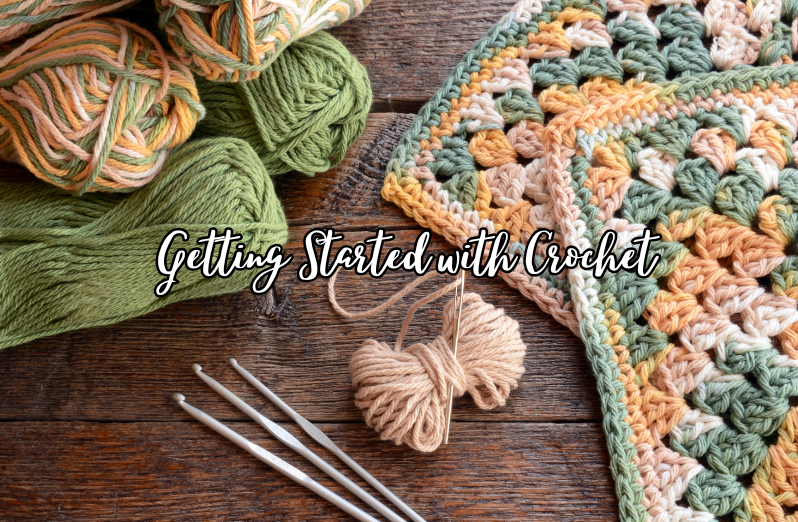
Crocheting is one of the most versatile fiber arts to explore. It can also be very daunting due to the amount of information there is to learn all at once! This blog will provide some information on crochet basics to help get you started. Check out our Knitting and Crochet Kit from our Kit Library and follow along to start practicing your crochet skills!
Choosing Your Yarn and Hook
The size of the yarn you are working with will have a recommended hook size that corresponds to the thickness of the yarn. On a new ball of yarn, the yarn and hook will be indicated on the yarn label. If you aren’t buying new yarn and has lost the label, you can use this guide to measure your yarn to see what hook size is best. The chart below can also give you a feel for the recommended hook and yarn sizes that go together.
| Yarn Weight | Category Name; Recommended Yarn to Use | Crochet Hook Size |
| 0 | “Lace”: Fingering Crochet Thread | 6, 7, 8 Regular hook B–1 |
| 1 | “Super Fine”: Sock, Baby | B–1 to E–4 |
| 2 | “Fine”: Sport | E–4 to 7 |
| 3 | “Light”: DK, Light Worsted | 7 to I–9 |
| 4 | “Medium”: Worsted, Afghan, Aran | I–9 to K–10 1⁄2 |
| 5 | “Bulky”: Chunky, Craft, Rug | K–10 1⁄2 to M–13 |
| 6 | “Super Bulky”: Super Bulky, Roving | M–13 to Q |
| 7 | “Jumbo”: Jumbo, Roving | Q and larger |
Source: https://www.craftyarncouncil.com/standards/yarn-weight-system
Making a Slip Knot
A slip knot is used at the beginning of almost every crochet project. To make one, we need to know the different ends of the yarn. The end that is closest to the ball of yarn is called the “ball end” and the other end is called the “tail end”. We’re going to be holding the yarn in both hands with the tail end of the yarn in our right hand, leaving a couple of inches. In our left hand will be the ball end of the yarn – the end that’s closest to the ball.
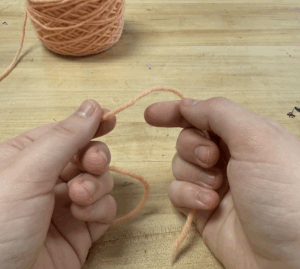
Next, make a loop, crossing the tail end over the ball end of the yarn.

While holding onto where the two ends of the yarn cross over with your left hand, use your right hand to maneuver the tail end of the yarn so it’s behind the loop.

Holding both ends of the yarn, pull that loop up and through the circle.
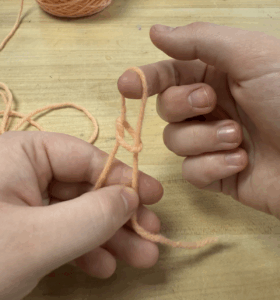
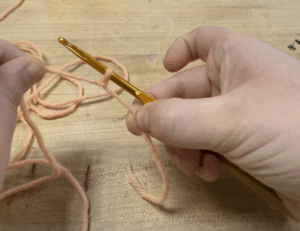
Now place your crochet hook in your right hand and put the hook inside the loop we have made. Using your fingers, pull both ends of the yarn so the knot is secure around the shaft of the crochet hook.
How to Hold Your Crochet Hook
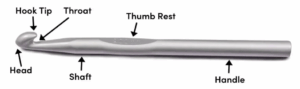
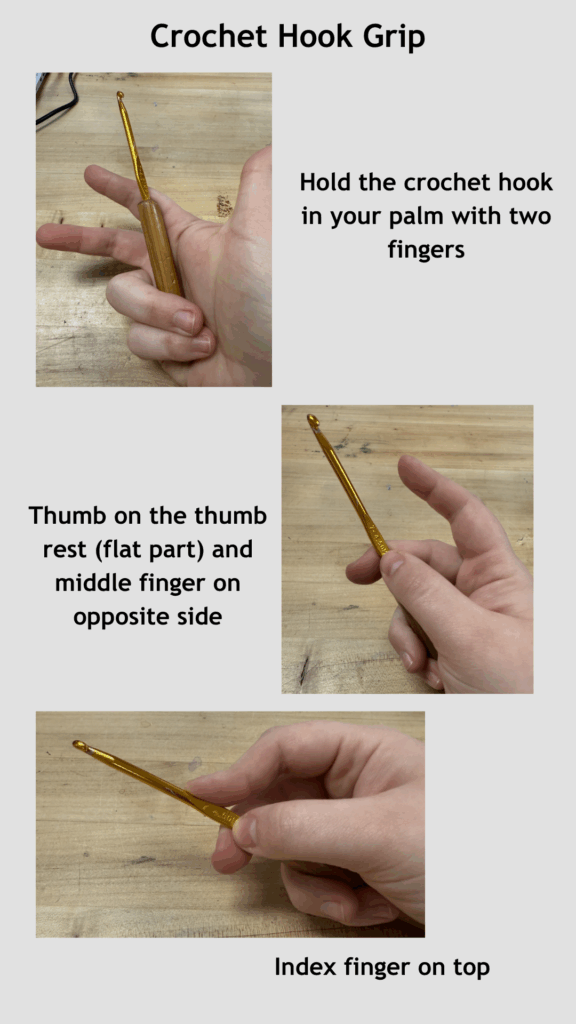
The most common way to hold your crochet hook is with an overhand grip. The overhand grip has the handle in the palm. The middle finger and palm meet between the thumb rest and handle. Our index finger will be on top to guide the hook. There are other grips to use, so find one that feels right for you.
How to Hold Your Yarn
There are a couple of different ways to hold your yarn. Choosing a way comes down to what is most comfortable for you. The way you hold the yarn directly affects how tightly or loosely the yarn is being pulled when your project is being made. This is called your “yarn tension.” To read more about yarn tension, follow this link.
To hold the yarn, start by holding it so the tail end is facing you in your right hand. Next, position your left hand so that your index and pinky fingers are under the yarn, while your middle and ring fingers are over it as seen below.
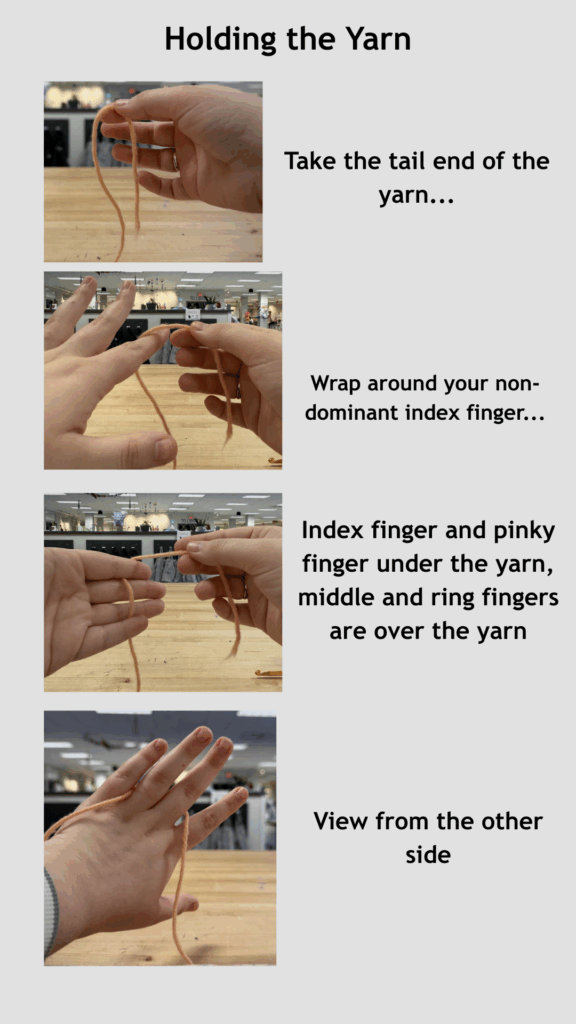
For more ways to hold your yarn, you can follow this link. There are other yarn holding techniques to get the right tension and for people who are left-handed, so find one that works for you.
Ready for more? Check out Part II of this series HERE.
Next time you’re in Ignite check out our Knitting and Crochet Kit to give these stitches a try. Join us on the 2nd Thursday of every month for Fiber Friends to work on your crochet projects and get advice from your neighbors. Post your makes to the Ignite Community Discussion Board on Facebook, and Happy making!