

by Kate H.
Whether you’re an avid gardener or just looking for a fun spring project, making seed paper will be a fun craft for you! Plantable seed paper is handmade paper that has flower seeds embedded in it. This is then planted and watered, which gives you a gardening head start in just a couple of weeks. Follow along to this tutorial or watch our video on how to use the Papermaking Kit for this activity!
Which Seeds Should You Use for Plantable Paper?
The first step for making seed paper is getting the seeds themselves. I chose to use flower seeds, but herb and vegetable seeds can also be used. Check out the chart below for some guidance on different seeds.
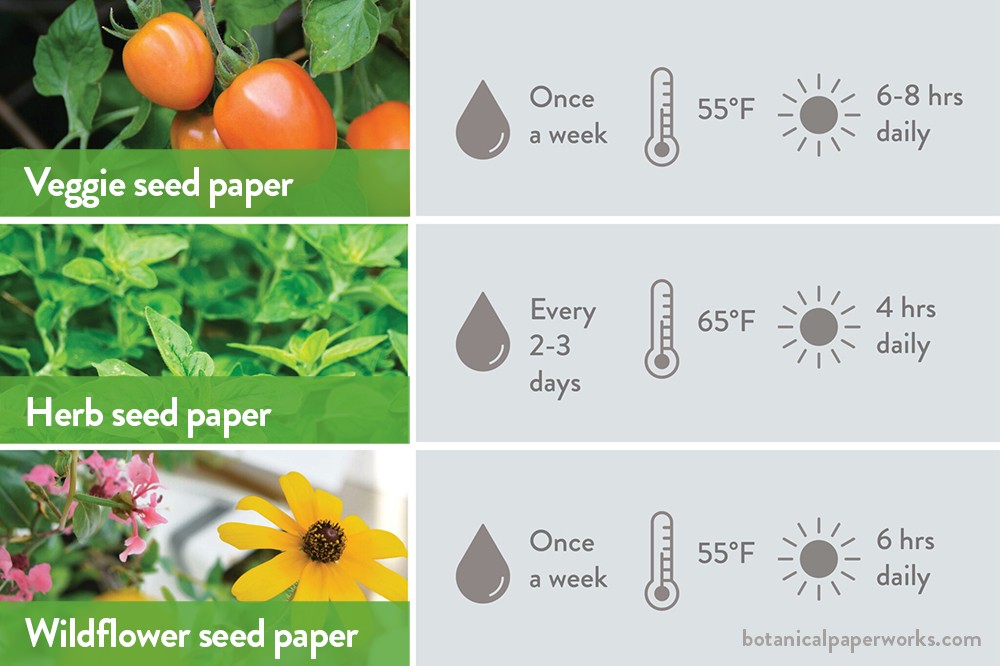
Source: https://botanicalpaperworks.com/blog/seed-paper-planting-instructions/?srsltid=AfmBOopRP-3AinsTo8jMYFFk_MnRBBd_Nn2zCjSqcjjDS-JelgsFaC43
I already had some prior knowledge since I have been gardening for the last 6 years. Still, I had a hard time choosing which flowers to do this specific project with. I reached out to the Master Gardeners of Hamilton County to see what their recommendation would be. If your area doesn’t have a Master Gardeners’ group, you can check with your local extension office as well.
I knew I wanted a beginner-friendly flower that would bloom within the first season of being planted and could do well in either a pot or the ground. I got in touch with the Master Gardener Jonathan Harrier who suggested Zinnia, Cosmos, and Coreopsis for this activity. I ended up going with the recommended Zinnia and also took some Nigella seeds as an experiment. Not only are they Level 1 beginner plants, but they are also noted as doing well in pots.
Where Can You Get Free Seeds?
I recommend checking out the Seed Library which can be found at both HEPL library locations. The seed library is a variety of seeds collected, put together, and made available by the Master Gardeners of Hamilton County, Friends of the Hamilton East Public Library, and the Hamilton East Public Library. Library card holders are welcome to take home up to 15 seed packets a year.

Fishers Seed Library
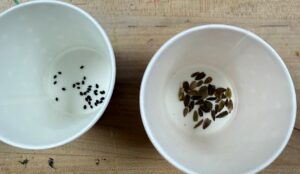
After picking out my seeds at the Fishers Seed Library, I went to Ignite and checked out the Paper Making Kit. I began by separating my seeds into two different cups so I could control how many seeds I put in each piece of paper.
Making the Paper Pulp
I took some strips of paper from the scrap paper bin to the left of the dryer in Ignite’s “Clean-up Area.” When you do this project, keep in mind that the scrap colors you choose will determine the final color of your seed paper. I tore up the strips into roughly 1-inch bits to make blending easier. I used enough paper to reach the 1 cup line and then filled the rest of the cup with enough water to reach the 2 cup line.
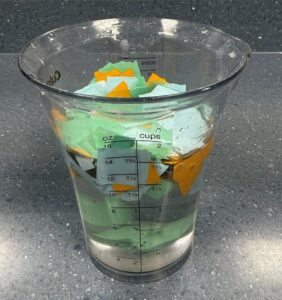
Next, I used the immersion blender included in the kit to blend the paper and water. I was making sure that I was moving the blender up and down to incorporate all of the paper in the cup. When you are doing this project, you may need to stop intermittently to remove large chunks from the blades. Exercise extreme caution around the blades as they are quite sharp.
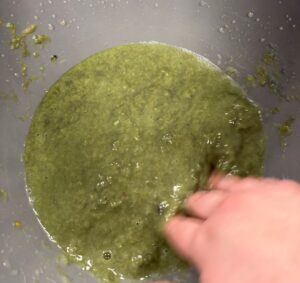
I continued blending until I was left with a soupy oatmeal consistency. I dumped it all into a large mixing bowl once the pulp was ready to free up the measuring cup for another batch of pulp. You can also do this with the tub included alongside the kit.
For my second batch of pulp, instead of using only paper, I took advantage of some dryer lint Ignite collects for paper making. I thinned out my clumps of lint by hand so there wouldn’t be any tangles or debris around the blades of the blender. Just like in the first step, once you get to that wet oatmeal consistency, you will dump it into the mixing bowl. The lint may take a bit longer to blend than the paper pulp.
Choosing Paper Shapes
Once I had enough pulp in the bowl I used my fingers to make sure everything was incorporated together. This is when you would pour your pulp into the Papermaking Kit’s deckle for larger pieces of handmade paper. However, I opted to use 3D printed cookie cutters that I found on Thingiverse for paper molds instead. You can do this too by getting certified on the 3D Printers. Once the pulp was ready, I laid out my molds on top of the black mesh screen from the kit. I made sure to do this on a tray lined with a towel.
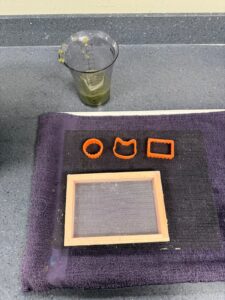
Making Plantable Paper
I dipped the measuring cup from earlier into my paper pulp bowl to get a small amount. Then I poured that into one of the 3D printed molds until the mesh was no longer visible. Using a sponge, I pressed excess water out of the paper pulp.
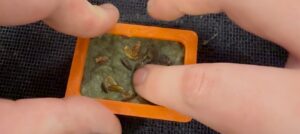
Now is the best time to add seeds, so I sprinkled some of my seeds on top of the pulp. I knew I wanted multiple pieces of paper, so I divided my seeds accordingly.
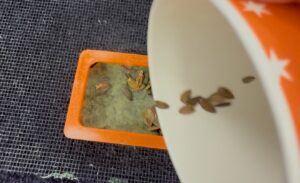
Next, I poured enough of the pulp to just cover the seeds. Then I used the sponge to press out the excess water from this top layer of pulp.

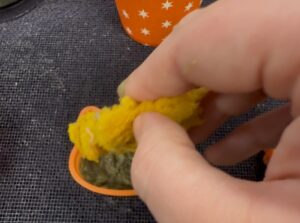
My plantable paper was almost ready at this point! I just needed to remove the molds and let the paper dry. I simply lifted the 3D printed molds up to remove them which left behind my paper to dry on the mesh. You can also transfer these to a piece of cardboard to dry. If you are using the Kit’s included deckle, you should follow the Kit instructions on how to do so successfully.
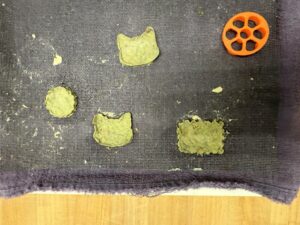
My paper dried fully in 24 hours, but your drying time will depend on how thick your paper is.
The next step after waiting for the paper to dry is to just wait for the last frost of the season! A couple of short weeks after planting the paper I will have the beginnings of my own flowers. Show us your plantable paper – or the results! Post your flowers on the Ignite Community Discussion Board on Facebook. Happy Making!
