

by Wil C.
This blog focuses on making a color gradient block print with Ignite Studio’s Relief Cut Printmaking Kit. You can find a full overview of our kit and the basic printing process here. Making a gradient is a way to add a unique touch to every print you make! It can also give your single pass prints an extra dimension. Let’s walk through the process.
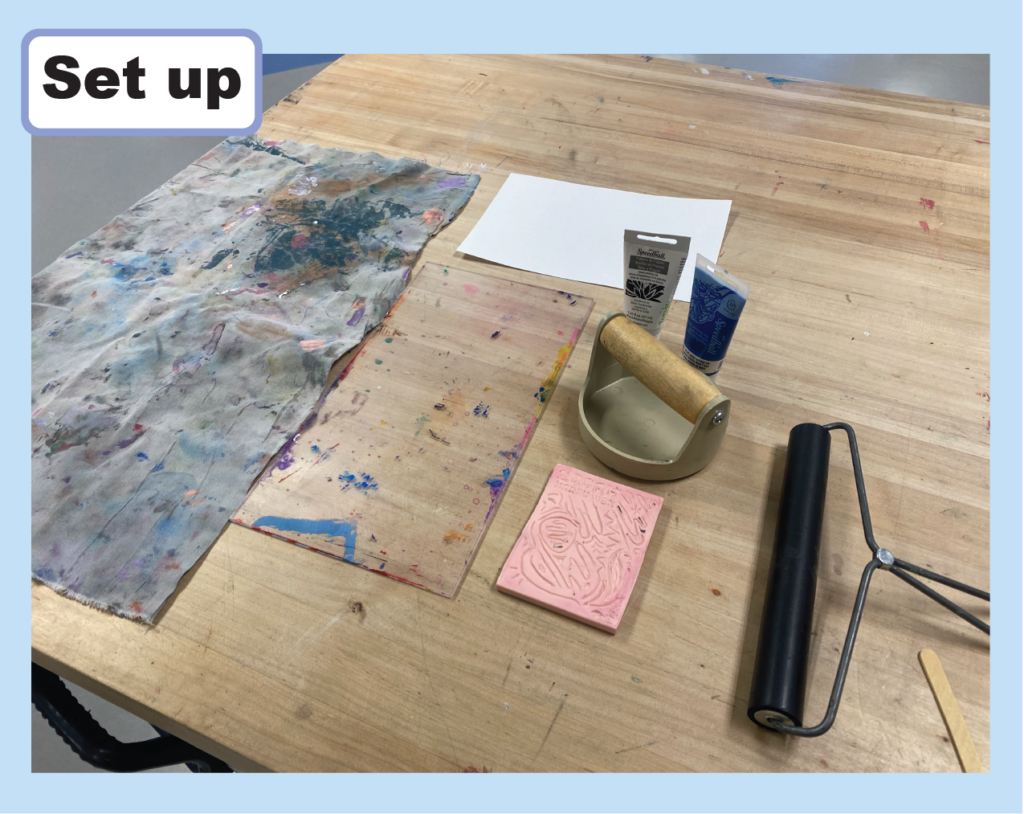
Materials
This is what you’ll need for this project:
- Carving block – you can find both rubber and linoleum in the kit
- Brayer
- Barren
- Ink for printmaking
- Acrylic Sheet
- Popsicle stick or palette knife
- Paper
Most of these things can be found in our Relief Cut Printmaking Kit.
Preparing the Ink
It is most common to use one color when block printing. If it’s your first time, I recommend starting with just one. However, if you are ready to try something new, let’s go!
Once you have all your materials laid out you can pick the two (or more!) colors you want to mix. You’ll want to consider how your colors will mix when selecting them to avoid unpleasant combinations. I tried dark blue with black and yellow with red for this project.

When putting the ink on the acrylic sheet you’ll want to place it in two separate areas. Make sure there is a little space between the colors to help you control how much they mix. The closer you put the two inks together, the more it will mix together. You can use a palette knife or popsicle stick to help spread the paint out a little to be the length of your brayer – it will help you with the next step.
Rolling the Ink
When making a color gradient, you’ll need to roll out the ink slightly differently than when you use one color. With monochrome prints, you roll the ink out with a brayer and can then spread it in different directions on the acrylic plate. However, with gradients, you can only roll the brayer in one direction. If you roll it more than one direction, you’ll mix the ink together instead of keeping your gradient neat. By only rolling the brayer in one direction, you can also control how much of the paint mixes together.
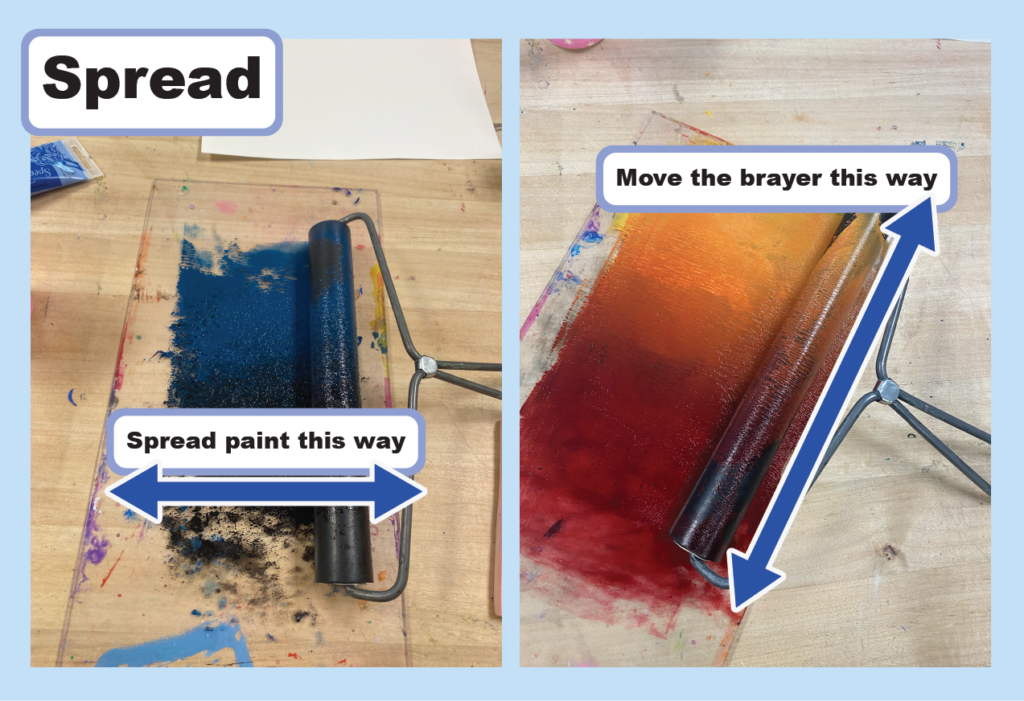
Roll the paint in one direction back and forth, and then move the brayer perpendicular to the way the ink is spreading out. As you spread out the paint you should start to see your gradient emerge!
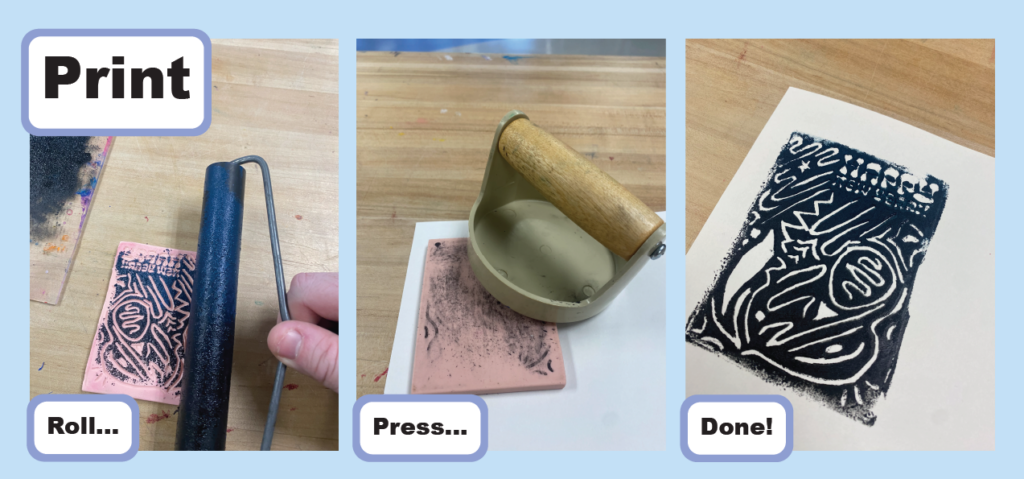
Print!
Once your ink is ready, you can make your print. The process is just like doing it with one color, but you apply the paint to the carved block in only one direction to keep the gradient intact.
Now it’s all about getting everything else just right to get the print the way you want it. Here were some of my prints I made and issues that influenced how they looked:

I hope you found this blog informative! You can learn some more ways to improve your gradient relief cut prints with some of our other blogs, like making multi-color prints or transferring digital art to your block. Post your prints on our Ignite Community Discussion Board on Facebook. Happy Making!
