

by Kate H.
Using The Cricut’s Debossing Tool For Card Embellishment
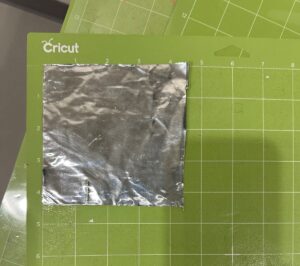
Part of the fun of holidays is the personal touches that you can put into cards for your loved ones. This Valentine’s Day, I decided to do that by utilizing Ignite’s Cricut to make cards with aluminum crafting foil embellishments.
Design Your Project
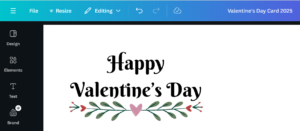
The first step I took in planning out this card was going to Canva. Using Canva I planned out what I wanted the card to say. I got to choose which fonts I wanted to use along with any other design aspects.
Adjust Cricut Design Space Settings
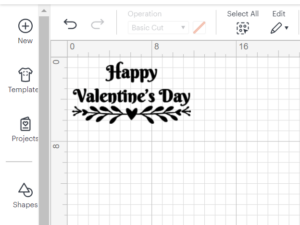
After my initial planning stage, I downloaded my design as a JPEG from Canva and uploaded it into Cricut Design Space. If you are unsure of how to do this, I would use the first half of our sticker making blog as a reference which you can find here. When you upload, Cricut Design Space lets you remove the background to make your design transparent. While it does a good job, I would recommend using an app like Procreate or Canva to edit out the finer details.
Before starting this project I had read blogs online like this one of people debossing with the Cricut on cardstock paper. I saw that the results are not very good without doing more than one pass. The aluminum I used is thicker than paper (.005”), and I wanted to ensure that my design came through. In order to do this, I needed to make my own material setting in Design Space. To do this I first went into my account settings.
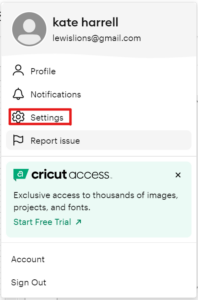
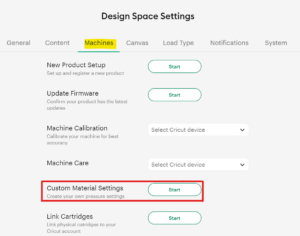
After opening the settings I went to the “Machines” tab and clicked “Start” in “Custom Material Settings.”
Next, I scrolled down the materials list to “Foil Poster Board” and once there, clicked on “Edit.” For the debossing effect to show on this material, I found that adjusting the sliding bar to 293 gave the best results without cutting through the aluminum.
![]()
The next setting that I changed was how many passes the Cricut would do. Since I had seen other people’s results with just one pass, I made sure to change to mine go over it twice.

After adjusting my material settings, I went back to the canvas to change the mode of operation so the Cricut knew to deboss instead of cut. Once you have your design selected the “Operation” settings drop-down menu will be available to click.
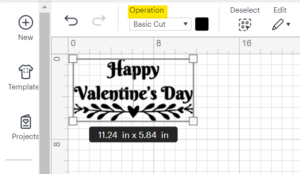
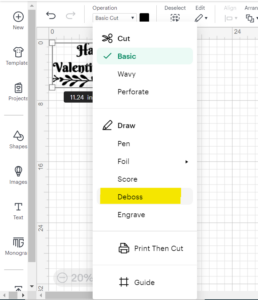
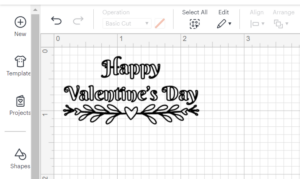
Next I chose the deboss option highlighted on the menu below. When you do this, you’ll notice that the canvas will change your design to have just the outline of your design left.
I also wanted my design smaller to fit on the front of a card, so I changed the size as well. My dimensions were 2.13” x 1.06”.
Sending Project to the Cricut
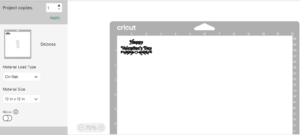
Now that all of my settings were in order and my design was at my desired size, it was time to send the project to the Cricut! In order for you to do this, you will need to click the green button that says “Make” and follow the directions. You will be prompted to choose how your materials will be loaded into the Cricut. For this project choose the “On Mat” option. After that, you will need to position your design where you want it to deboss. In order to conserve as much material as I could, I positioned my design in the uppermost left hand corner.
Tip: if you want an embossed effect as opposed to debossed, you can click “Mirror” to mirror your design. Then you would just need to turn your material over once done to see the embossed effect.
The next step is aligning the physical material on the cutting mat as it is shown on the screen.
Then you will click “Continue” in Design Space and the software will prompt you to connect your machine. For this project I was using Ignite’s Cricut Maker, so that was what I chose in the drop-down menu.
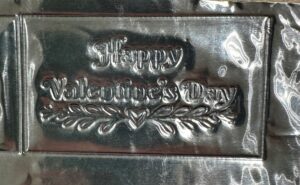
The Cricut will then prompt you to change out your tool from the knife blade to the debossing tool. You can find the extra tools in the Cricut kits next to the Cricut in Ignite. The software will show you steps on how to do this. Ask an Ignite staff member if you have any questions! Then you will send your project and the Cricut will do it’s work. Below are my finished products. The one on the left is the debossed and the one on the right is the embossed.

Create a Card with the Embellishment!
I ended up liking how the embossed option looked with my card, so that’s what I chose for my finished project. This card was for my mom so I took it a couple steps further using this project through Cricut Design Space. This picture is of my finished result when I put all the pieces together:
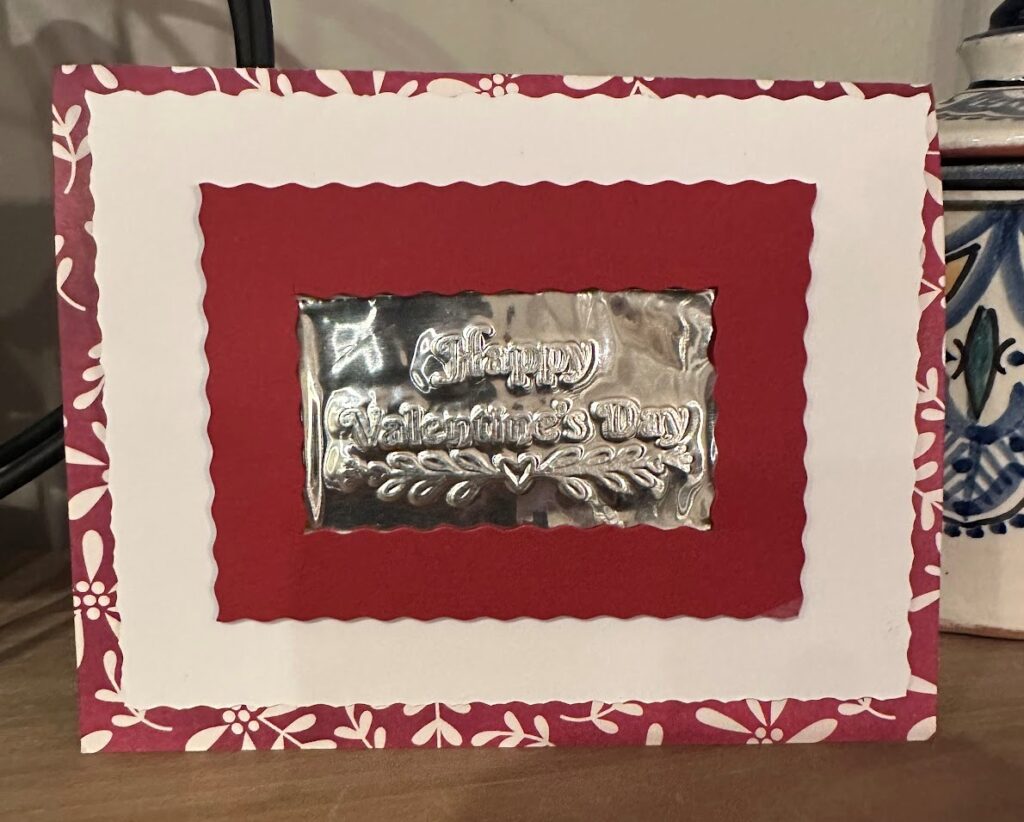
I took a couple creative liberties with the card design itself, but all in all, it came out exactly how I wanted. I’m so excited to give it to my mom this year and to also recreate it for family and friends. I hope this tutorial helps you with making your loved ones smile. Post your Cricut projects or questions on our Ignite Community Discussion Board. Happy Making!
