

By Alyssa Dyar
If you’ve been missing the paper quilling kit at Ignite Studio, you’ll especially love this drop-in project: toilet paper roll quilling! Quilling is the process of rolling strips of paper material into different shapes to form intricate designs or pictures. For this project we’ll use paper towel or toilet paper rolls.
Watch below to see the process of toilet paper roll quilling before getting started.
Materials
- Toilet paper rolls or paper towel rolls
- Scissors
- Glue (any glue will work to hold this together: hot glue, school glue, superglue, whatever’s around the house. If you’re out of glue, try tape.)
- Something to hold the strips together while the glue dries: clothespins, paperclips, binder clips, or hairpins work well.
- Optional: paint, markers, etc. to color your design
Instructions
1. Cut the toilet paper rolls into strips. You can cut them lengthwise for a longer, open strip or widthwise for a closed strip. Make sure you’re cutting them to have the same height from your work surface unless your pattern calls for depth variation.
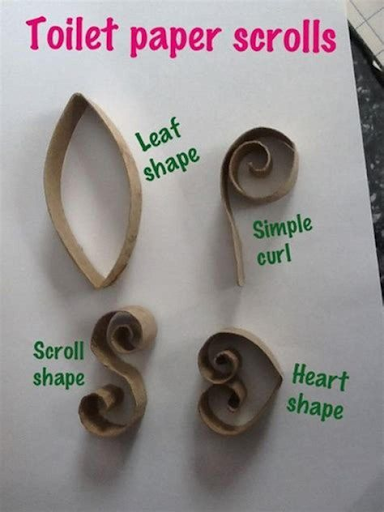
2. Shape the rolls into different designs. Here are a few examples of different shapes you can form:
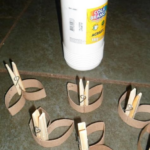 3. Glue the shapes together to form your design. Use the clothespins to hold the design together while the glue dries.
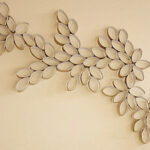
4. Once your design is dry, attach it to another surface. Hang it on nails to make a decorative wall piece, or glue it to a poster board to make it more portable.
5. (Optional) To jazz it up, paint or color the cardboard tubes before or after assembling (make sure the glue is dry if you decide to decorate after).
Don’t forget to post what you’ve made to HEPL’s Facebook page or Instagram! Have fun scrolling and quilling, and don’t forget to check back Monday at 9am for our next drop-in activity!
