

by Makenna M.
Are you a digital artist interested in printmaking? Or maybe you’d like to create custom stamps for a project? In this blog, I will take you through the step-by-step process to convert your digital art into 3D printed relief plates. With these plates, you can quickly reproduce your artwork onto various materials. If you are new to relief printing, check out the below links to previous Ignite tutorials to learn more.
Prepping Your Art File
For relief printing, it’s important to understand your use of negative and positive space in your design. Your digital art must be a black and white design, like the examples below. The black spaces of your design are the “positive” spaces and will be what gets printed on both the 3D plate and on your final ink prints. Pay attention to intricate parts in your image and make note that the 3D printer may be unable to replicate small details.
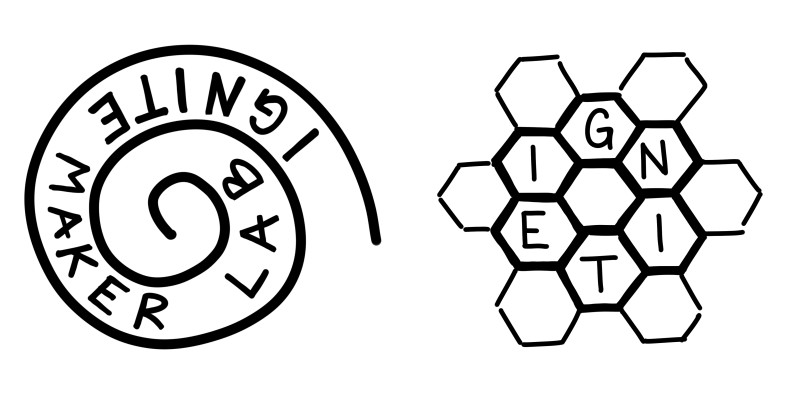
Examples of black and white art files that are ready to convert.
Flip and Convert Using Inkscape
Once you have a black and white design ready, you will want to make sure your design is mirrored and converted to an SVG properly. The SVG file is what you will need for the next step of 3D printing. You will also check that the dimensions for your image are the same as you want for your 3D print. In physical printmaking your design must always be mirrored as it will print in reverse from what you see on the plate. Mirroring your image ensures that your design prints correctly, especially if there is text in your design.
You can resize and convert your file using most graphics editing software, but this blog will take you through the steps using Inkscape. Inkscape is a free-to-download software and available to use on Maker Lab laptops.
Step 1: Create a new document in Inkscape and open your art image file in the blank project by going to FILE -> IMPORT. Resize your image by changing its dimensions in the top ribbon.
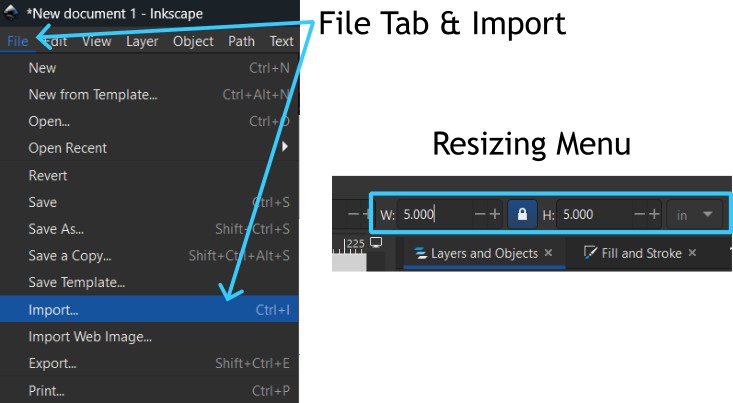
The File Import (Left) and Resizing menu (Right) in Inkscape.
Step 2: To mirror your design, select your image and click the “Flip Horizontal” icon pictured below. You can also go to the OBJECT tab and click “Flip Horizontal”.

The Flip Horizontal icon in the ribbon (Left) and the Object tab (Right).
To bring your design into Bambu Studio, it must be converted into an SVG file.
Step 3: Select your mirrored image, go to the PATH tab, and click “Trace Bitmap”. This will open the “Trace Bitmap” menu. Use the Brightness Cutoff detection mode with the same settings as pictured below and click APPLY. This will make your image into a bitmap path object. Drag this object away from the original and delete your original image file.
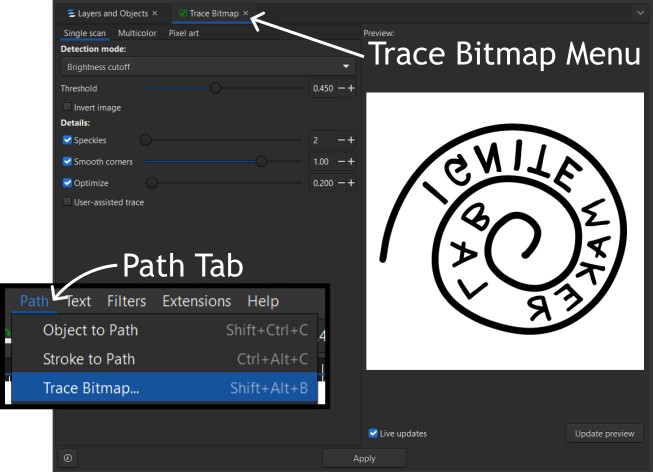
The Path tab (Left) and the Trace Bitmap menu with correct settings (Right).
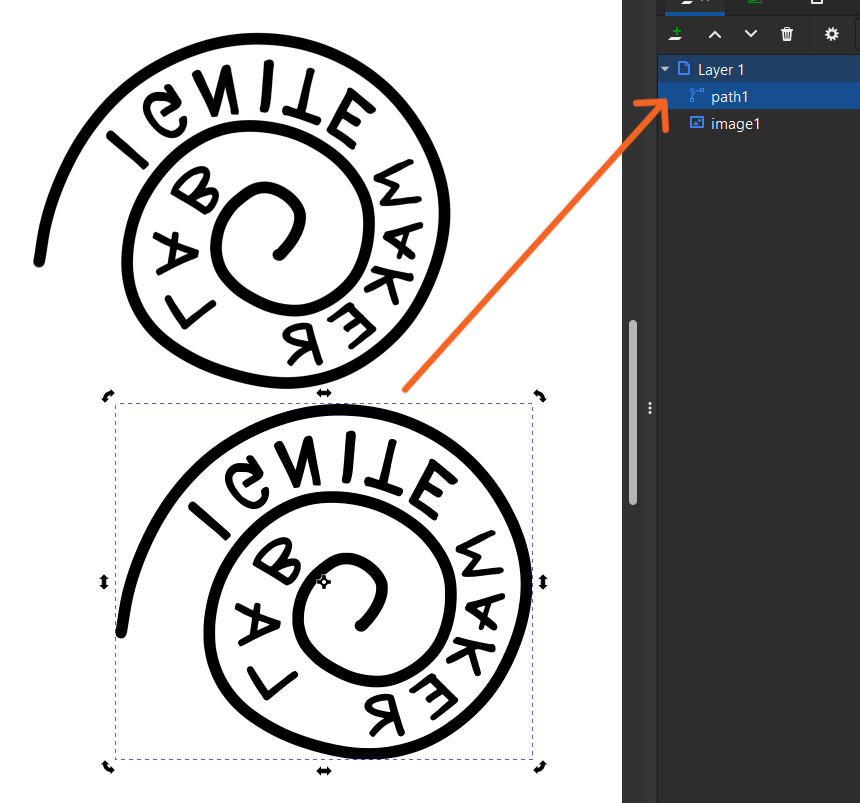
The resulting bitmap (path1 shown above) will have the path icon next to it in the layer tab. Keep this copy and delete the image file (image1 shown above).
Step 4: Open the Export menu by going to FILE -> EXPORT. With “Selection” mode chosen in the export menu, select the path from the bitmap trace, and check the box that says, “Export Selected Only”. Export your file as a Plain SVG. Once exported, your art file is ready to be brought into Bambu Studio.
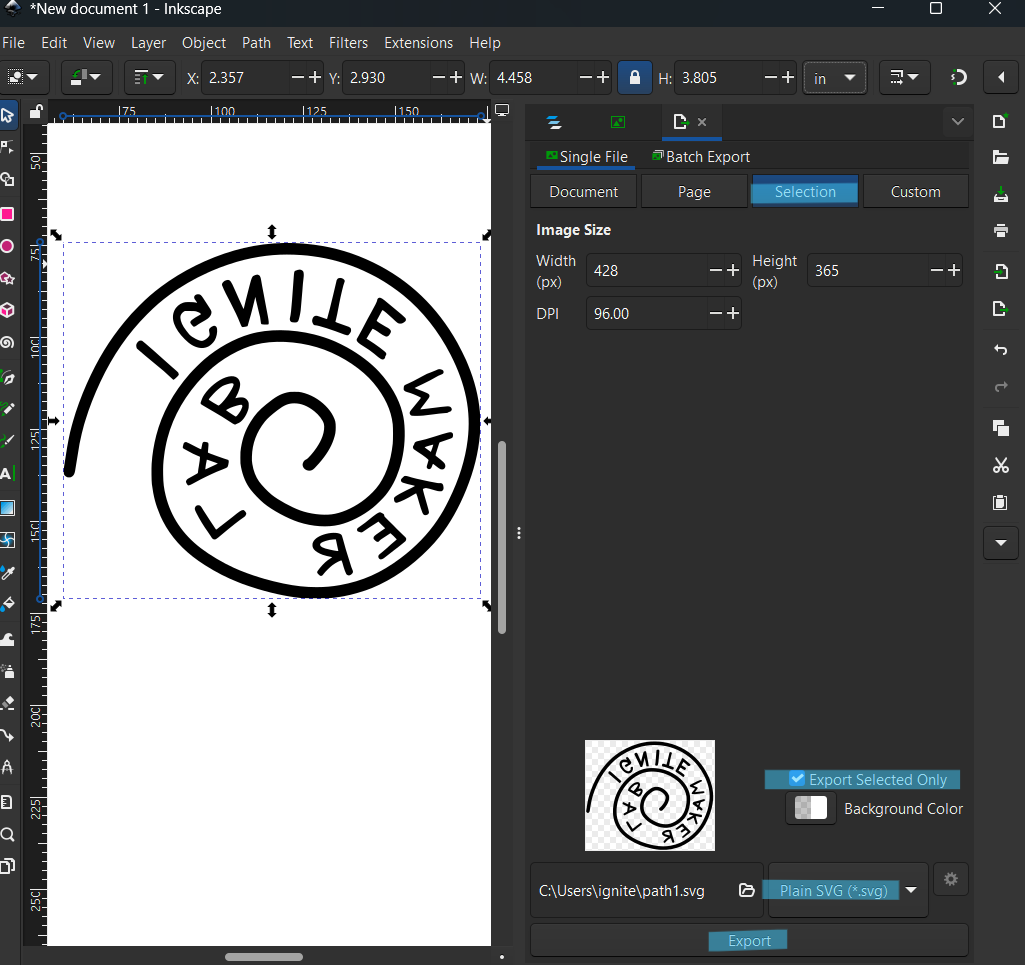
Export menu with highlighted setting choices.
Creating Your Model in Bambu Studio
Luckily, you can create the 3D model for your plate entirely within the slicing software for our 3D printers, Bambu Studio.
Step 1: In an empty project in Bambu Studio, right-click on the build plate, select “Add Primitive”, and click “Cube”. This object will become the baseplate for your art design.
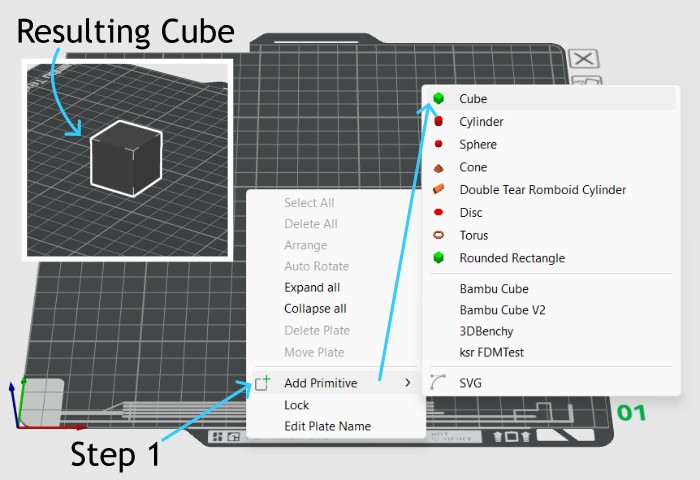
Right-click menu with “Add Primitive” -> “Cube”.
Step 2: Resize the cube using the SCALE tool. Shorten the height (Z) of the cube to 3mm and adjust the length (Y) and width (X) to fit the dimensions of your image. You will want some extra room around your image, so make it a bit larger than your design (5-10mm will do). Center this object by selecting it, right-clicking, and selecting “center”.
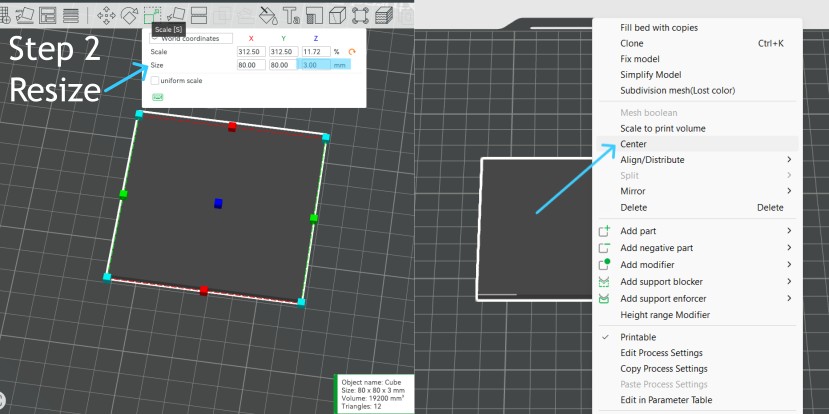
Scale Tool with correct Z Height highlighted (Left). Right-click menu with “Center” selected (Right).
Step 3: Right-click on the baseplate object and click ADD PART -> SVG. Select your SVG file. This will automatically create a 3D object from the SVG file and open the SVG tool menu.
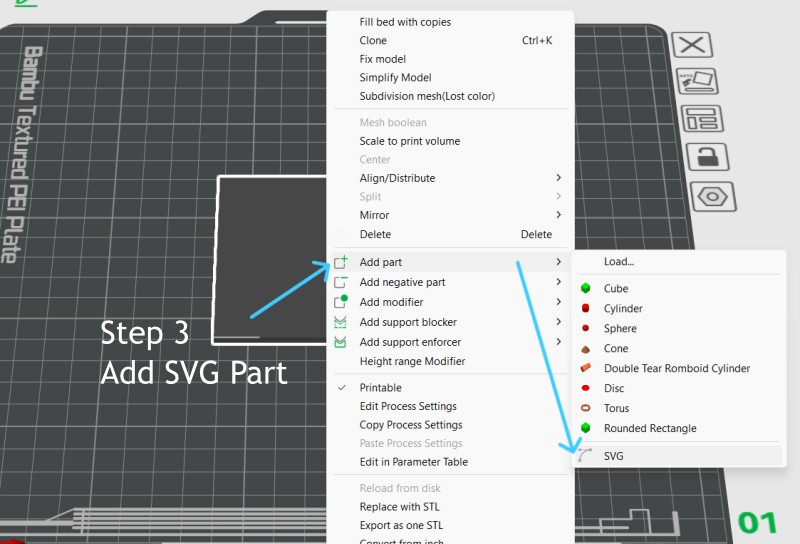
Right-click menu with “Add part” and “SVG” selected.
Step 4: Within the SVG tool, adjust the depth of the SVG part to 3mm. You may need to adjust its size and placement as well. The Operation type should be JOIN. When you click away from the SVG tool, the baseplate and SVG part will combine into one object.
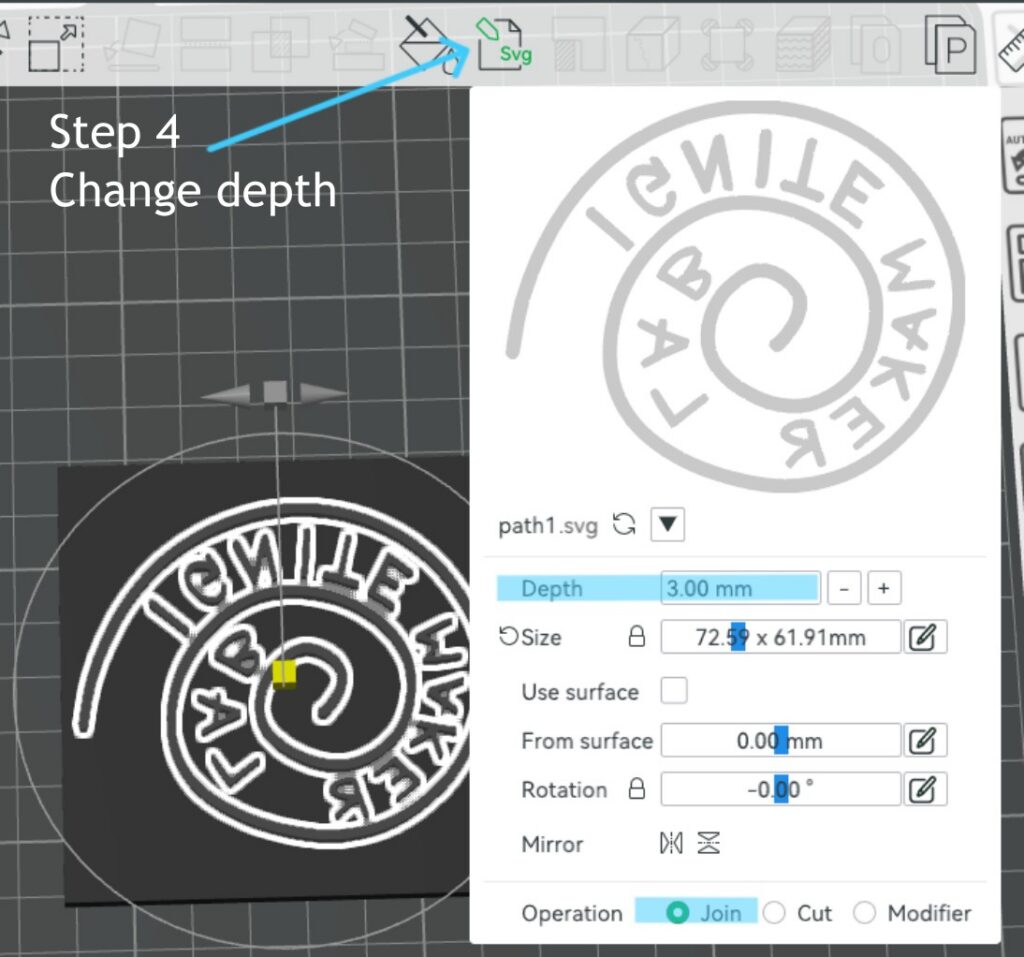
The SVG tool menu with highlighted settings.
Once combined into a singular object, your model is ready to print! Be sure to save your Bambu project file.
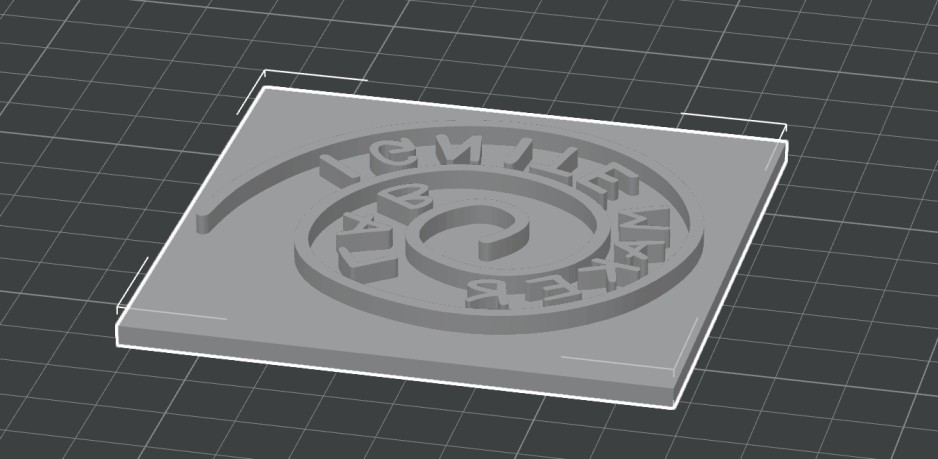
Final plate model.
Plate & Print Results
Shown below are some example prints I made using this method. I really enjoyed printing stamp-sized examples and using them to customize things like books and fabric. I found that the texture from the 3D filament created interesting patterns in the final ink prints. Here’s a tip: Print the plate in a mid-neutral filament color, like light gray, so it’s easier to see ink on the plate.
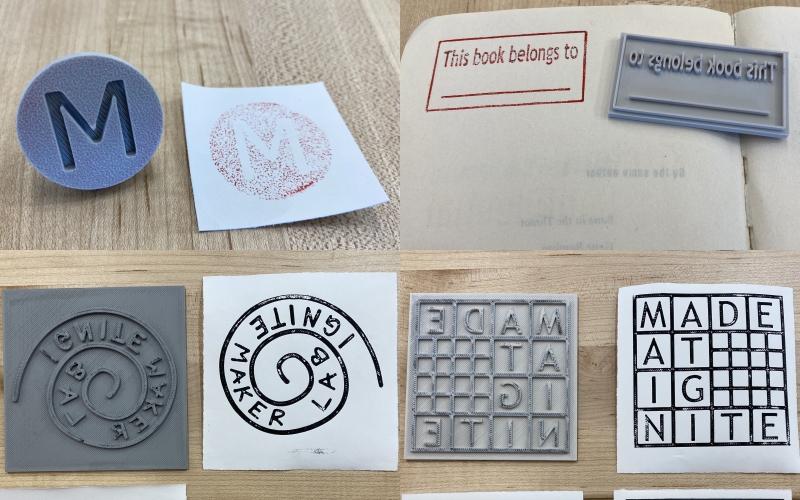
As a reminder, ink and other printmaking materials are not available at the Noblesville Maker Lab. However, there are printmaking kits available in Ignite Studio at the Fishers Library.
I hope this blog inspired you to make your own 3D printed relief plates. If you like the look of woodcuts/linocuts but find it difficult to carve your design, these plates are great alternatives. I encourage you to come into the Maker Lab and print your model using our Bambu X1C printers. You can also view the example plates and prints on display!
Post your 3D and 2D prints on the Ignite Community Discussion Board on Facebook. Happy Making!
