By Sydney Brink
What is Paper Marbling?
Paper marbling is a way of dyeing paper for a more unique and beautiful effect – a craft that was developed well over a thousand years ago. Artisans in China used flour paste and pigment, while Renaissance-era papermakers in the Middle East and Europe used water, a thick paste (called size or sizing), and dye. These ingredients came together to dye papers for paintings, bookbinding, and even drawer linings.
Today, paper marbling is usually done in water baths of sizing with ingredients like alum, methocel and ammonia with liquid paints. The process has a lot of steps and can be a little intimidating to first-time marblers – so a lot of methods have been developed to make paper look marbled with a simpler process. This one is with shaving cream!

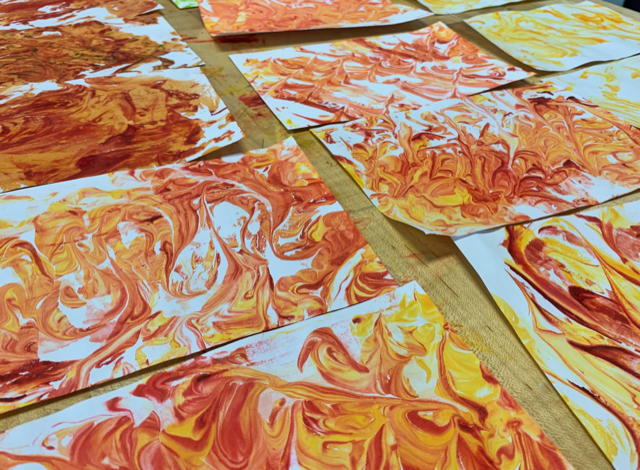
I used this craft as an opportunity to decorate for the fall – I chose colors and shapes that would reflect the fall foliage I see outside!
What will you need for paper marbling?
You’ll need:
- Shaving cream
- Food dye (I used a gel, but I think a liquid food dye would have worked better)
- A stick (or something similar) to swirl the dye
- A ruler (or something similar)
- Paper of your choice (I used a combination of plain printer paper and light cardstock)
- A space to be messy!
How to Marble Paper
First, spray an even-ish layer of the shaving cream onto a tray or piece of cardboard, or something similar. The food dye will stain, so pick your surface carefully!

Use the ruler to level out the shaving cream.
Drop some colors in!

Use the stick (I used a palette knife here) to swirl your colors around. Keep in mind when you choose your dyes that some colors will make brown when mixed together.
Lay your piece of paper onto the shaving cream and gently make sure the surfaces have made full contact with each other.
Pull your paper off and set it aside. Use the ruler again to scrape away all the shaving cream.

Let dry, and then make something festive with your beautiful marbled paper!
What to do with Marbled Paper

I sent mine through the Cricut, which is available for check-out at Ignite. I used the Cricut to cut leaves from my marbled paper. Scissors would work great too! I think these leaves look great. They liven up the space on rainy fall days. The process was so fun. I could have easily made well over a hundred of these marbled paper prints! And this is definitely an easy craft for all ages.


