

RDWorks will still be available as usual, but we are excited to announce that patrons can now also access Lightburn while using our laser engraver. Lightburn is the industry standard laser-cutting software. For those who are interested in making the transition from RDWorks, this blog will show some of the key differences between the two software. The main downside to using Lightburn is that you will not be able to prepare ahead of time unless you purchase your own Lightburn license for your home computer. Read more to learn about our new Lightburn software for the laser engraver.
NEW: Lightburn Software for the Laser Engraver
This blog is written assuming you already have knowledge of RDWorks and how to use our laser engraver. Prior to using Ignite’s laser engraver for the first time, we require that you take our short certification course. If you need to do that, you can get started on our website HERE.
When you first open Lightburn, you’ll notice that the software doesn’t look that much different from RDWorks. The toolbars on the edges of the window are all set up very similarly. Here are some of the differences you’ll find.
Cuts / Layers Panel
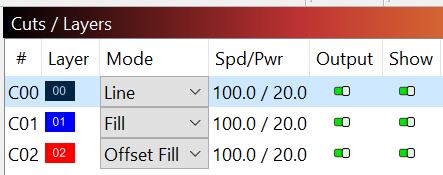
As you add shapes and assign color layers, like you would in RDWorks, they get assigned to the Layers panel. Under “Mode” there is a dropdown.
Line – Follows the line (Referred to as “Cut” in RDWorks)
Fill – Fills in the shape (Referred to as “Scan” in RDWorks)
Offset Fill – (Mode not offered in RDWorks) Fills one shape at a time working in a spiral motion. This can save a lot of time when scanning two shapes that are on the same layer. See examples below for visual aids.
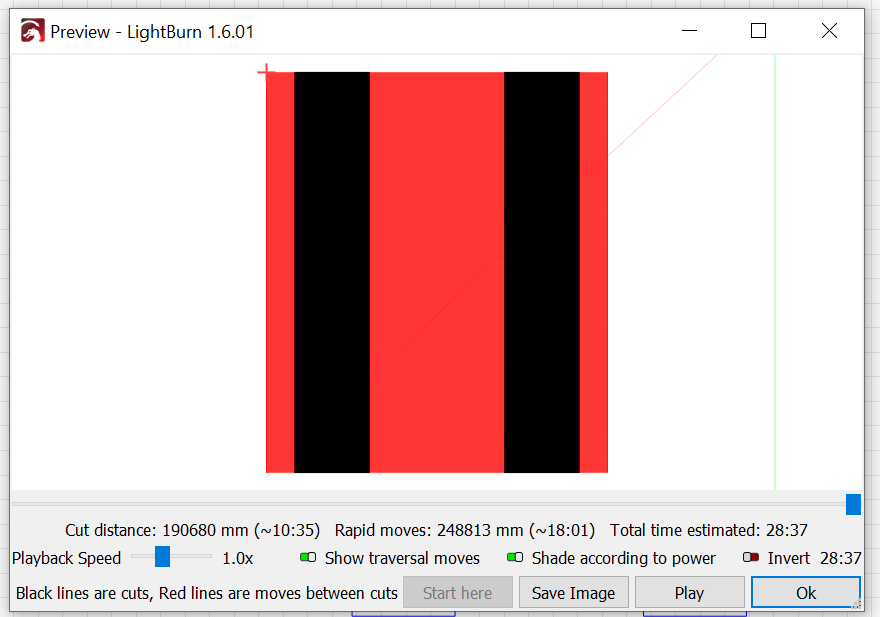
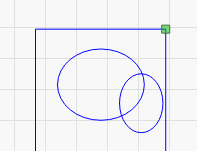
- Example 1: These two rectangles are set to “Fill.” The red area shows space that the laser covers while not actively burning. As it moves from left to right, there is a lot of inactive laser movement. With these settings, the project is anticipating to take 28 minutes and 37 seconds.
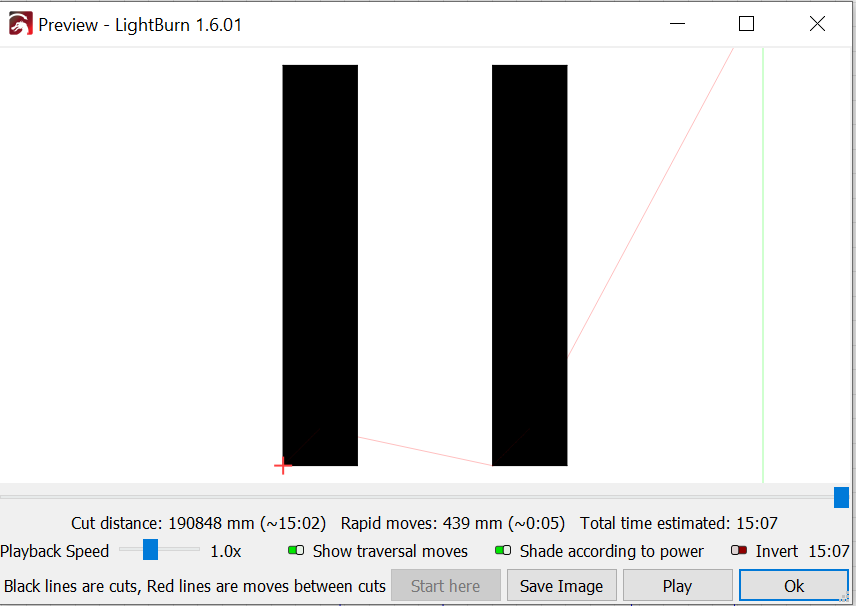
- Example 2: This project is using all of the same settings except the mode is set to “Offset Fill.” Notice how there is barely any red. The only red lines are the laser’s movement to each shape. This is because the laser starts with the box on the right. Burning in a spiral motion until the shape is complete. Then moves on to the next. Because all unnecessary laser travel has been removed, this project is now estimated to take 15 minutes and 7 seconds.
Laser Panel
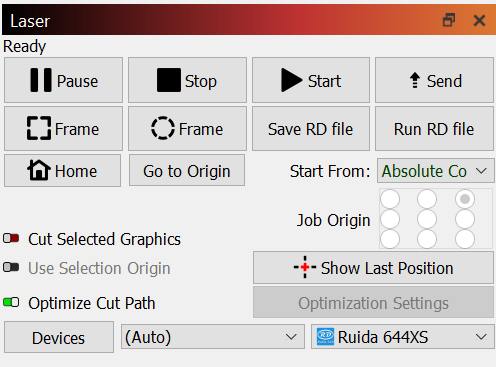
You can still use the same methods you did previously with RDWorks by pressing the “Send” button to send the file to the machine. Same as pressing “Download” in RDWorks.
Before doing that, there is an important section to notice in this panel. The “Start From” section, by default, is set to “Absolute Coordinates.” This means the origin of your project is set to the back right corner. You can see this represented by the green square in the top-right corner of your workspace.

If you’d like it to be positioned like it was in RDWorks, simply select “User Origin” from the “Start From” drop-down. Now the green square will move to the top-right corner of your project.
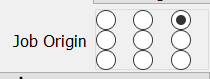
If you don’t want the origin to be at the top right of your project, you can also use the bullet points next to “Job Origin” to select at which corner, side, or center, you’d like it to start. You’ll notice the green square moving around your project as you click between these bullet points.
Once you have the job origin set, you can click “Send” and proceed as you usually would by using the buttons on the laser engraver. Alternatively, you can frame and send your project right from within Lightburn. To do that, first, focus the laser to your material and use the buttons on the machine to move the laser and set the origin point. You can then click one of the two frame buttons in Lightburn’s laser panel. Once you get it positioned correctly, you can click “Start.”
Move Panel
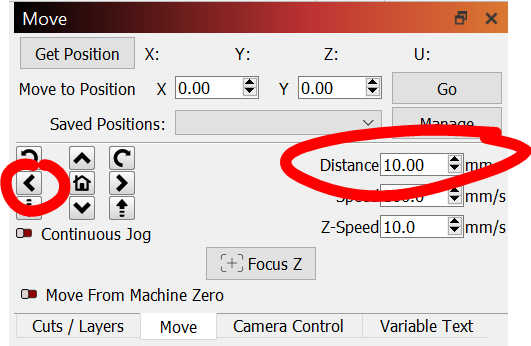
A feature that is very useful is within the “Move” panel. If you don’t see the “Move” tab below the “Laser” Panel, you can activate it by navigating in the menu bar at the top of the screen (Window>Move).
The move panel is convenient if you need to move the laser a specific distance. For example, if you need to set your origin point to the left 10mm from where the laser is currently positioned, adjust the “Distance” to “10” and click the left arrow. You’ll then see the laser head’s position move in the direction and distance you chose. Then press the origin button on the machine to save the new position as your origin point.
Opening an RDWorks file in Lightburn
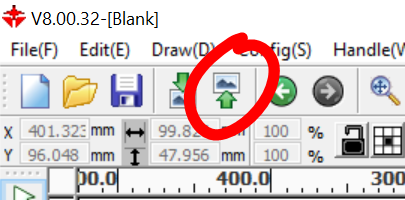
RDWorks save files aren’t directly compatible with Lightburn. However, one option is to export your RDWorks file as an “.ai” file. You can do this by selecting “File>Export” from the top menu bar, or by clicking the export button in the top toolbar. Once you’ve saved your “.ai” file, you can then import that file into Lightburn. Since “.ai” files don’t support laser settings, all of your speed and power levels for each layer will need to be reset.
I hope these tips have helped if you’re wanting to make the transition to Lightburn. Help inspire others by sharing your creations on the Ignite Community Discussion Board. Happy Making!
