

by Katie W.
Greetings from Ignite! Have you ever wanted to make or edit a video, but didn’t know where to start? If the answer is yes, then good news! I’m going to walk you through some video editing basics using a program called iMovie. This is free software that automatically comes with Apple brand computers. If you don’t have a Mac at home, that’s okay! We have Macs available in our Digital Media Labs, which are available for patrons for any kind of digital media project.
Getting Started
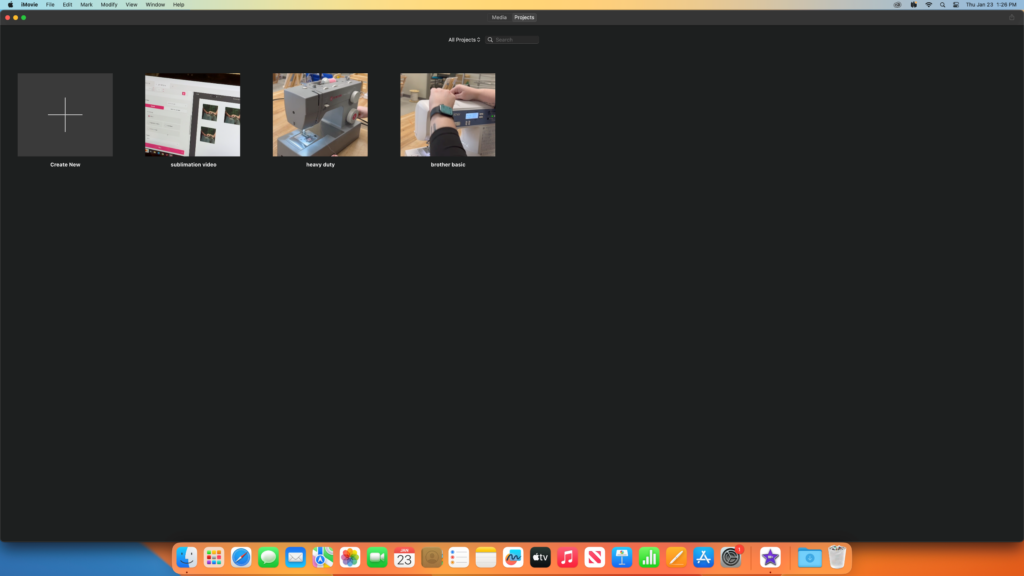
To get started, open iMovie and click “Create New” to begin a new project. This home screen is also where any in-progress or finished projects will be displayed.
Importing Media
Import any videos, photos, and/or audio clips you wish to include in your project. Media can be imported from a flash drive, downloaded from an email, or transferred directly from your phone via a charging cord connected to the Mac computer.

Editing Media
To start editing your media, drag your file from the “My Movie” section down to the dark gray “Editing” area. The editing area is where most of your work will be done.
In the following section, I’ll cover some basic editing tools, which will allow you to make a simple but professional-looking video project.
Editing Tools
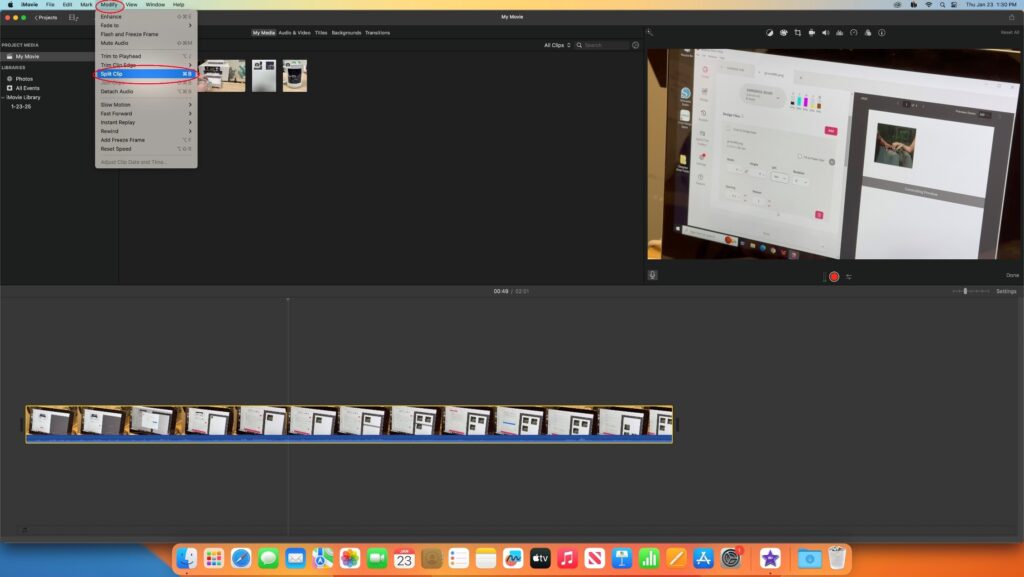
Split Clip
This tool allows you to split a clip into multiple sections. You may want to split a clip to cut out an unwanted section, insert a transition, or spread one piece of media out across different parts of your video. To use this tool, click on the specific part where you would like to split your clip, then pull up the drop-down menu under “Modify” and press “Split Clip.” Now your one clip has become two! This process can be done with audio clips as well.
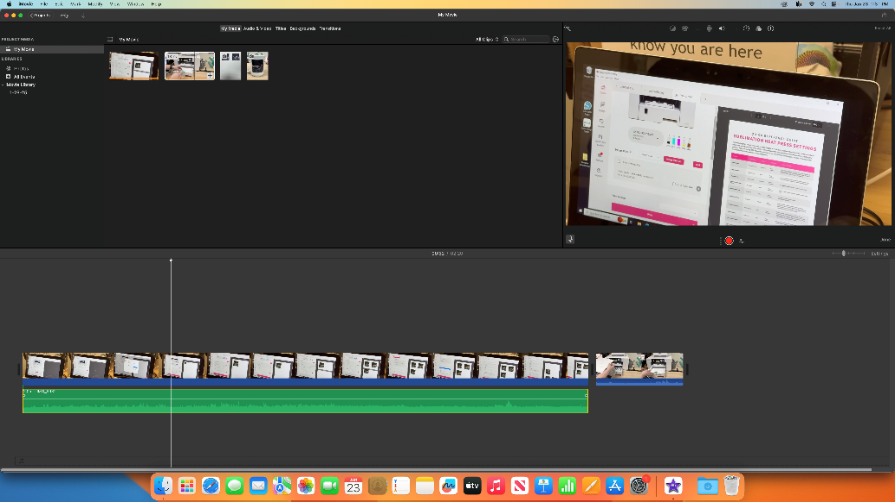
Detach Audio
This tool allows you to remove the audio from a video clip. This is useful when doing voice-overs, or for removing an unwanted section of audio, without having to remove any of the accompanying video. To use this tool, click on your piece of media, then then open the drop-down menu under “modify” and press “Detach Audio.” The audio will now be displayed as its own piece of media, shown in green beneath the video.
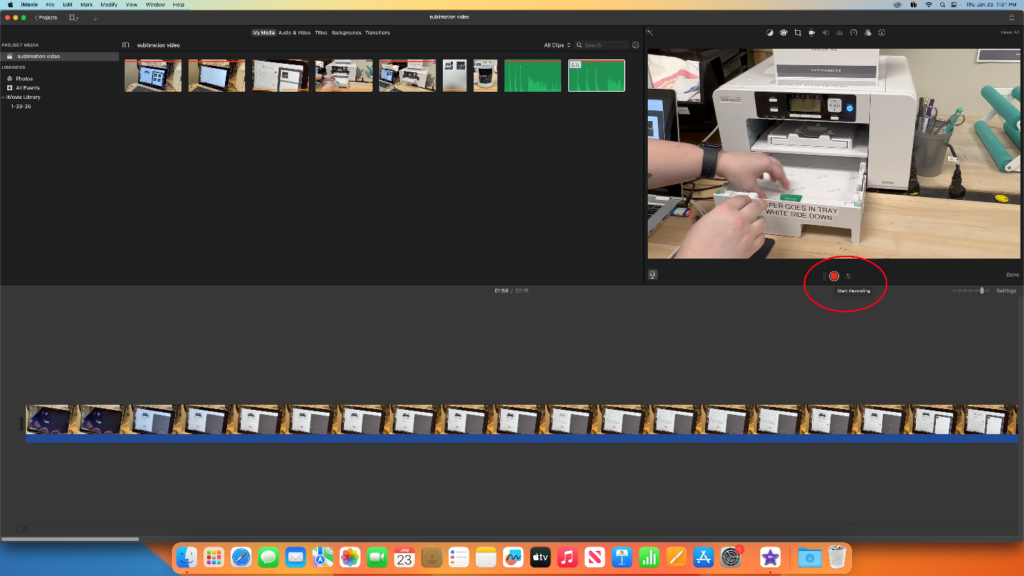
Recording Audio
This tool allows you to record audio directly into iMovie rather than importing it. To use this tool, click on the red circle button on the right section of your screen. After a three-second countdown, it will start recording. To stop the recording, click the red button again. After finishing your recording it will appear in your media library.
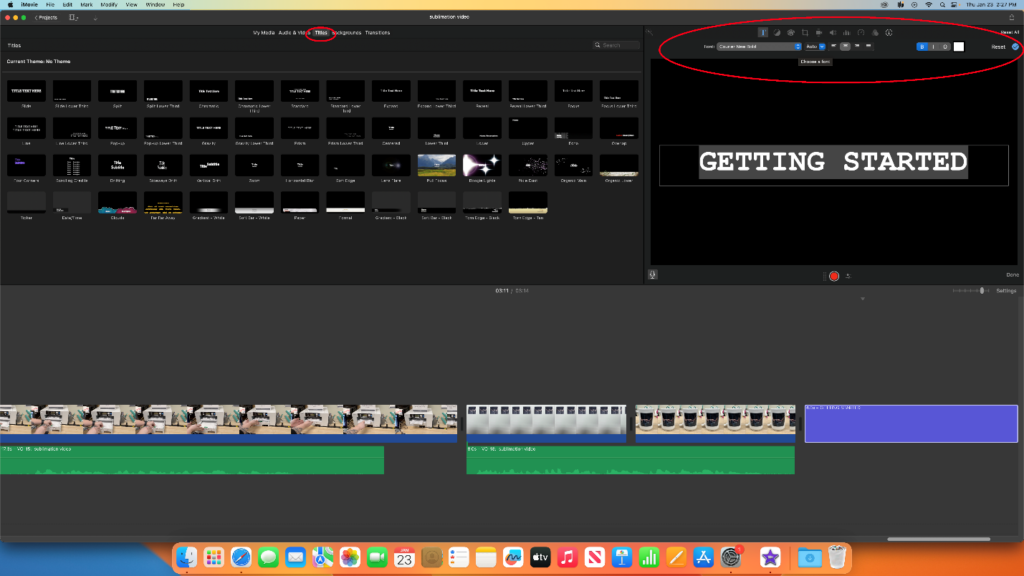
Title
This tool is useful for inserting title pages with text. You can insert these at the beginning of your project as well as in between any clips. To use this tool, click on the word “Titles” at the top of your screen. Use the menu on the right-hand size to change the words, font, or color of the title text. To change the background color of a title slide, click on “Backgrounds” next to “Titles.” Then, drag the desired background under your title slide. You can use your own images as a background as well! Just drag and drop the image from the “My Media” tab rather than the “Backgrounds” tab.
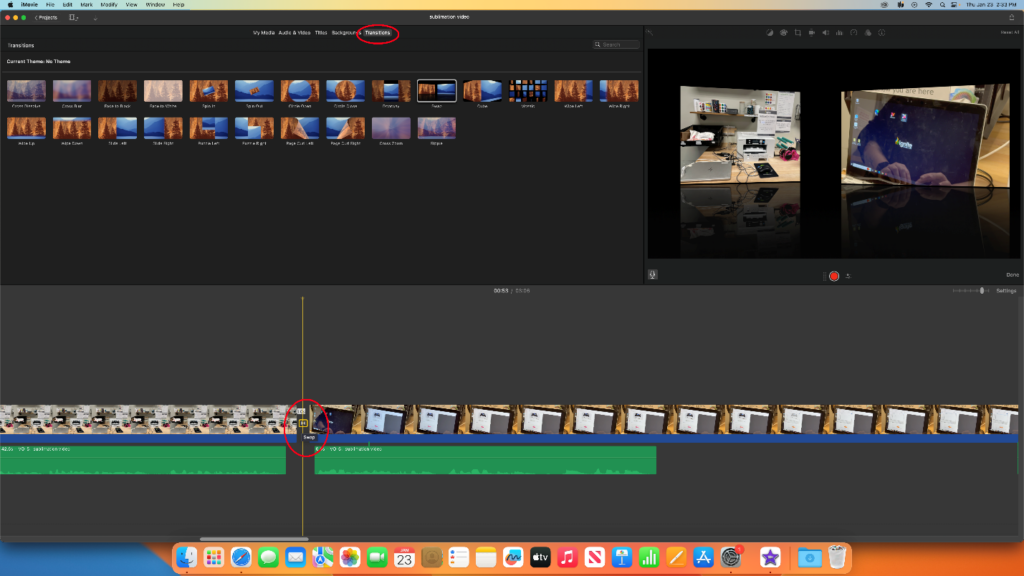
Transitions
This tool can be used to add a fun little transition between your clips, which can help with a video’s flow to make it less choppy. To use this tool, click on the “Transitions” tab at the top. When you’ve decided on a transition, drag it down and insert it between two clips.
Finishing Your iMovie Project
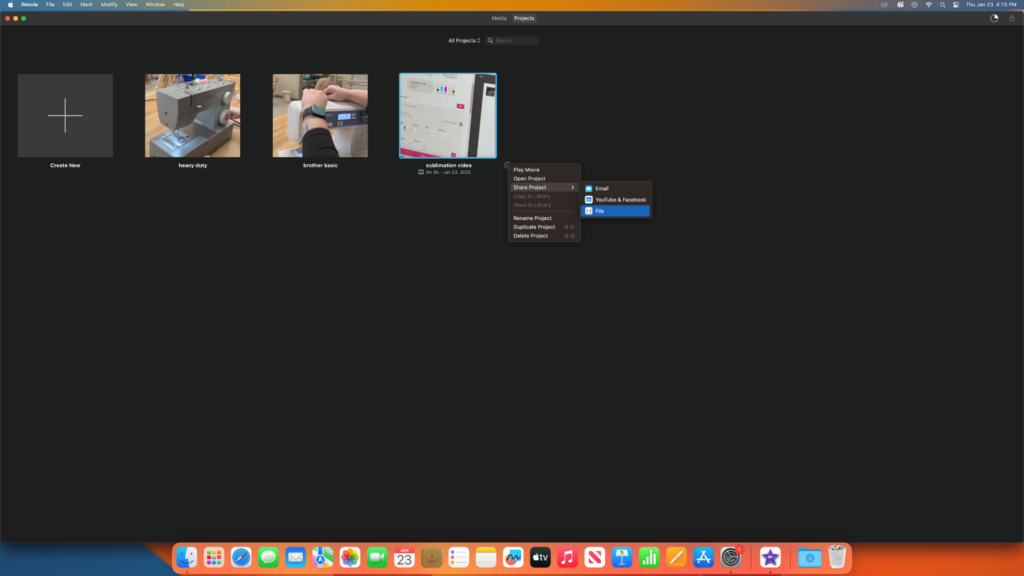
When you have finished your project and are ready to export or share you have multiple options for doing so. You can save your project to a flash drive, email it to yourself, or upload it directly to social media. To do any of these, return to the project library (the page you started on). Then, click on the three dots next to your project, then “Share Project.”
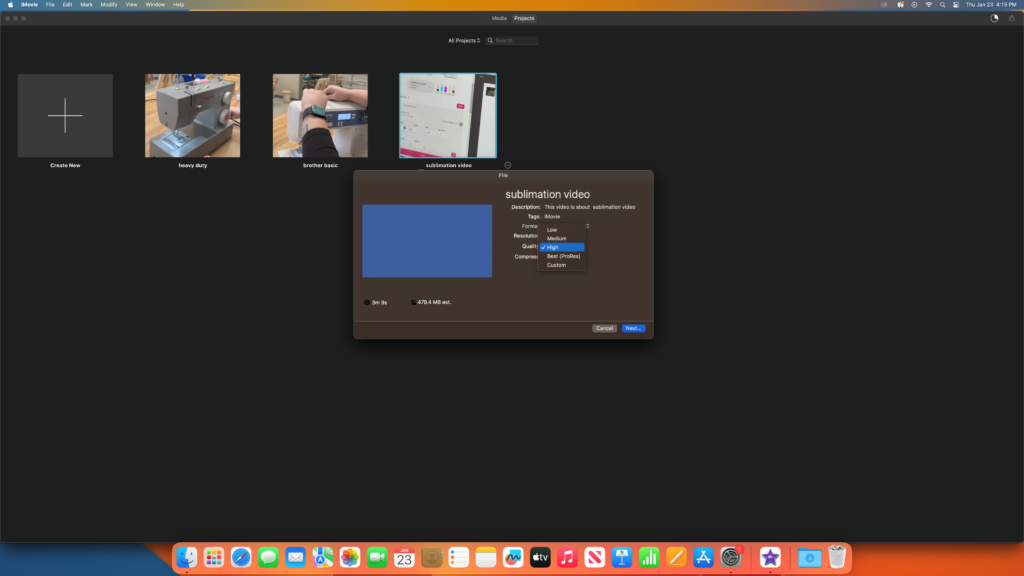
It is important when sharing your project to choose an appropriate video quality. The options “high” or “best” will make your project more visually clear but take up more storage space and take a long time to transfer. The medium and low options will give you less clarity but will transfer faster and take up less space.
This blog covers everything you need to make a basic video project in iMovie. However, there are a lot more editing tools and customization options available. This iMovie user guide is a great resource that’s both comprehensive and interactive. There are also a variety of YouTube videos out there that go over specific tools and effects. Drop any questions into the Ignite Community Discussion Board on Facebook. Happy Making!
