

by Kenzye P.
How to Mat Your Art Professionally with Ignite’s Mat Cutter
When making art, it’s important to consider how you will display the finished product. Many works on paper, canvas panels, and even some three dimensional objects can be matted to elevate the look of your artwork. This blog will walk you through how to mat a two dimensional artwork using a manual mat cutter and precise measurements.
Measure Your Art and Mat
To get started, we need to measure the exact size of our artwork, taking away a 1/8″ to 1/4″ allowance on all sides to make sure the mat will fit over the artwork. This measurement that you take will be the image size.
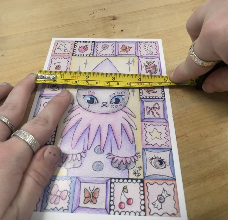
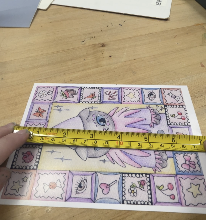
For this 5×7 print, my image size will be 4 3/4″ x 6 3/4″. This measurement accounts for the 1/8″ allowance on all four sides.
Next, we need to determine our “outside size.” If you have a frame, the measurements of the display area will be your outside size. I’m not working with a specific frame size, so I’ve decided I’d like a 1″ mat all around my image. So to get my outside size, I will add 2″ to both dimensions. If we wanted a 2″ mat, we would add 4″ to each dimension, or a 2 1/2″ mat would 5″ to each dimension, and so on.
With my 1″ mat, I’ve determined that my outside size will be 6 3/4″ x 8 3/4″.
Cut Down Mat & Mount
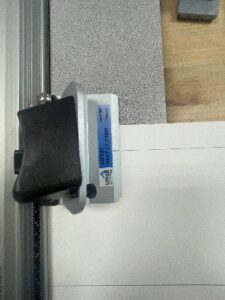
Now that we have our two measurements for our image size and outside size, we need to use the straight cutter to cut down our mat. We will also need to cut down and a piece of foamcore or scrap mat to mount the work on. Use the ruler on the bottom of the mat cutter and set the silver measurement tool to the first dimension you’d like to cut. I cut my height first so I set my ruler to 8 3/4″.
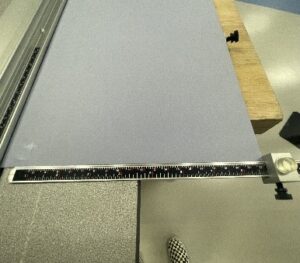
Then, line up your mat board with the flat edge on the bottom of the cutter. Make sure it is also flush on the opposite side with the silver measurement piece.
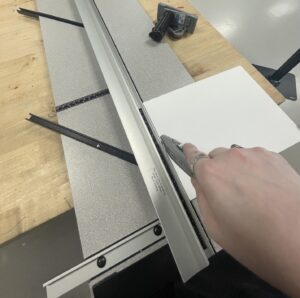
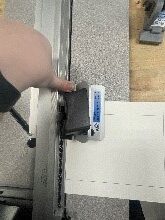
Fit the edge of the blade of the straight cut tool (the one with the tall black handle) along the metal rail. Firmly push down to the blade and begin pulling towards you to cut your mat.
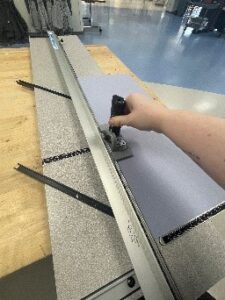
Then, move your silver measurement tool along the bottom ruler to the size of your other dimension. Follow the same method from the last step using your straight cut tool.
Use the same steps to cut your mounting board to the same outside size. This can be foamcore or a scrap piece of mat board – whatever the material, you’ll be mounting your work and mat onto this.
Tip: If you decide to use foamcore, use a box cutter pressed against the edge of the rail instead of the straight cut tool to get a deep enough cut.
Use a box cutter instead of the straight cut tool for foamcore.
Bevel Cut Interior of Mat
Once you have your mat and mounting board cut to the measurements of the outside size, it’s time to measure and cut the interior of the mat to your image size. The interior will be a bevel cut instead of a straight cut which requires some different tools and steps. A bevel cut helps with looking more professional and prevents unwanted shadows from appearing in your framed work.
You will need to lift up the silver rail that says “Set Scale” and adjust the flat edge ruler underneath it to the size you want for the interior cut. Because I’ve decided to use a 1″ mat, I’ll load my “set scale” flat edge at 1″ on the ruler beneath it (see picture below). Now, when I press my mat board up against that flat edge and put down the silver rail, there will be a 1″ area of mat from edge to the center of the mat board.
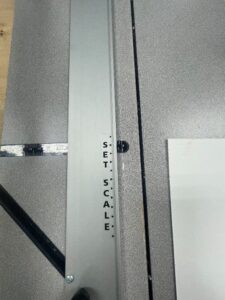
“Set Scale” silver bar with the perpendicular ruler underneath it.
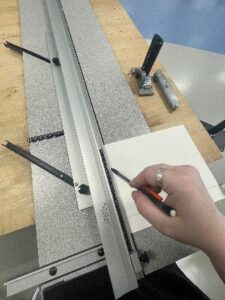
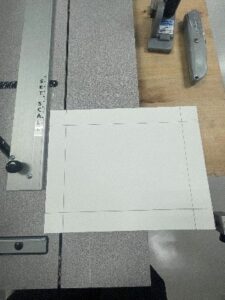
Before we cut the interior, we are going to mark our cuts with a pencil to ensure the size we measured will fit on our board. Put the mat board upside down and line it up with the “set scale” flat edge, close the rail, and use a pencil to mark where the cut will go all the way across the mat. Repeat this for each side of your mat. The back of your mat should look like the picture below. DO NOT PUT YOUR PENCIL MARKS ON THE FRONT OF THE MAT BOARD!
Now you’re ready to cut out the interior. Press the mat board up against the “set scale” flat edge, close the rail, and place your bevel cut tool on the rail. The bevel cut tool is the one with a flat black handle. Line up the lightly engraved line on the center of the bevel cut tool with the pencil lines you marked earlier.
The bevel cut tool showing the engraved line aligned with the measured pencil mark.
You must begin by pressing down the silver pin at the top of the bevel mat cutter. This is to ensure the cutter doesn’t move when the blade is pressed in. While holding down the pin, press the black handle to get the bevel blade into your mat. Now you can let go of the pin but do not release the black handle for the blade. Pull the bevel mat cutter towards you until the engraved line on the middle of the blade reaches the opposite 1″ line you marked with your pencil. Then, release the blade.
Press the silver pin down.
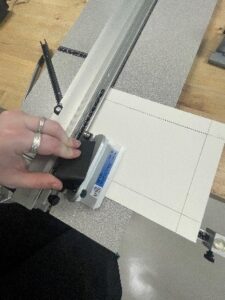
Then press the black handle down as well. Release the silver pin and pull the blade towards you.
Turn your mat 90 degrees and line it up with the “Set Scale” flat edge once more and follow the same steps:
- Close the rail
- Line up the bevel mat cutter with the pencil line
- Press the pin
- Push the blade through the mat
- Release the pin – DON’T RELEASE THE BLADE
- Begin pulling the cutter towards you once more until you reach the pencil line on the opposite side.
Repeat these steps on the final two sides of your mat. After you’ve cut all four sides, the center of your mat should fall out of the center.
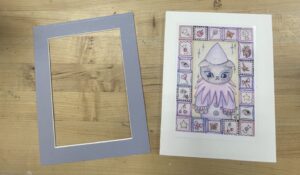
Our cut mat and artwork.
Mount Your Art and Mat
Now we need to mount our art to keep it in place behind the mat. This is what the foamcore or scrap mat we cut earlier is for.
Lay down your artwork roughly in the center of the foamcore. Then, lay the mat over the top and center your artwork in the middle. Once you have your art positioned under the mat how you prefer, place a weight on the piece to keep it from shifting. A weight could be anything, like a heavy book. You can see in the picture below I used a container of beads to stabilize.
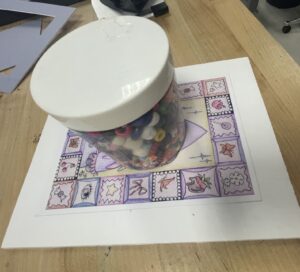
Tip: You can cover your art with a tissue or paper towel to prevent potential smudging before putting a weight on top.
With you piece stabilized, remove the mat and T-hinge your artwork in place on the top edge. To make a T-hinge, you’ll need 4 pieces of tape. Place your first piece of tape vertically with the sticky side UP underneath the top left of your art. Leave 1″-2″ of tape showing above your art.
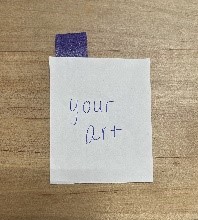
Tape vertically with the sticky side UP underneath the top left of your art.
Then, take another piece of tape and place it, sticky side DOWN, horizontally across the tab of tape still showing above the artwork. Be careful NOT to touch your art with the horizontal piece of tape. I’ve used colored masking tape to demonstrate this in the photos, but it’s best to use a clear, acid free tape for any art matting or framing you do. I am also demonstrating this on a table, but for your project you will do this on your foamcore.

2nd piece of tape placed sticky side DOWN, horizontally across the tab of tape still showing above the artwork.
Repeat to hinge the top right of your artwork with your other two pieces of tape.
Once we’ve hinged the artwork to the backing, we’re ready to attach our mat. Line the edges around your artwork with double sided tape. Gently center your mat over your artwork and press down all four sides.
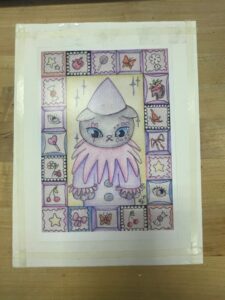
Artwork lined with double sided tape.
VOILA! You’ve matted your own artwork! This process is very detailed and can be hard to attempt for the first time on your own. If you want to give it a try on your own, come down to Ignite and use our hand mat cutter here in the studio!
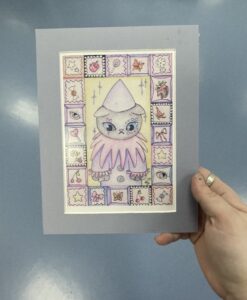
Finished artwork mounted with a mat.
If you’d like to try your hand at making a mat, just ask a staff member for access to our mat cutter and mat boards. Be sure to post your creations or questions to the Ignite Community Discussion Board. These tips might help you with art display if you are interested in submitting to our exhibits. Happy Making!
