
by Jared Hart
After receiving some requests from patrons, we are excited to announce that we have acquired a Cinch book binding press. This little tool does everything from punching the holes, to clamping it together with a binding wire. Read on to learn how to use Ignite’s Cinch book binding tool, which can be found in our Bookbinding Kit.
How to Use Ignite’s Cinch Book Binding Tool
Making your first hole punches
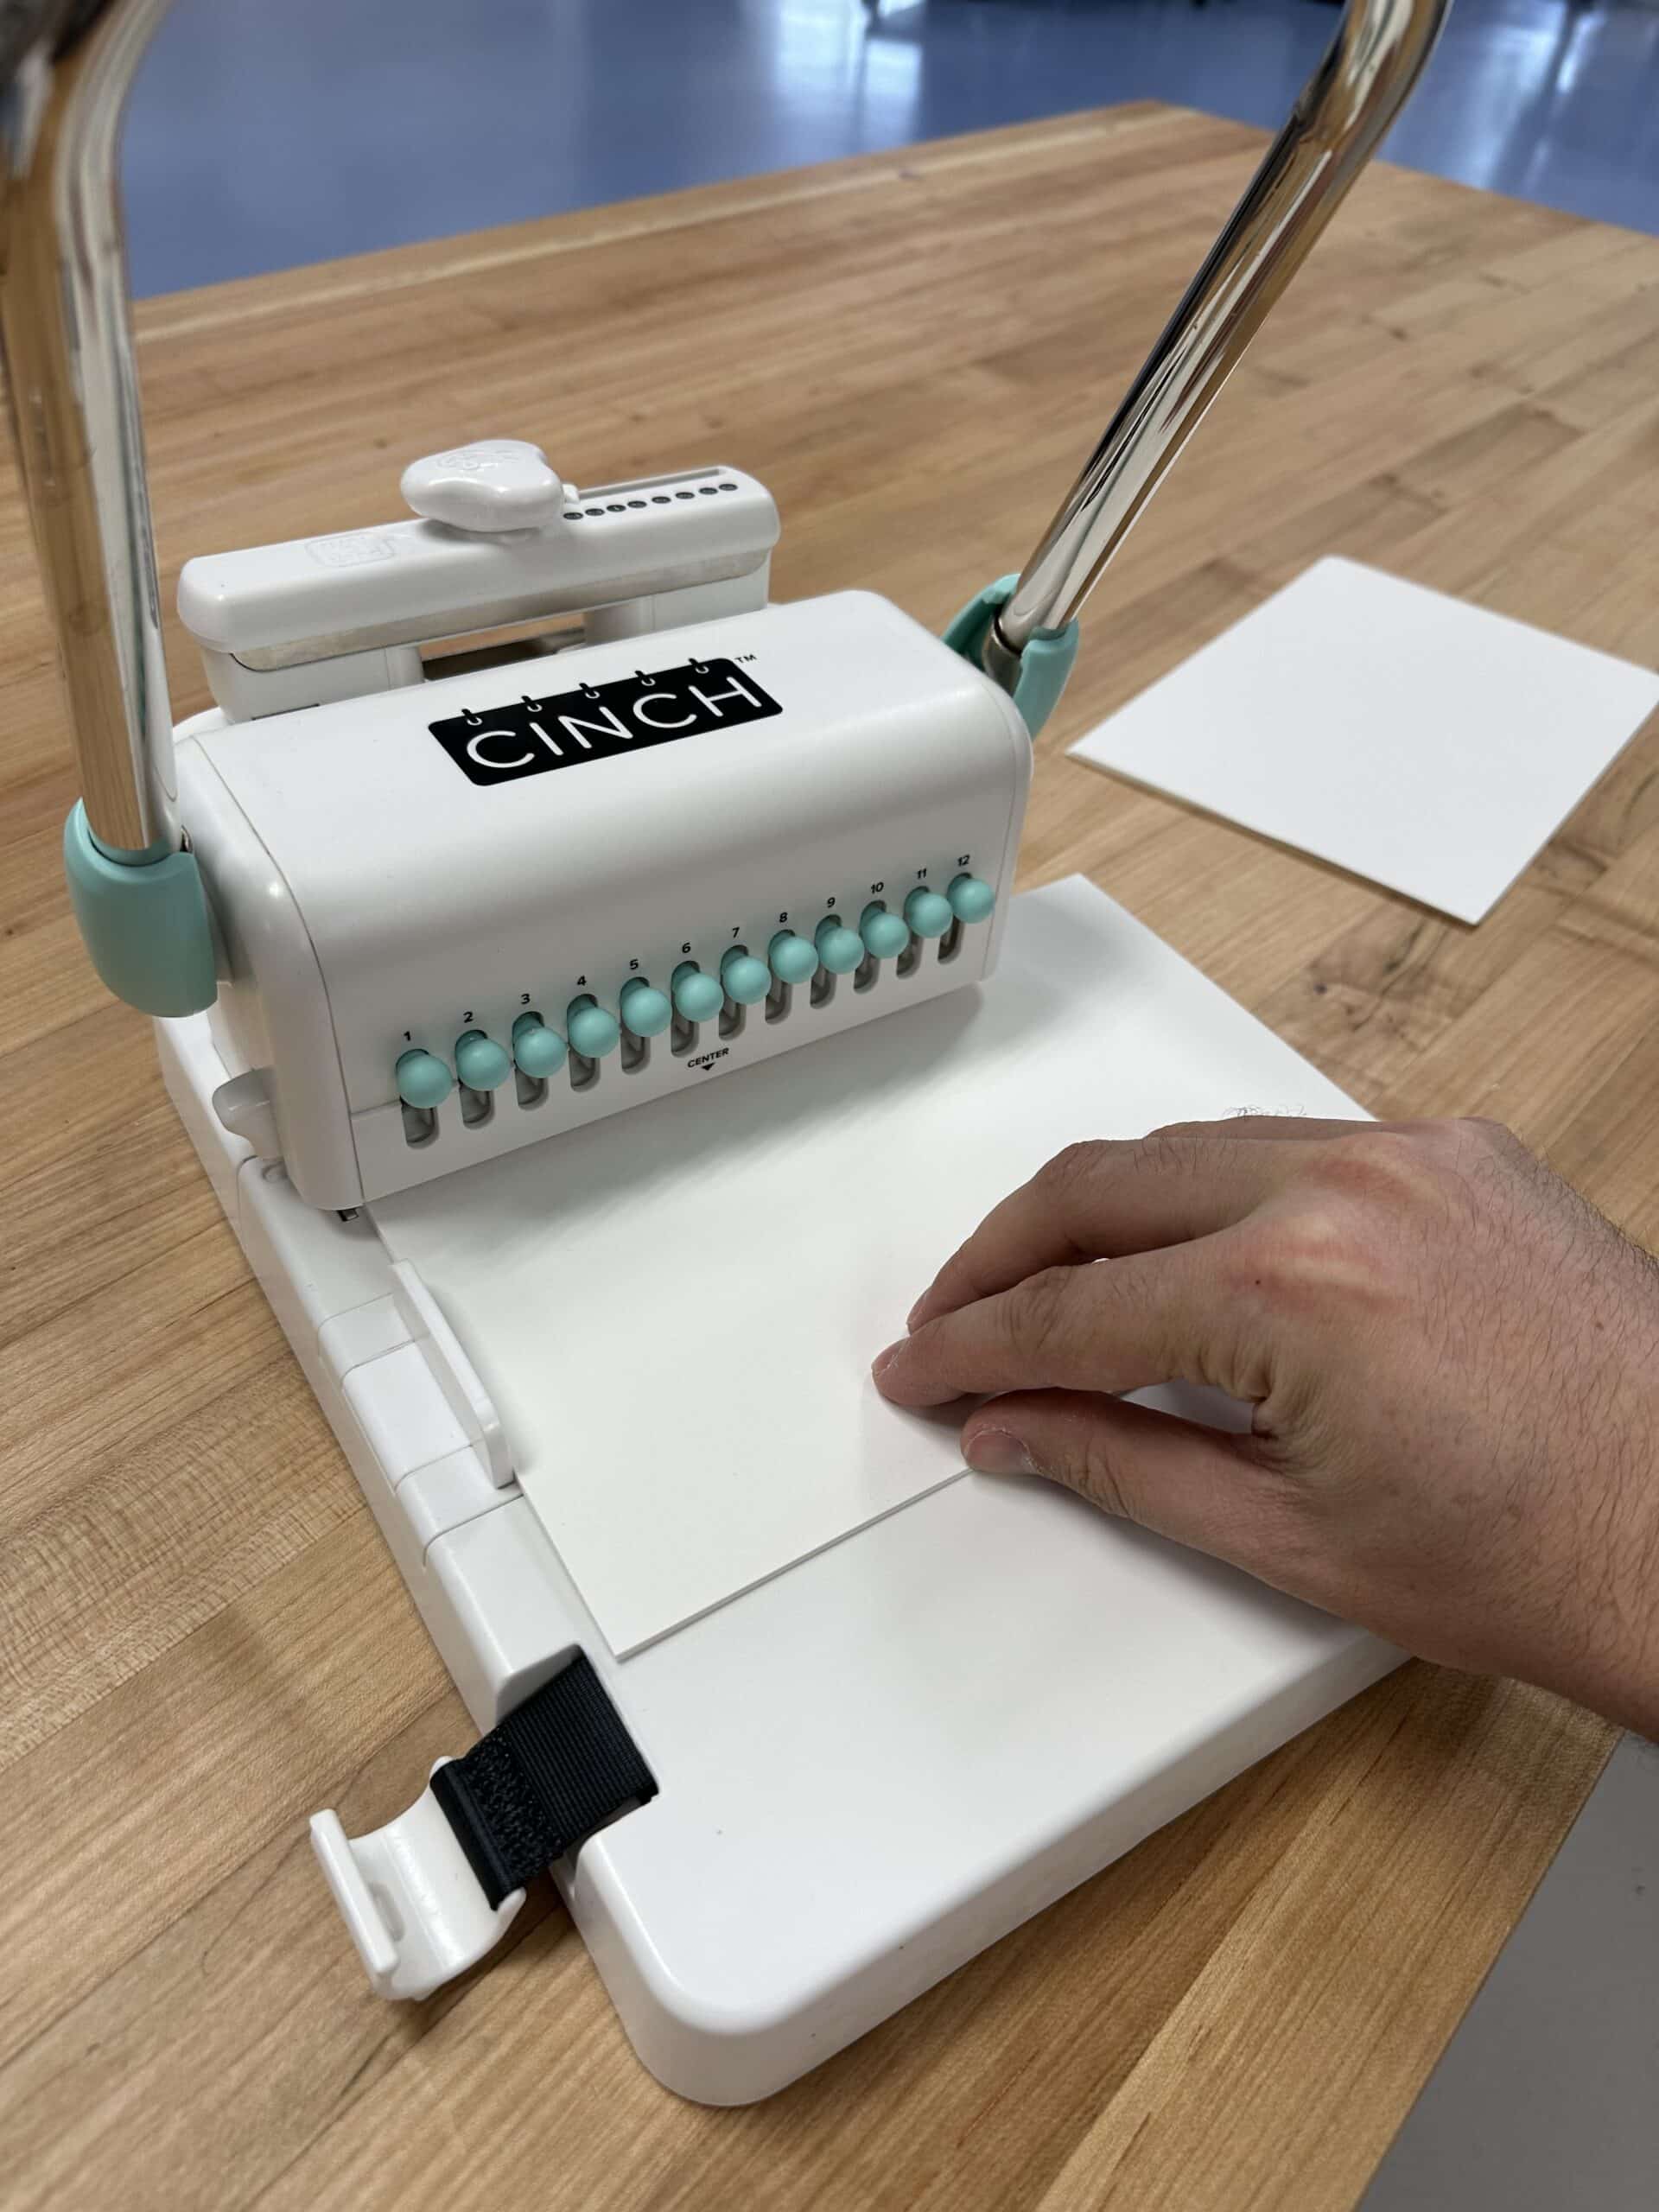
To get started, collect all of the sheets you would like to be in your book. Make sure all of the blue spherical tabs on the Cinch machine are pushed in. To test it, you can pull the lever to make sure all of the tabs move. If a tab is pulled out, it won’t move at all.
If your book spine is 6 inches or shorter, consult this chart to determine which peg needs pulled to disengage it.

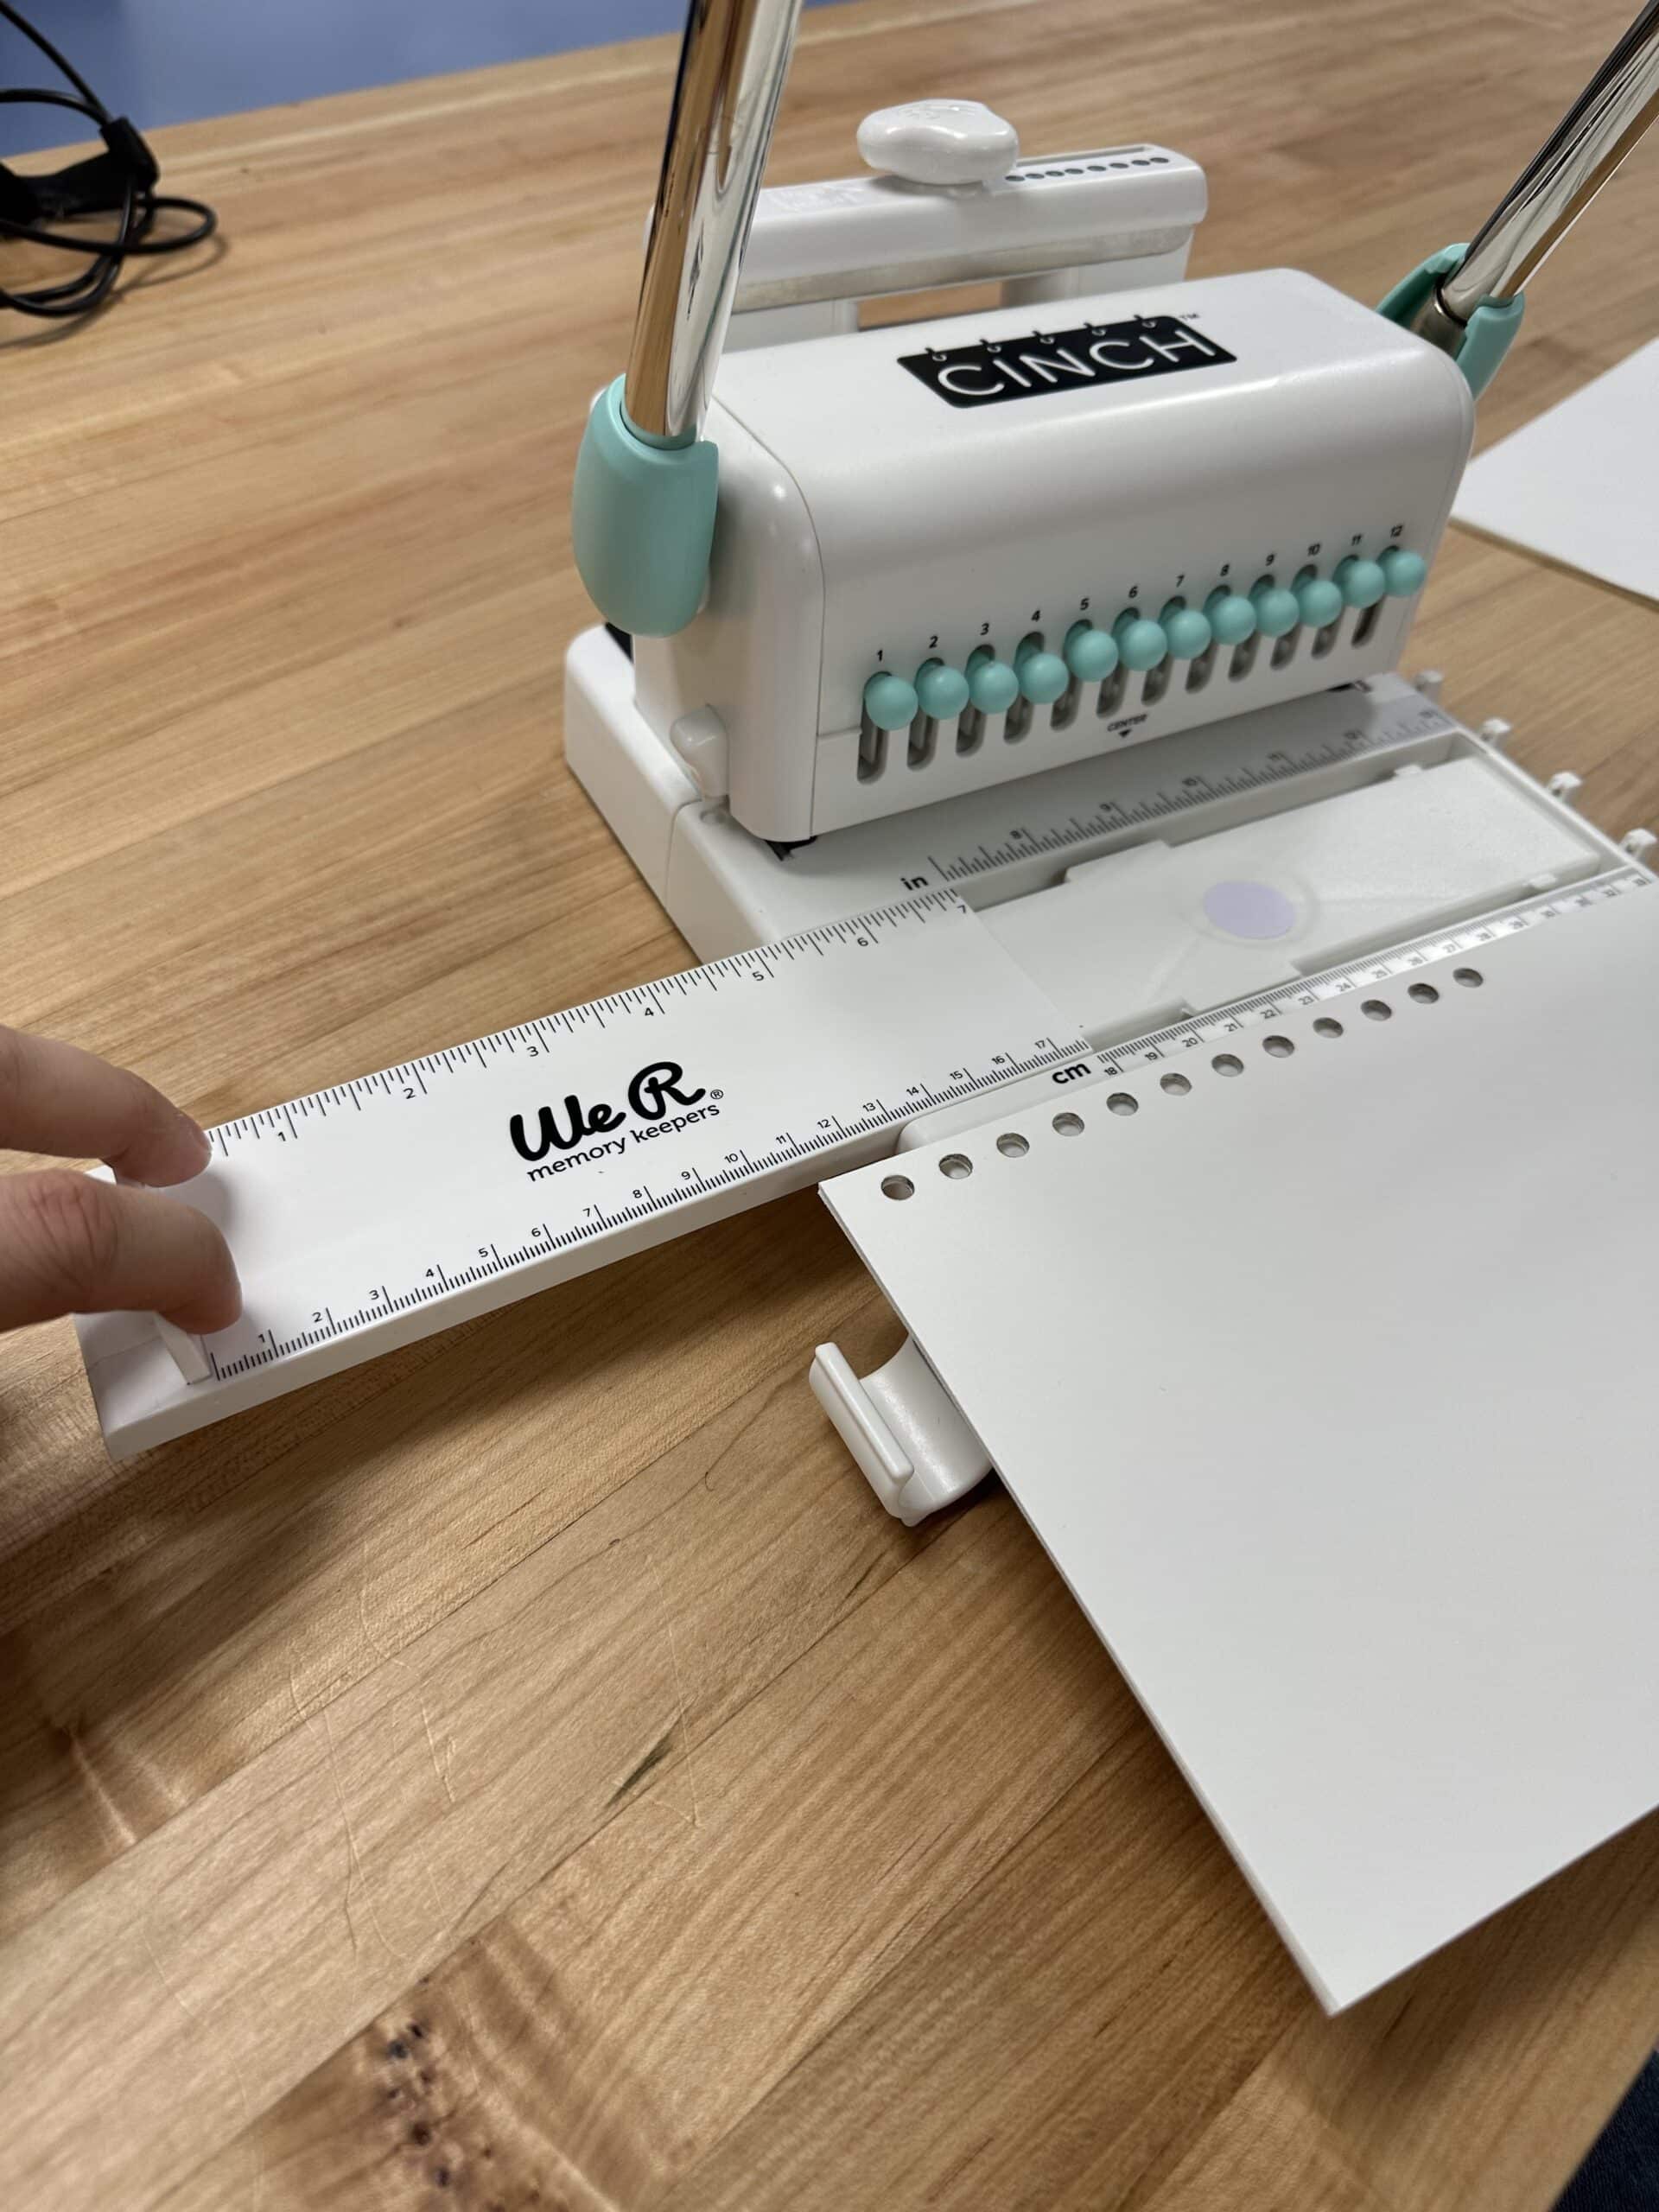
If your book is longer than 6 inches, leave all pegs pushed in. Push the slide ruler all the way in, lining your paper up against it, and push a small stack of paper into the machine as far as it will go. Pull the lever.
Making your final hole punches
If your book is longer than 6 inches, you will need to punch more holes. Pull the slide ruler all the way out and line your sheets up against the ruler again.
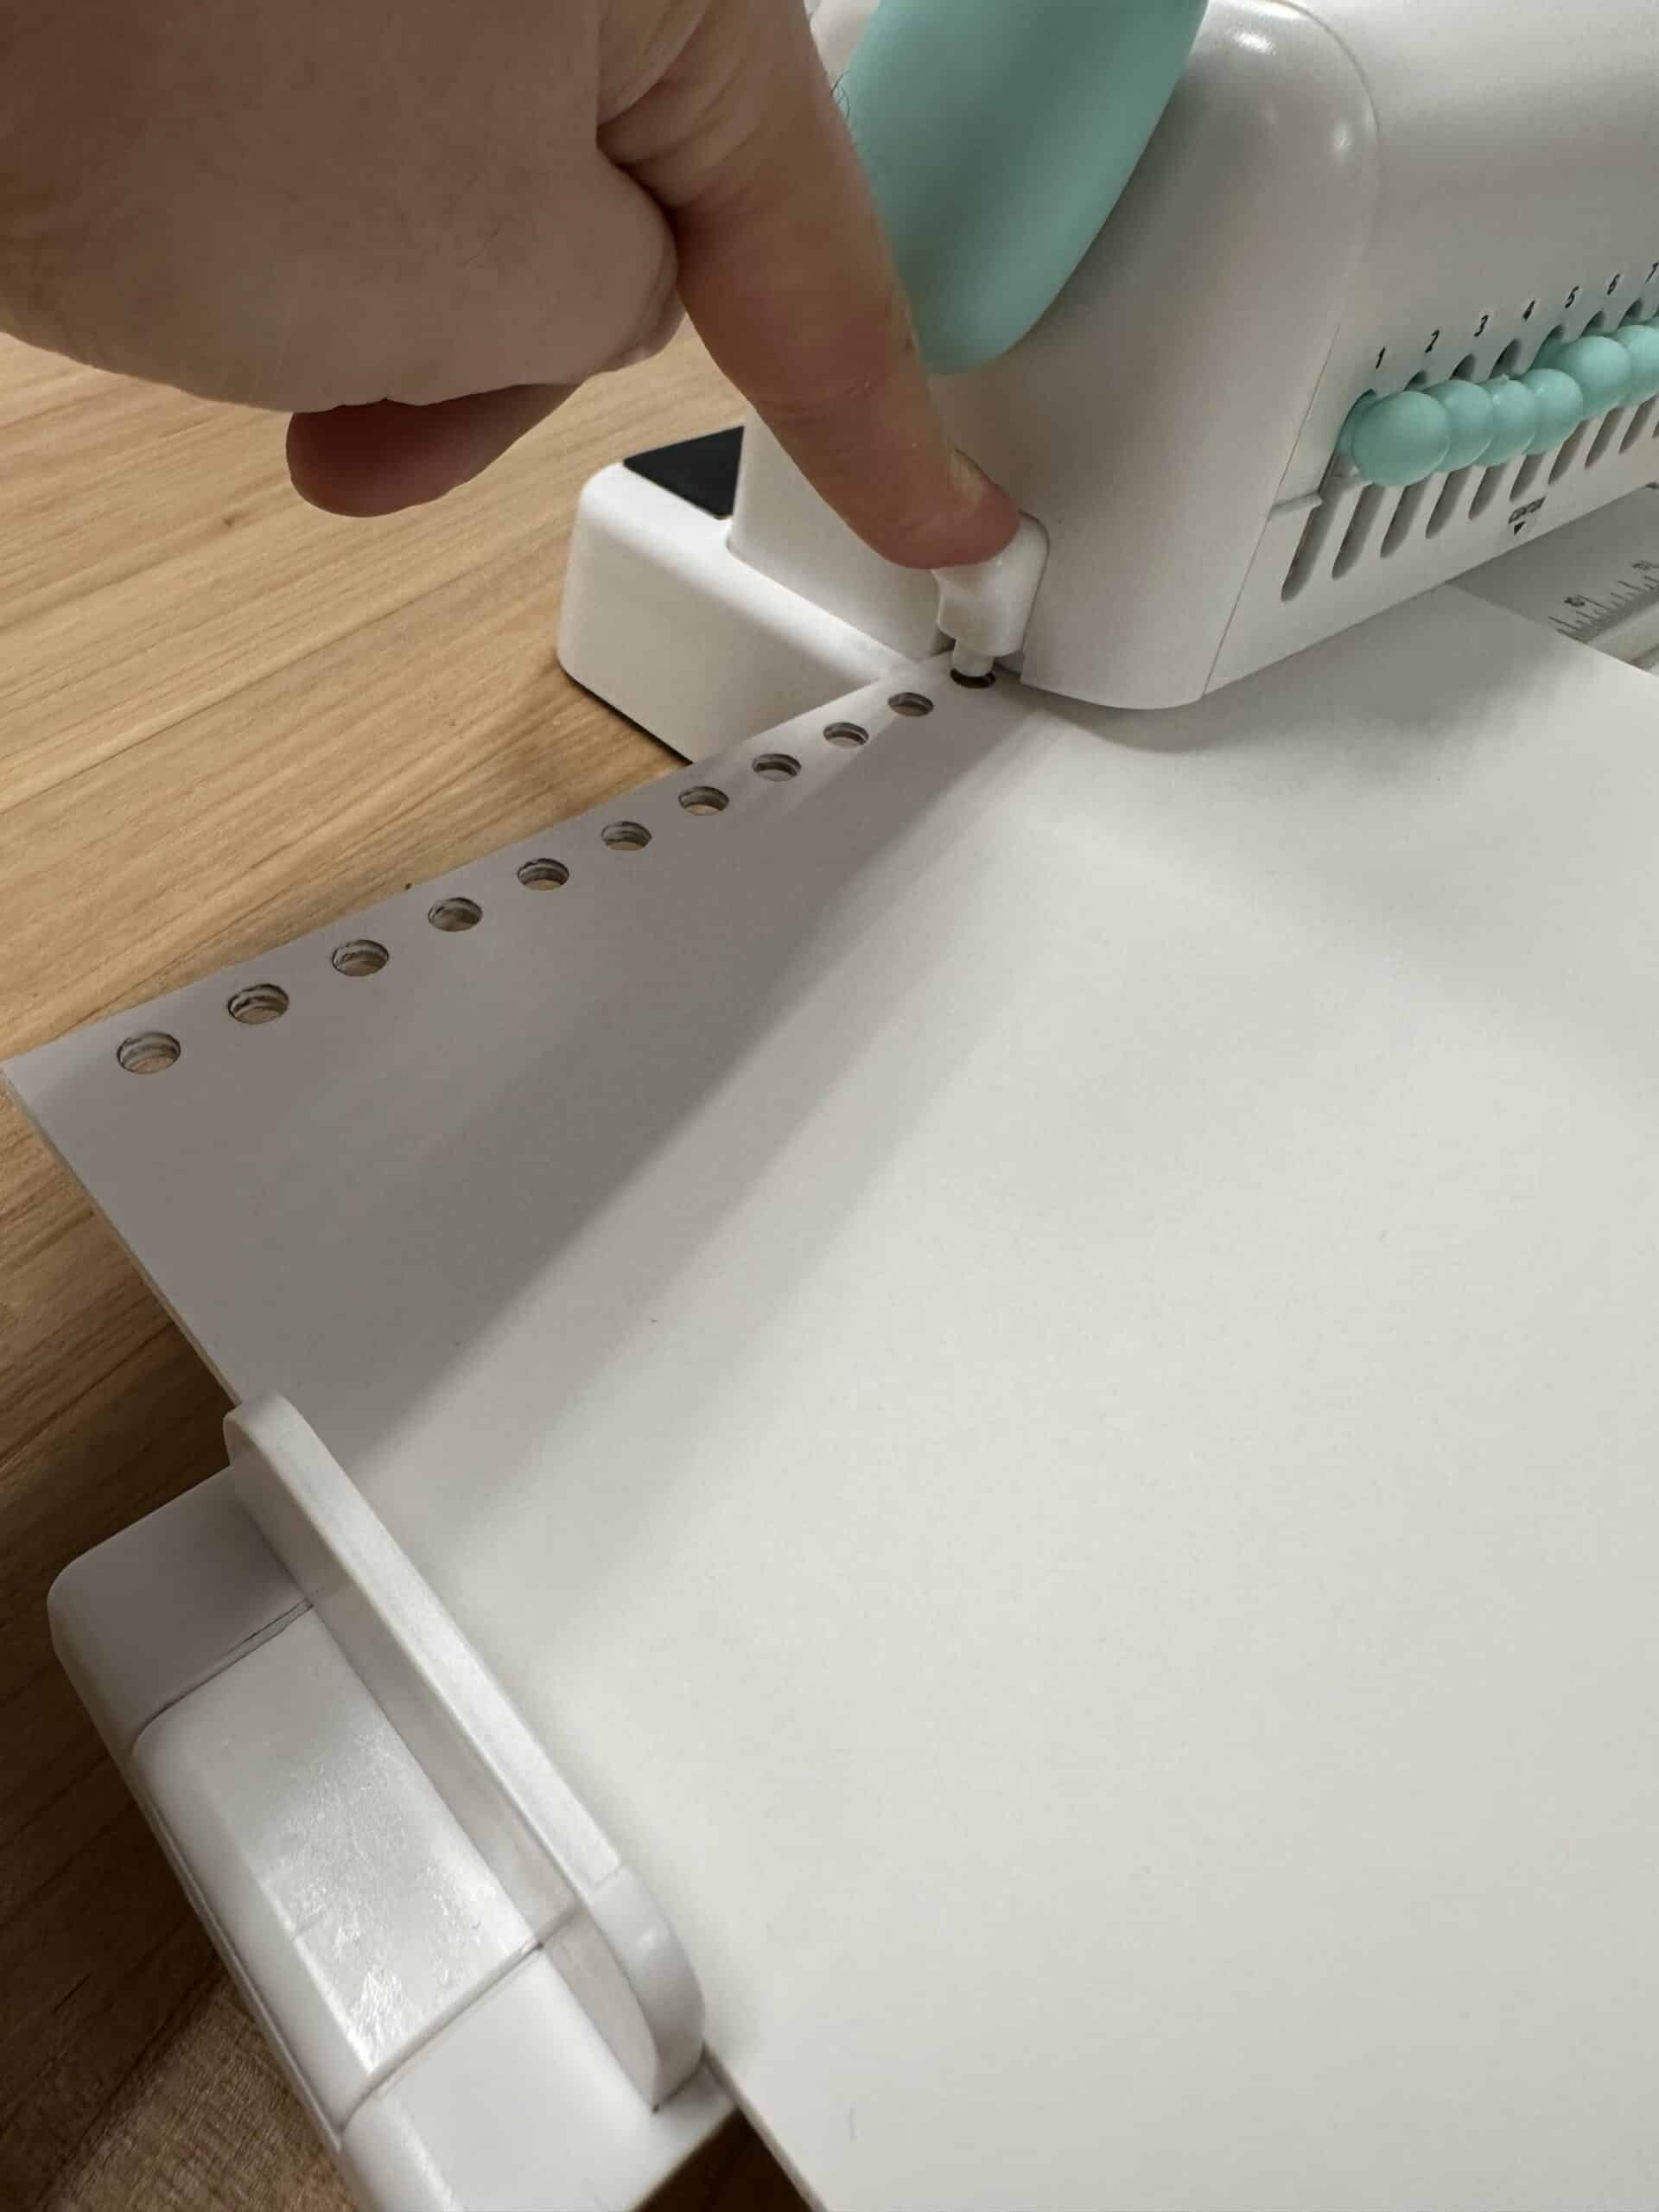
After pushing your paper into the machine, this time press down on the alignment peg to sit inside the punched hole directly below it. This will help to keep your holes in a straight line.
Depending on the length of the spine, you will need to pull out a specific peg to disengage that hole punch. To find out which peg to pull, consult the chart we have attached to the machine.

My book is 9” tall, so I needed to pull out peg 6.
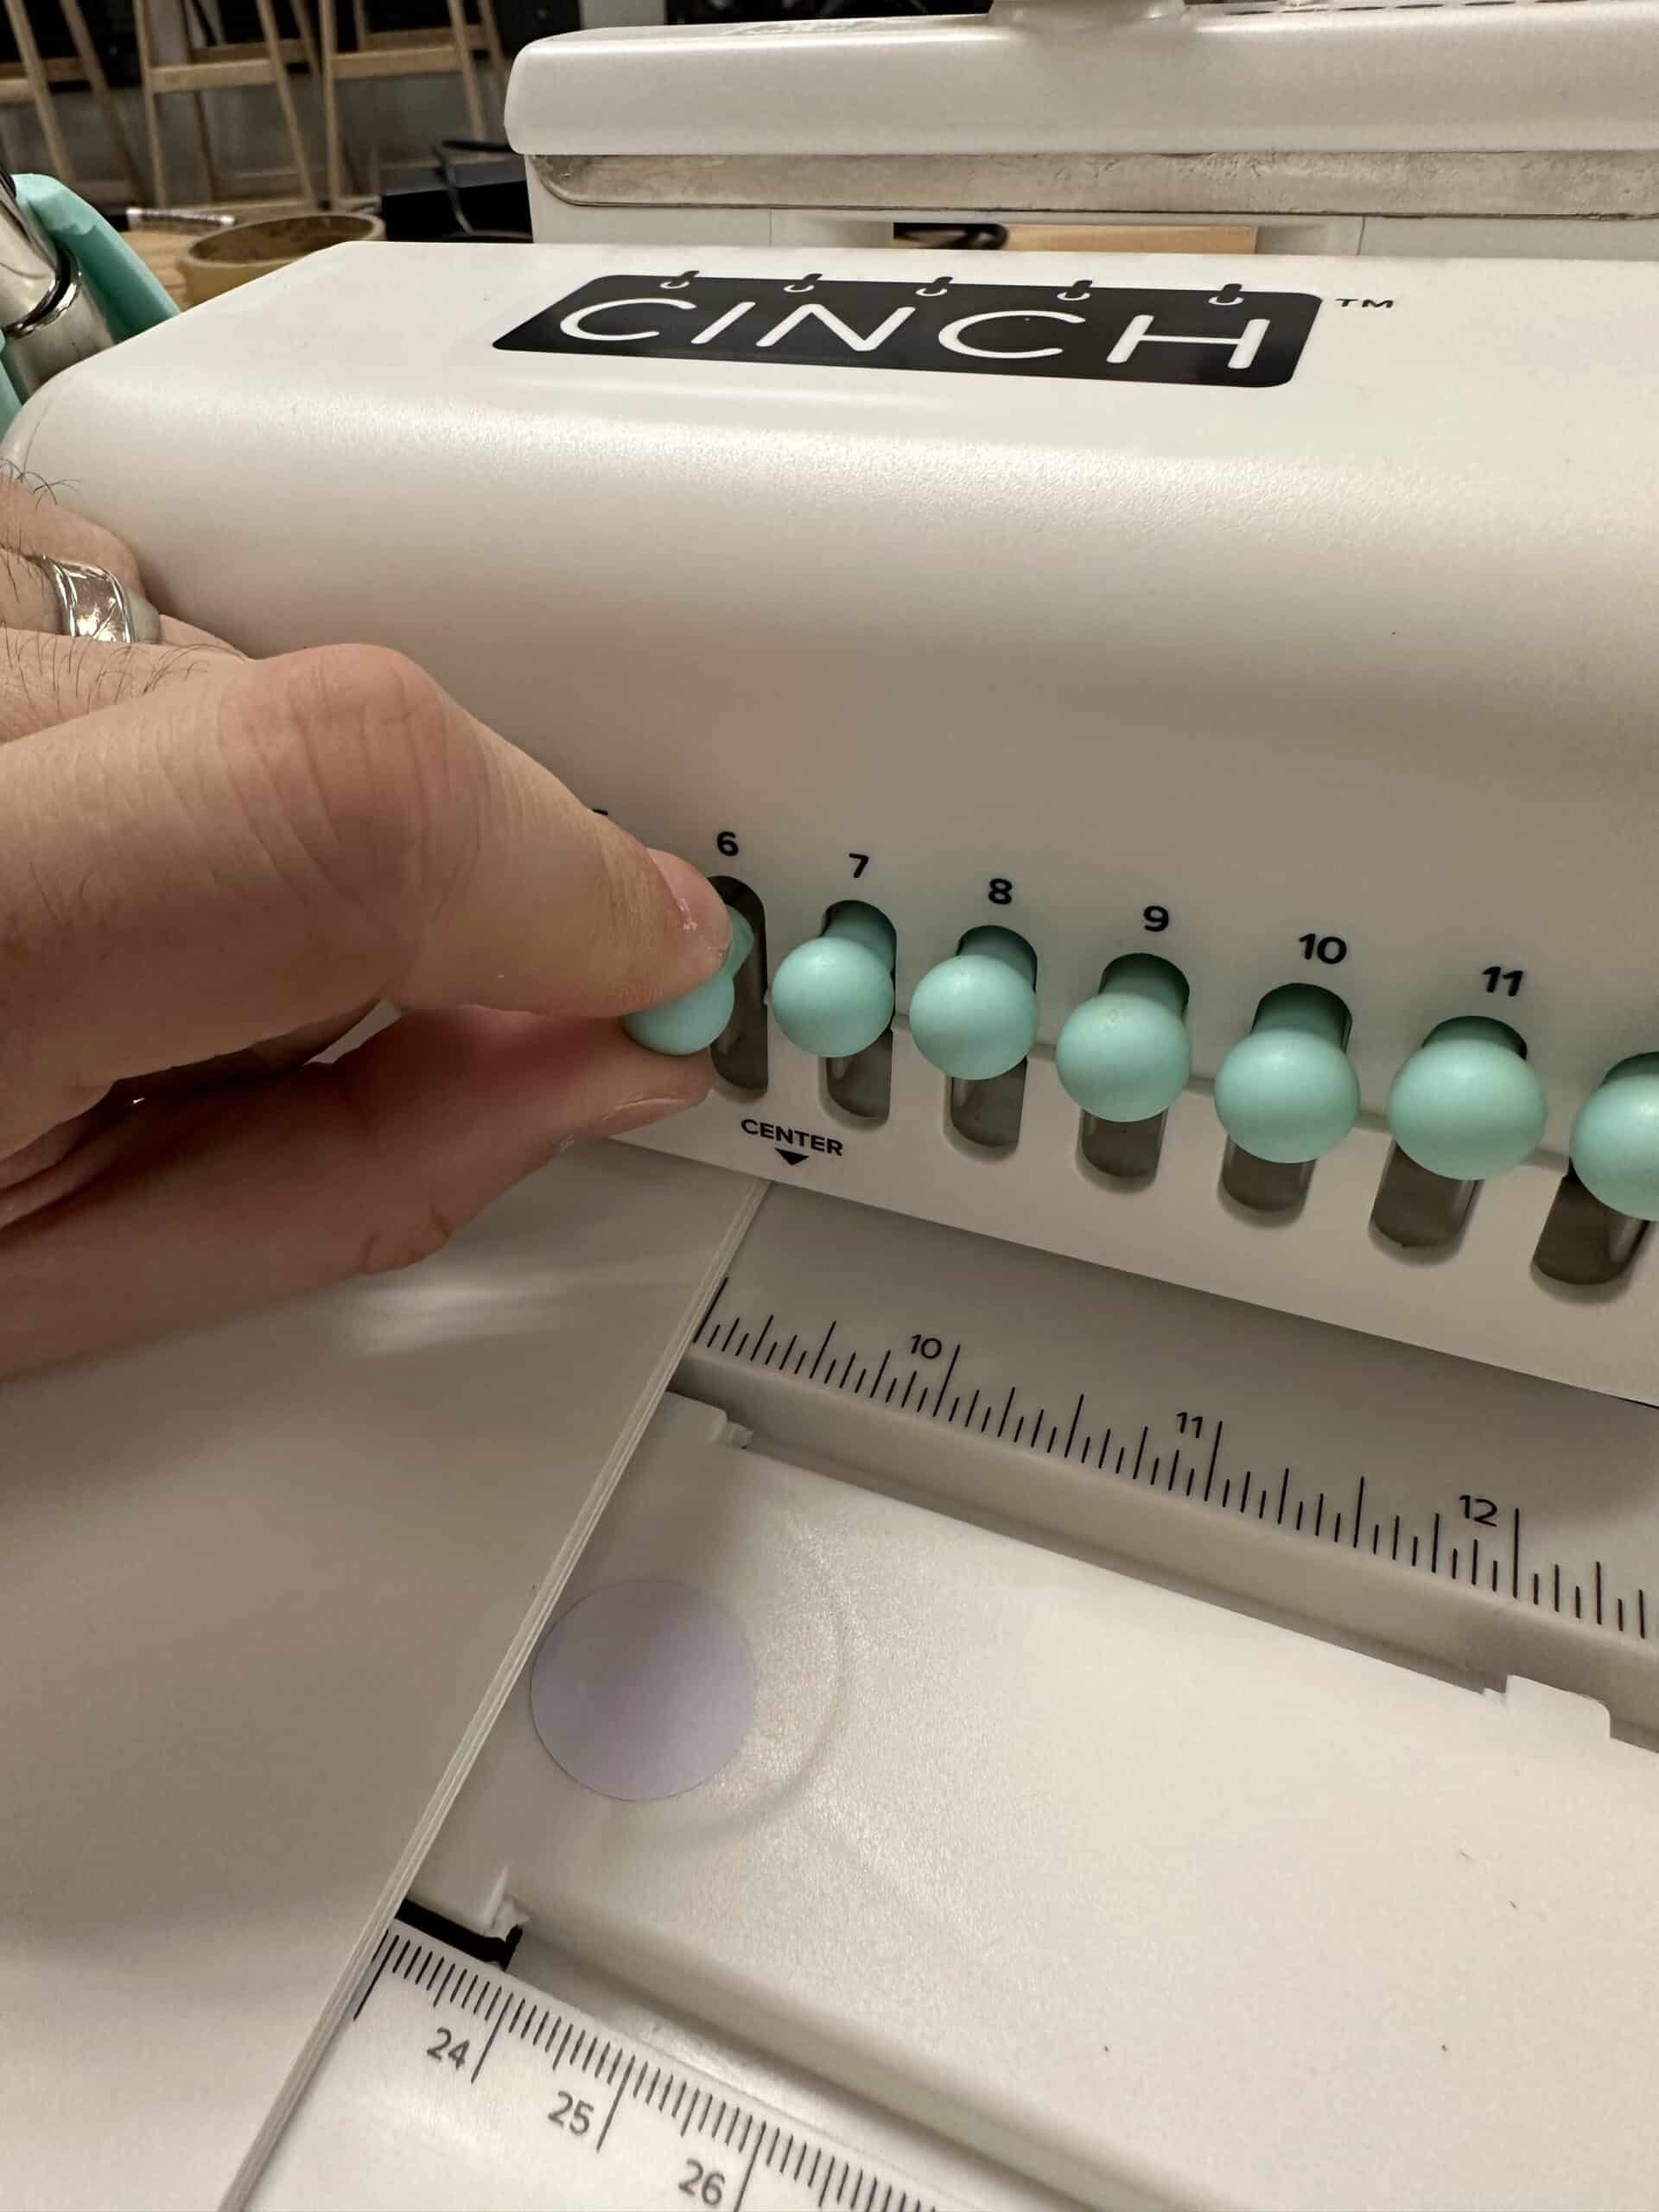
After disengaging the designated peg, and engaging the alignment peg, pull the lever to finish off your hole punches.
Assembling Your Book
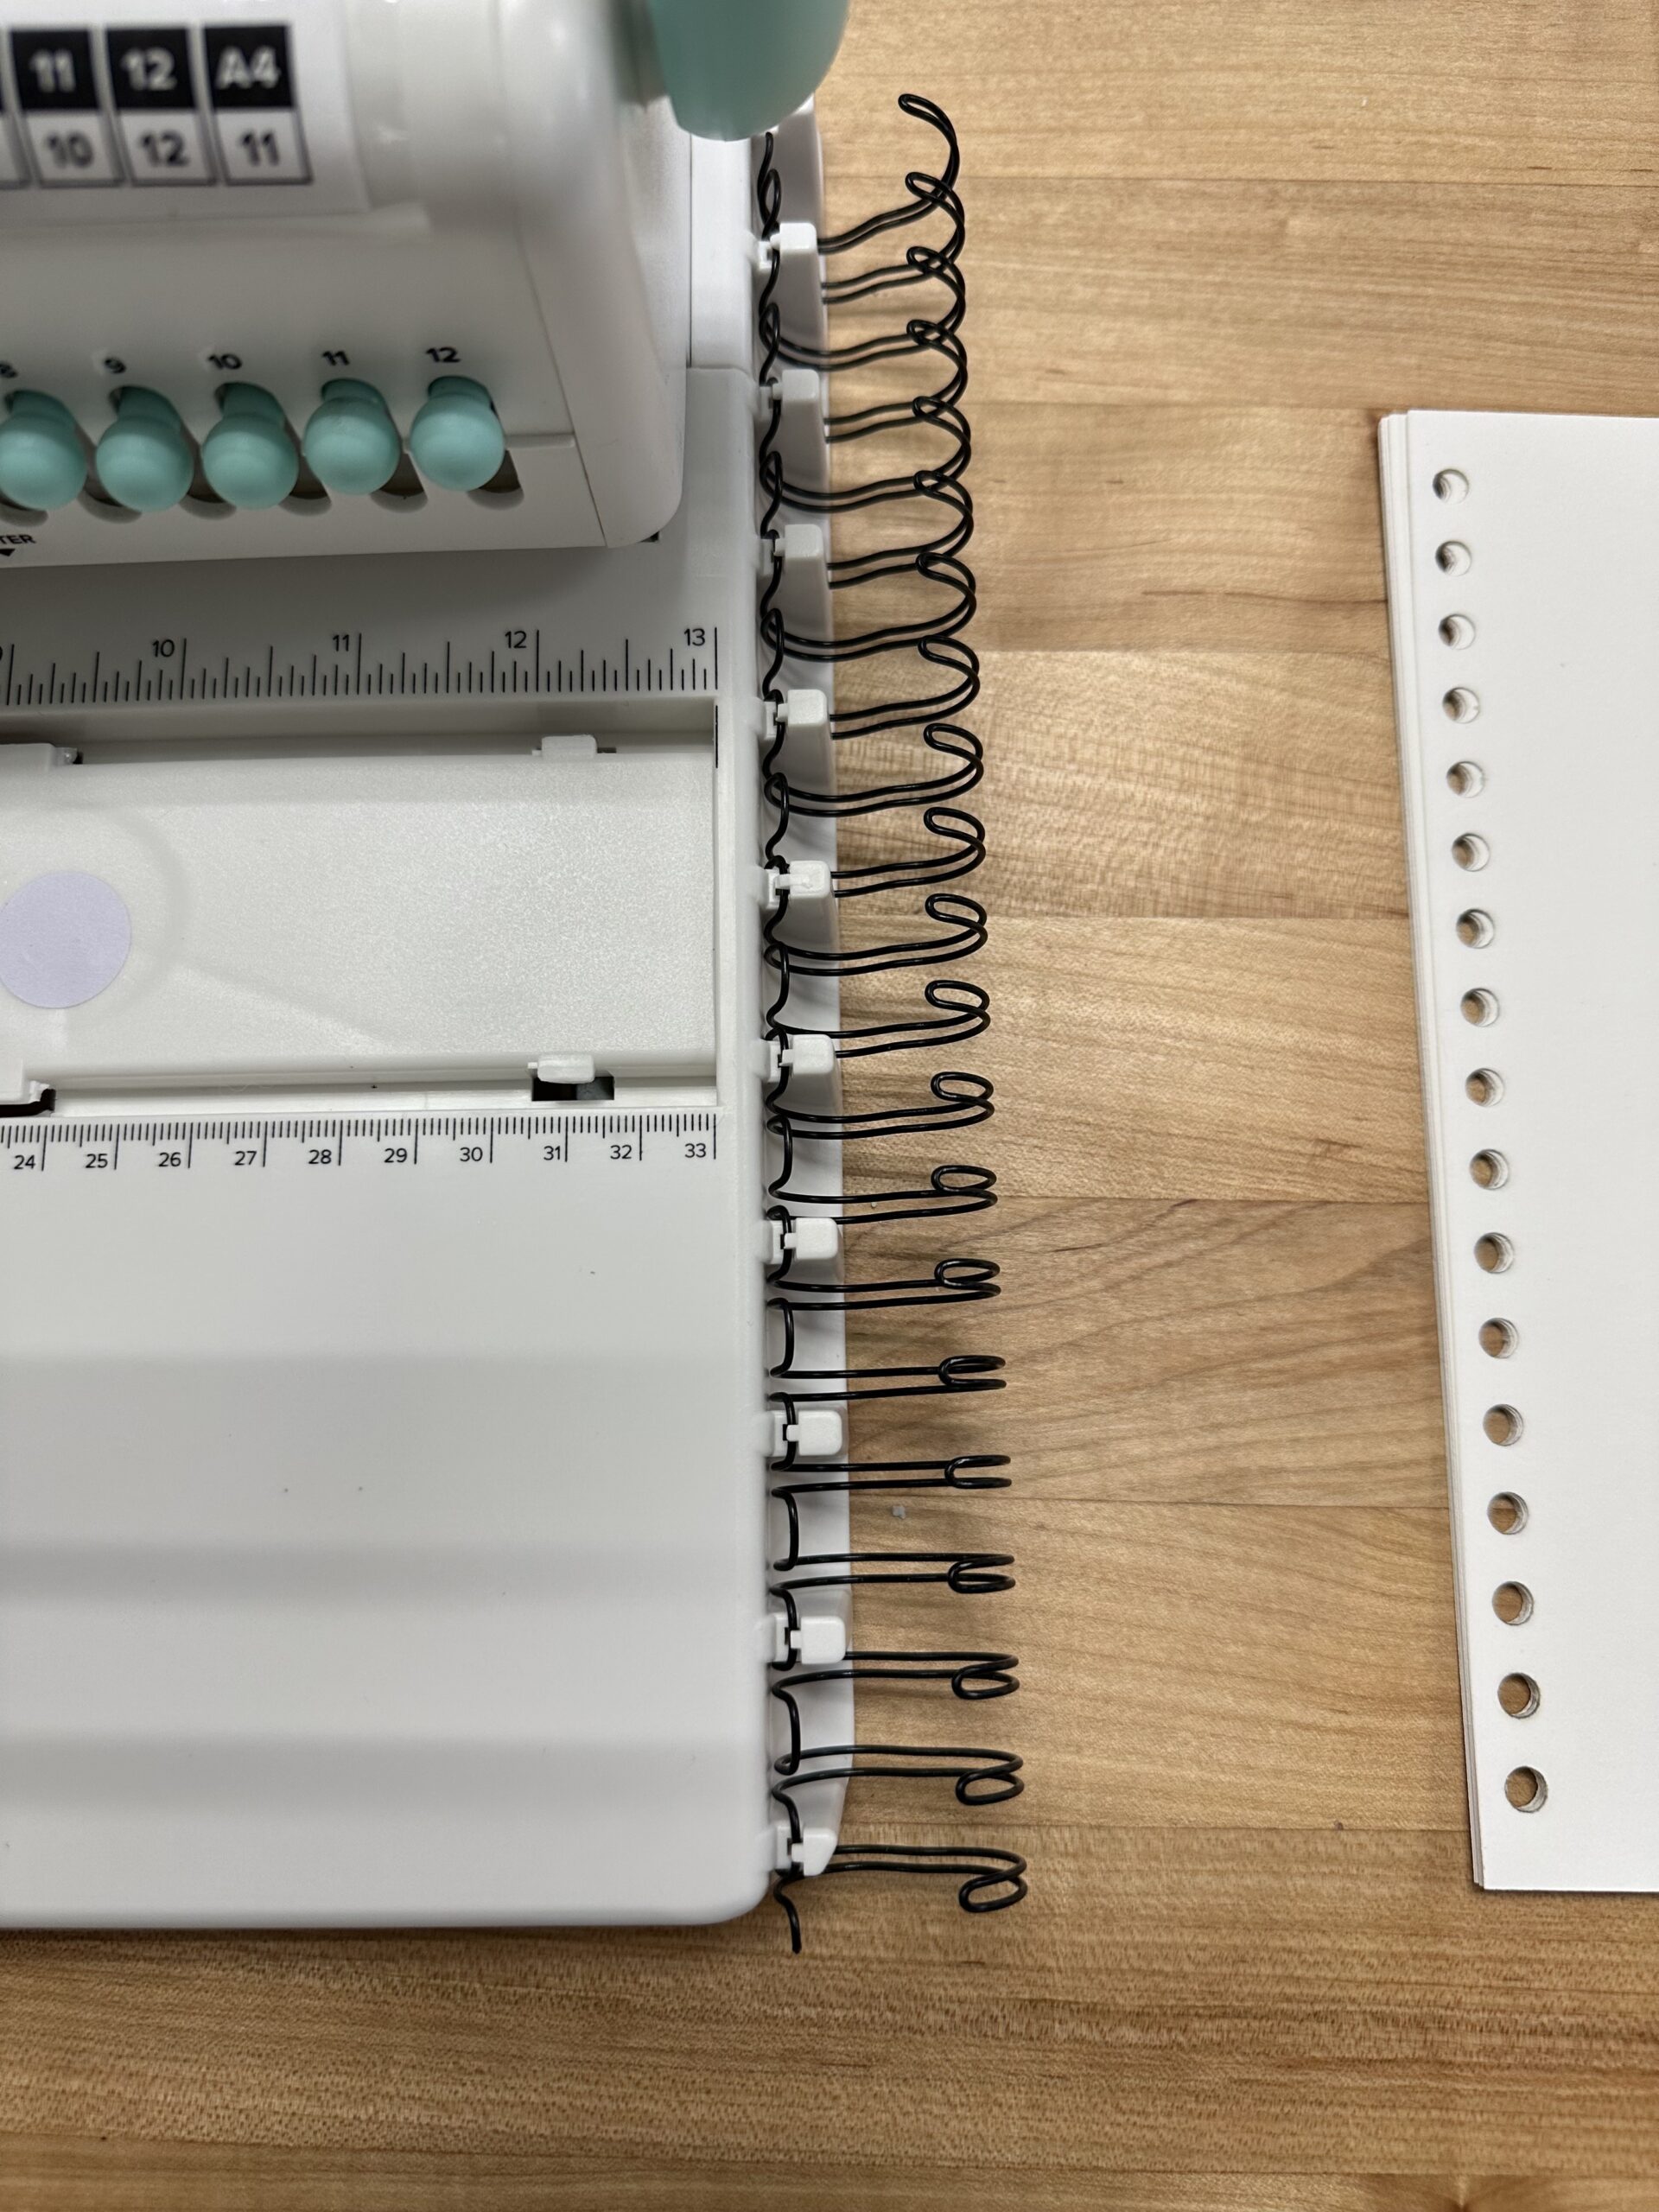
Place your coil binding on the side hooks so you can assemble your book as you finish each set of pages. (Coils are available for sale at the Ignite service desk) Repeat these steps until your binding hook is fairly full.
Adding the Covers
Repeat the same process with your front and back covers.
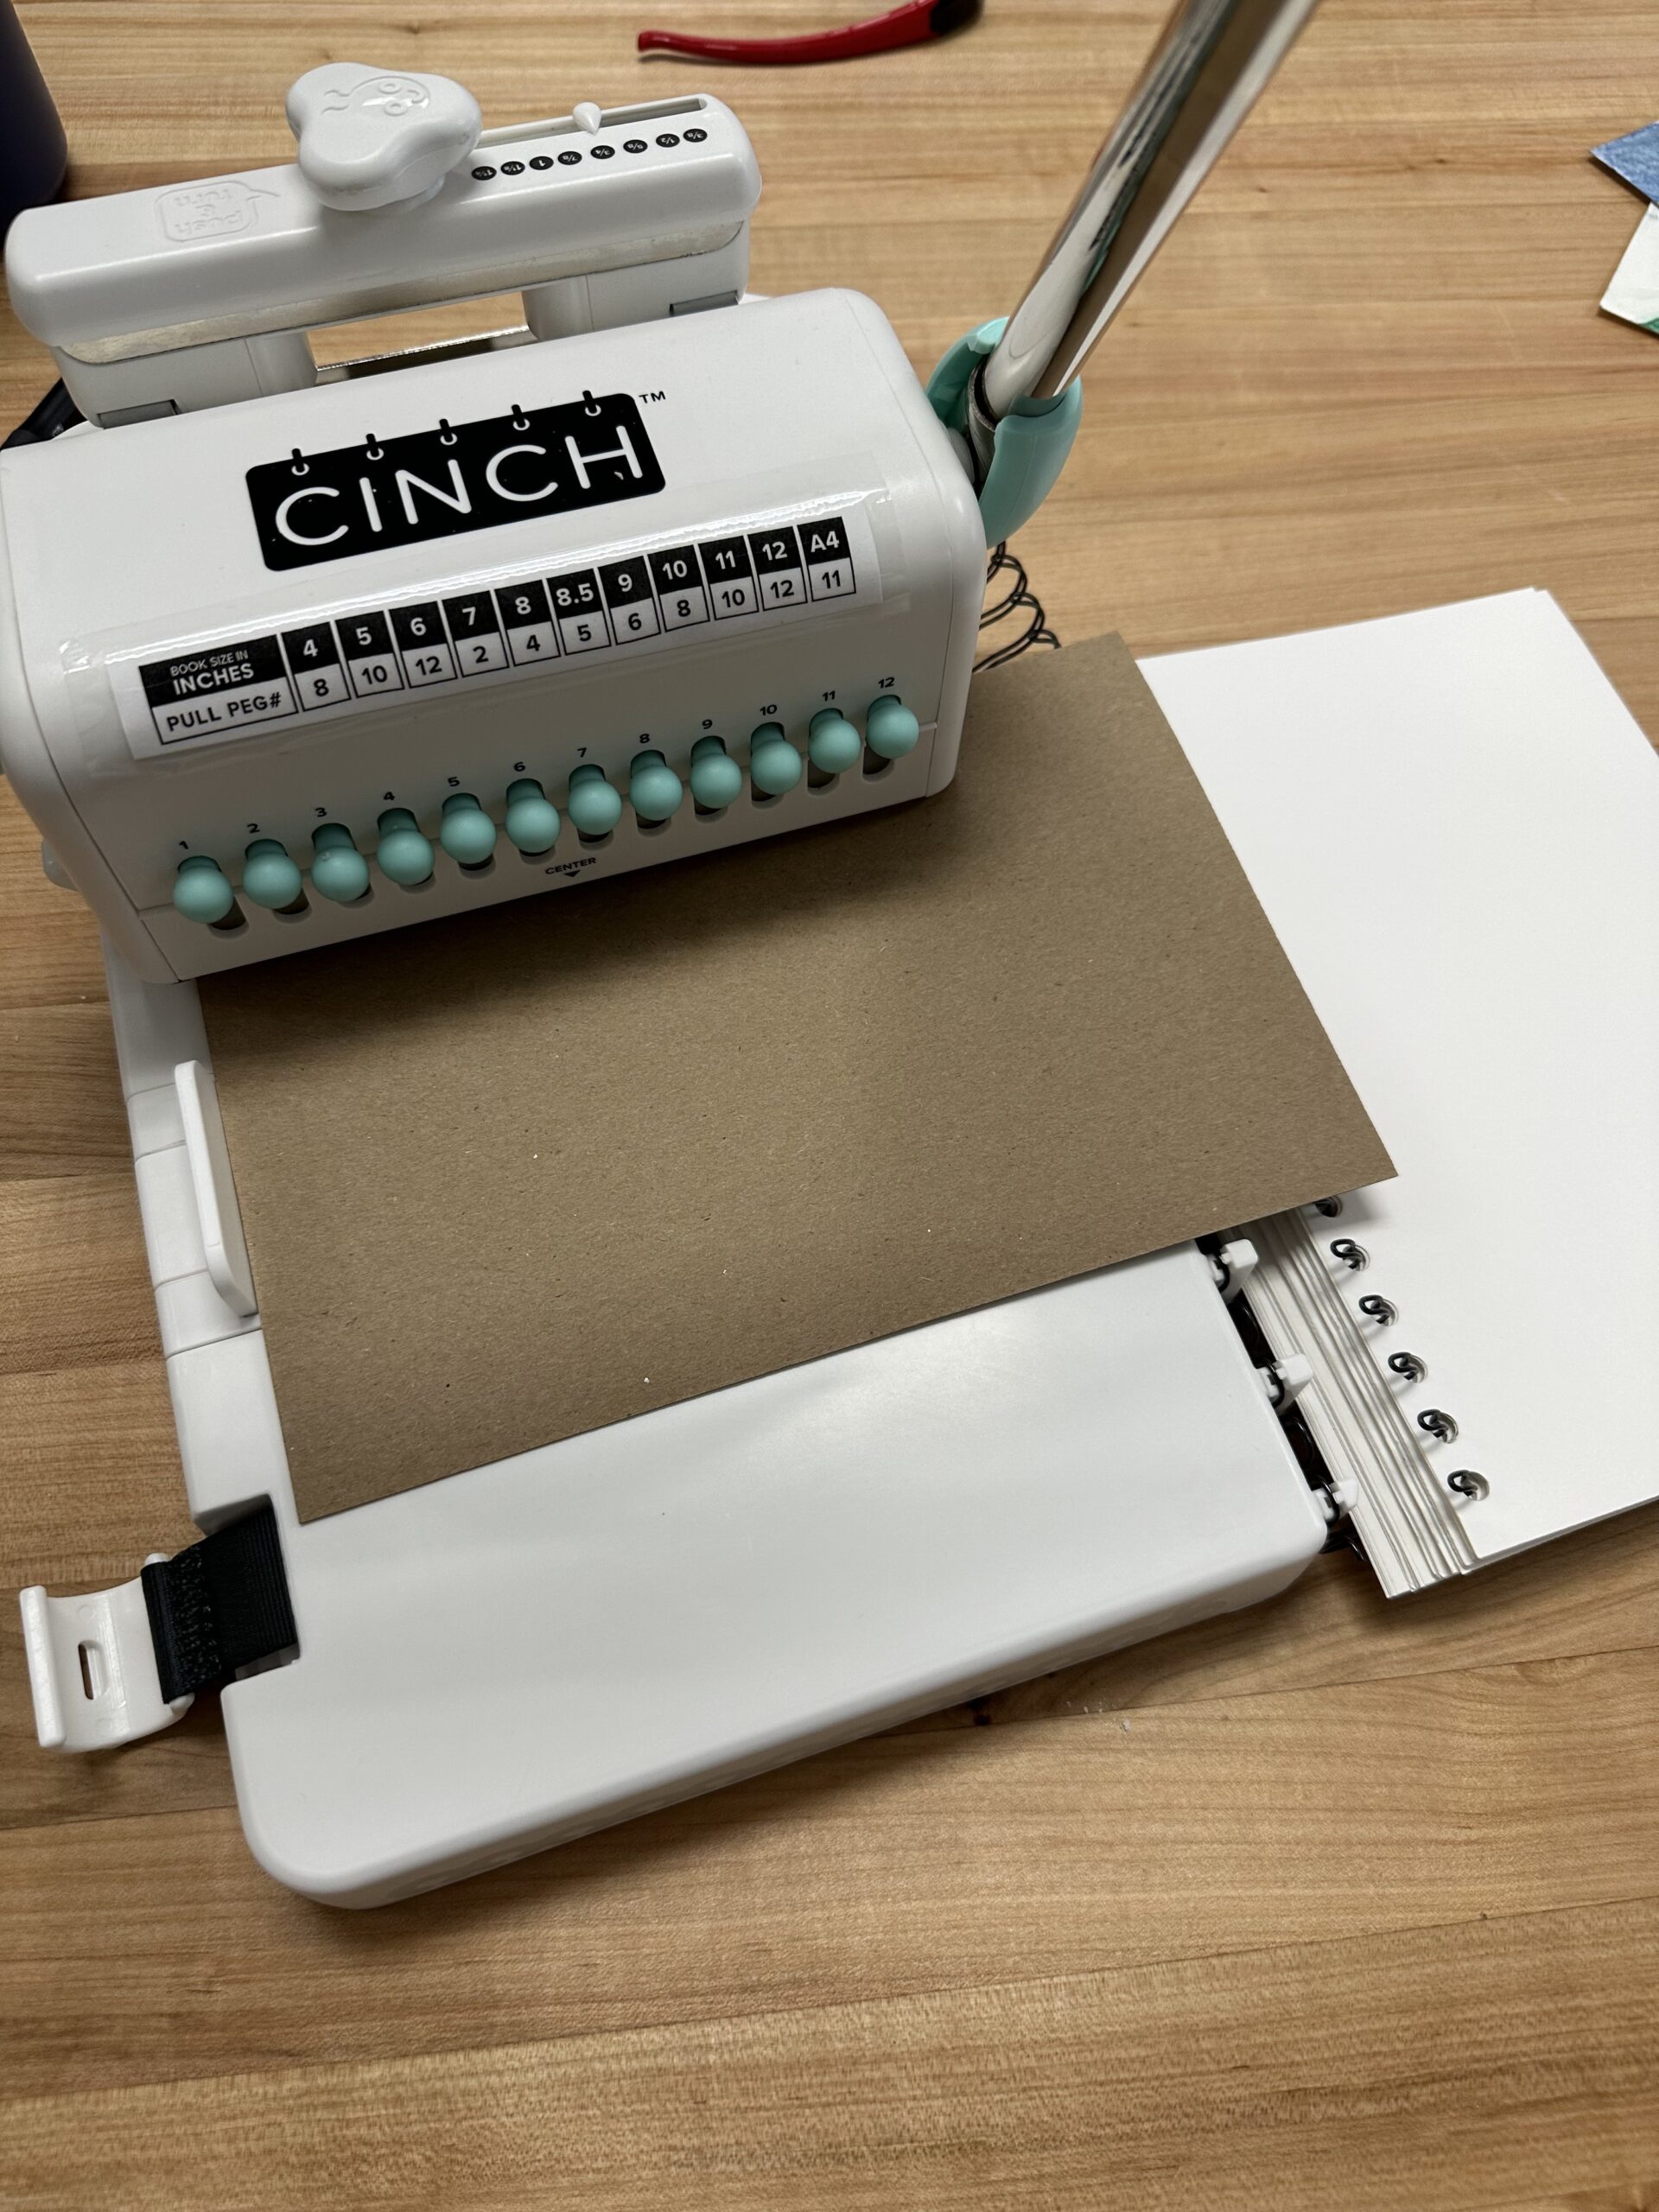
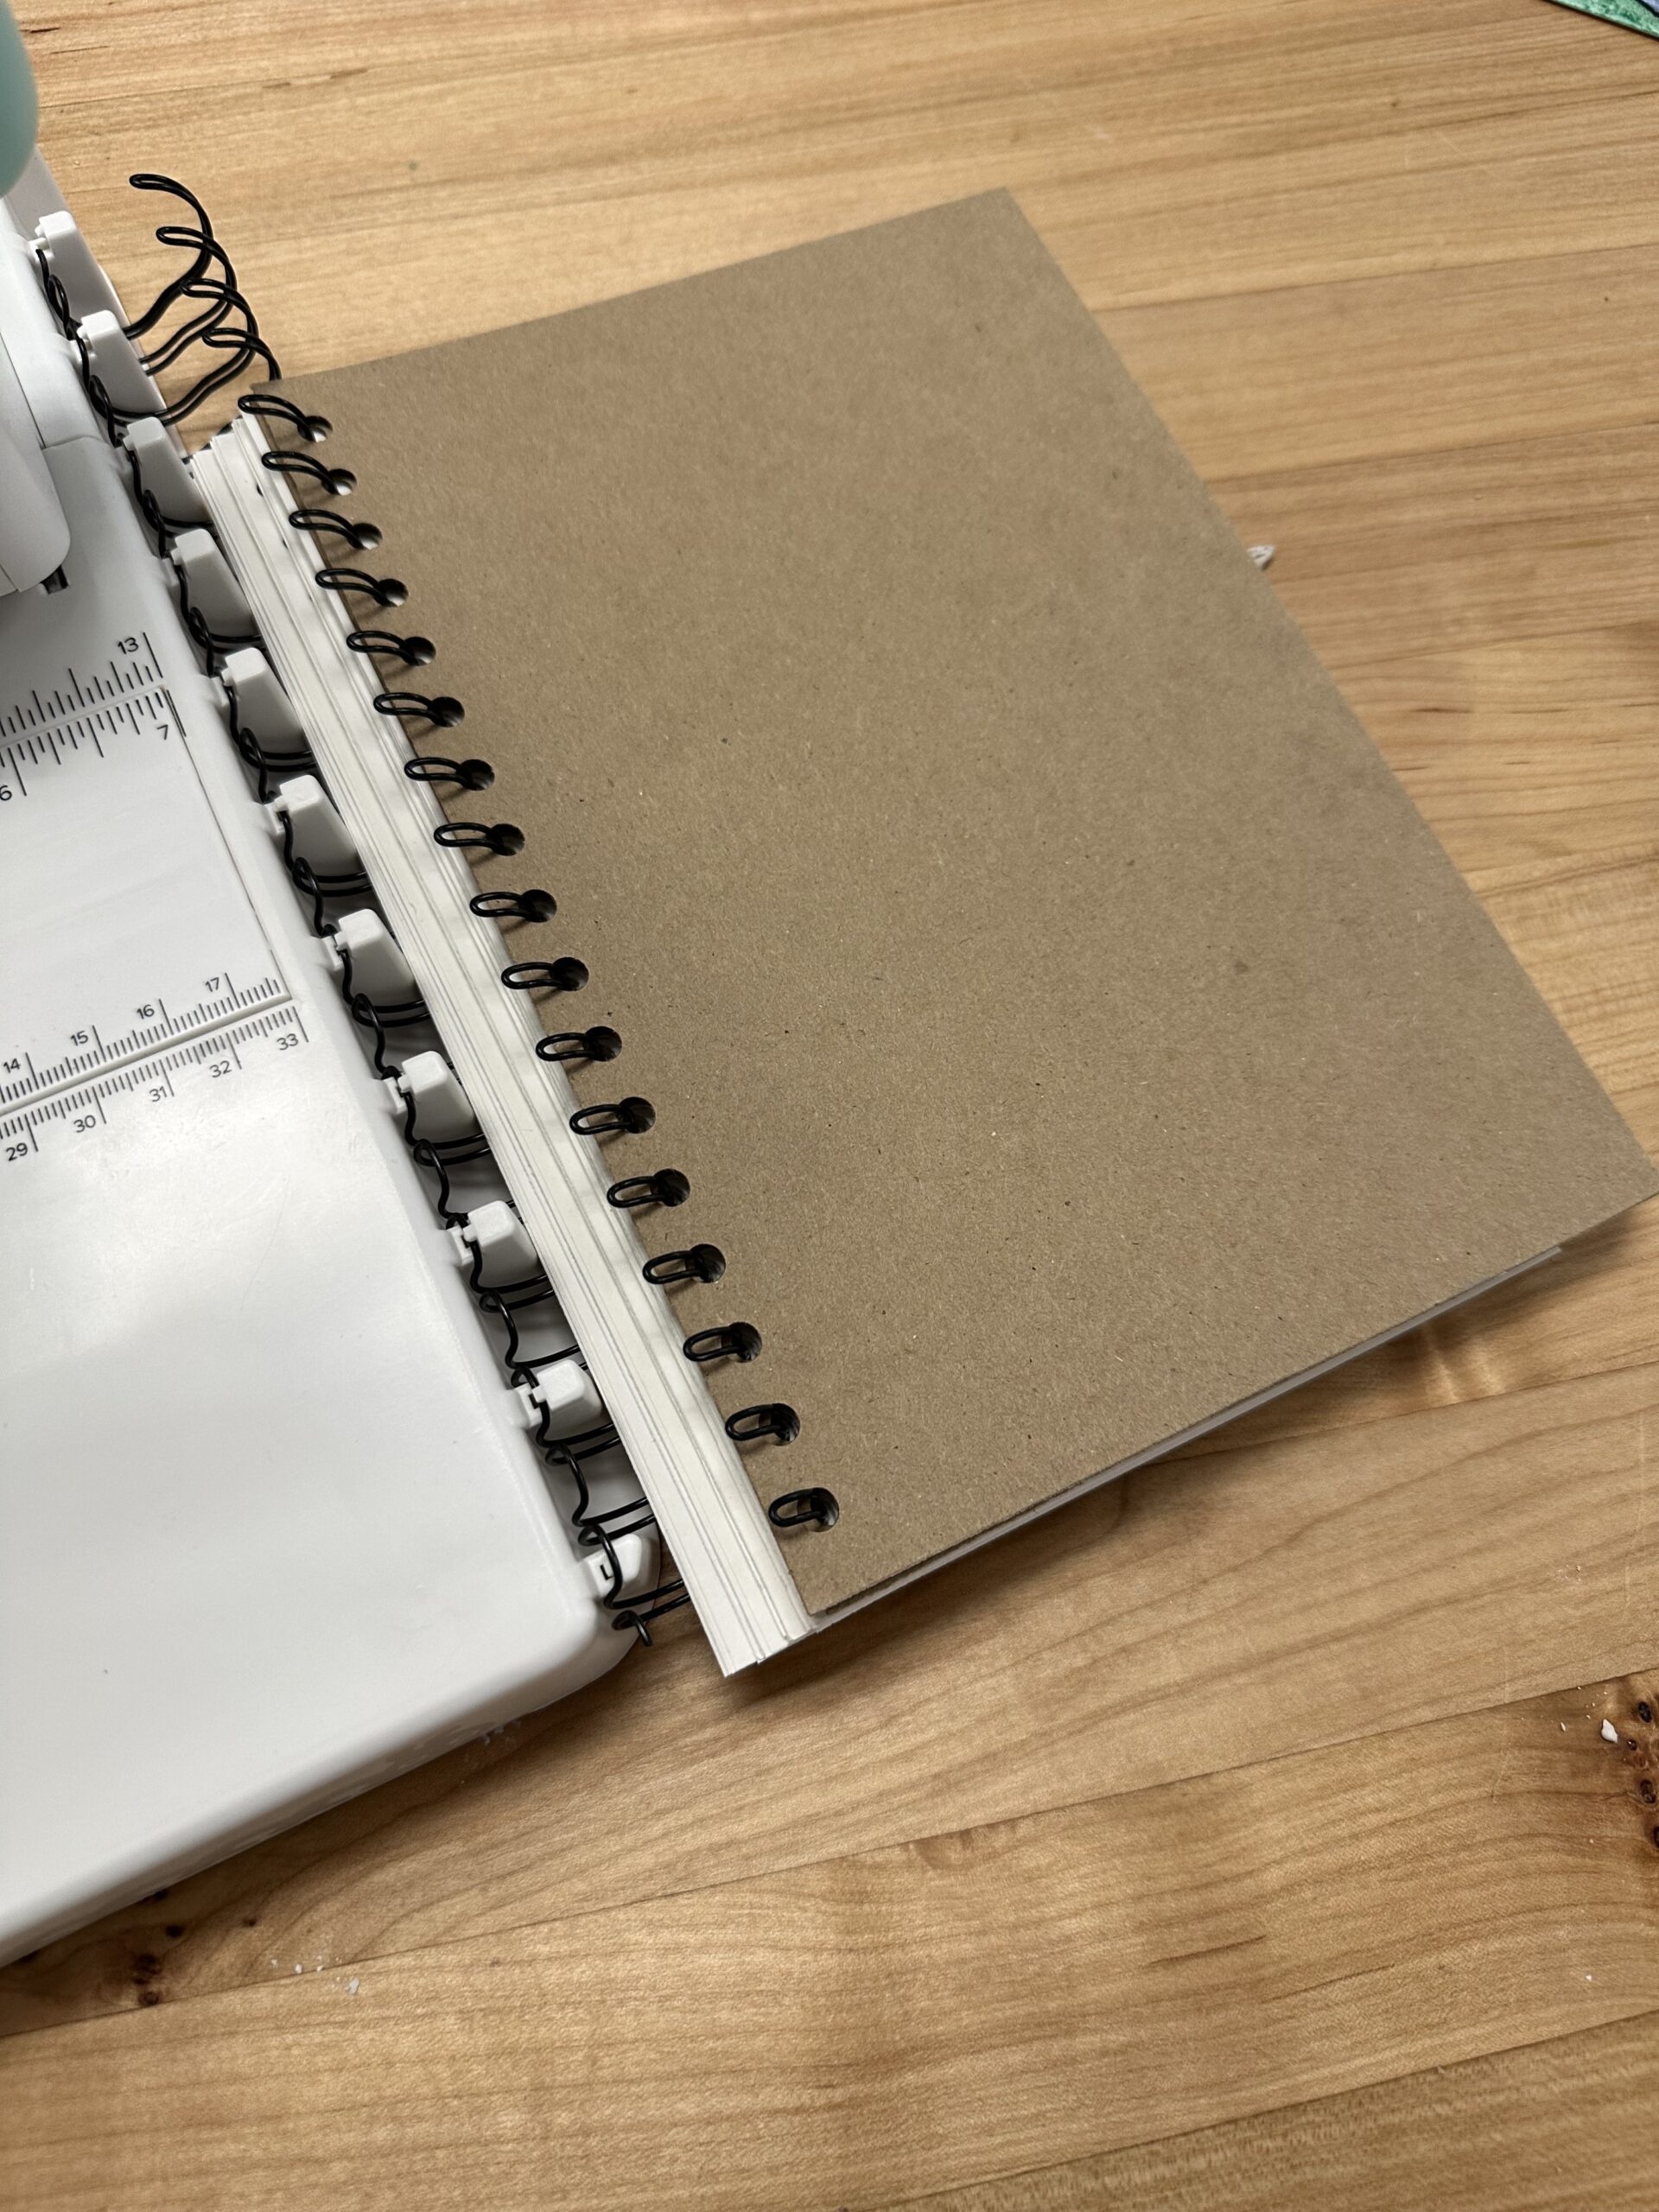
Place both front and back covers on your binding together. First, your front cover, then your back cover (The front and back covers should face each other.)
Cinching the Bind Closed
Push-and-turn the clamp-press knob to match the size of binding you are using. For my project, I’m using a ¾” bind.
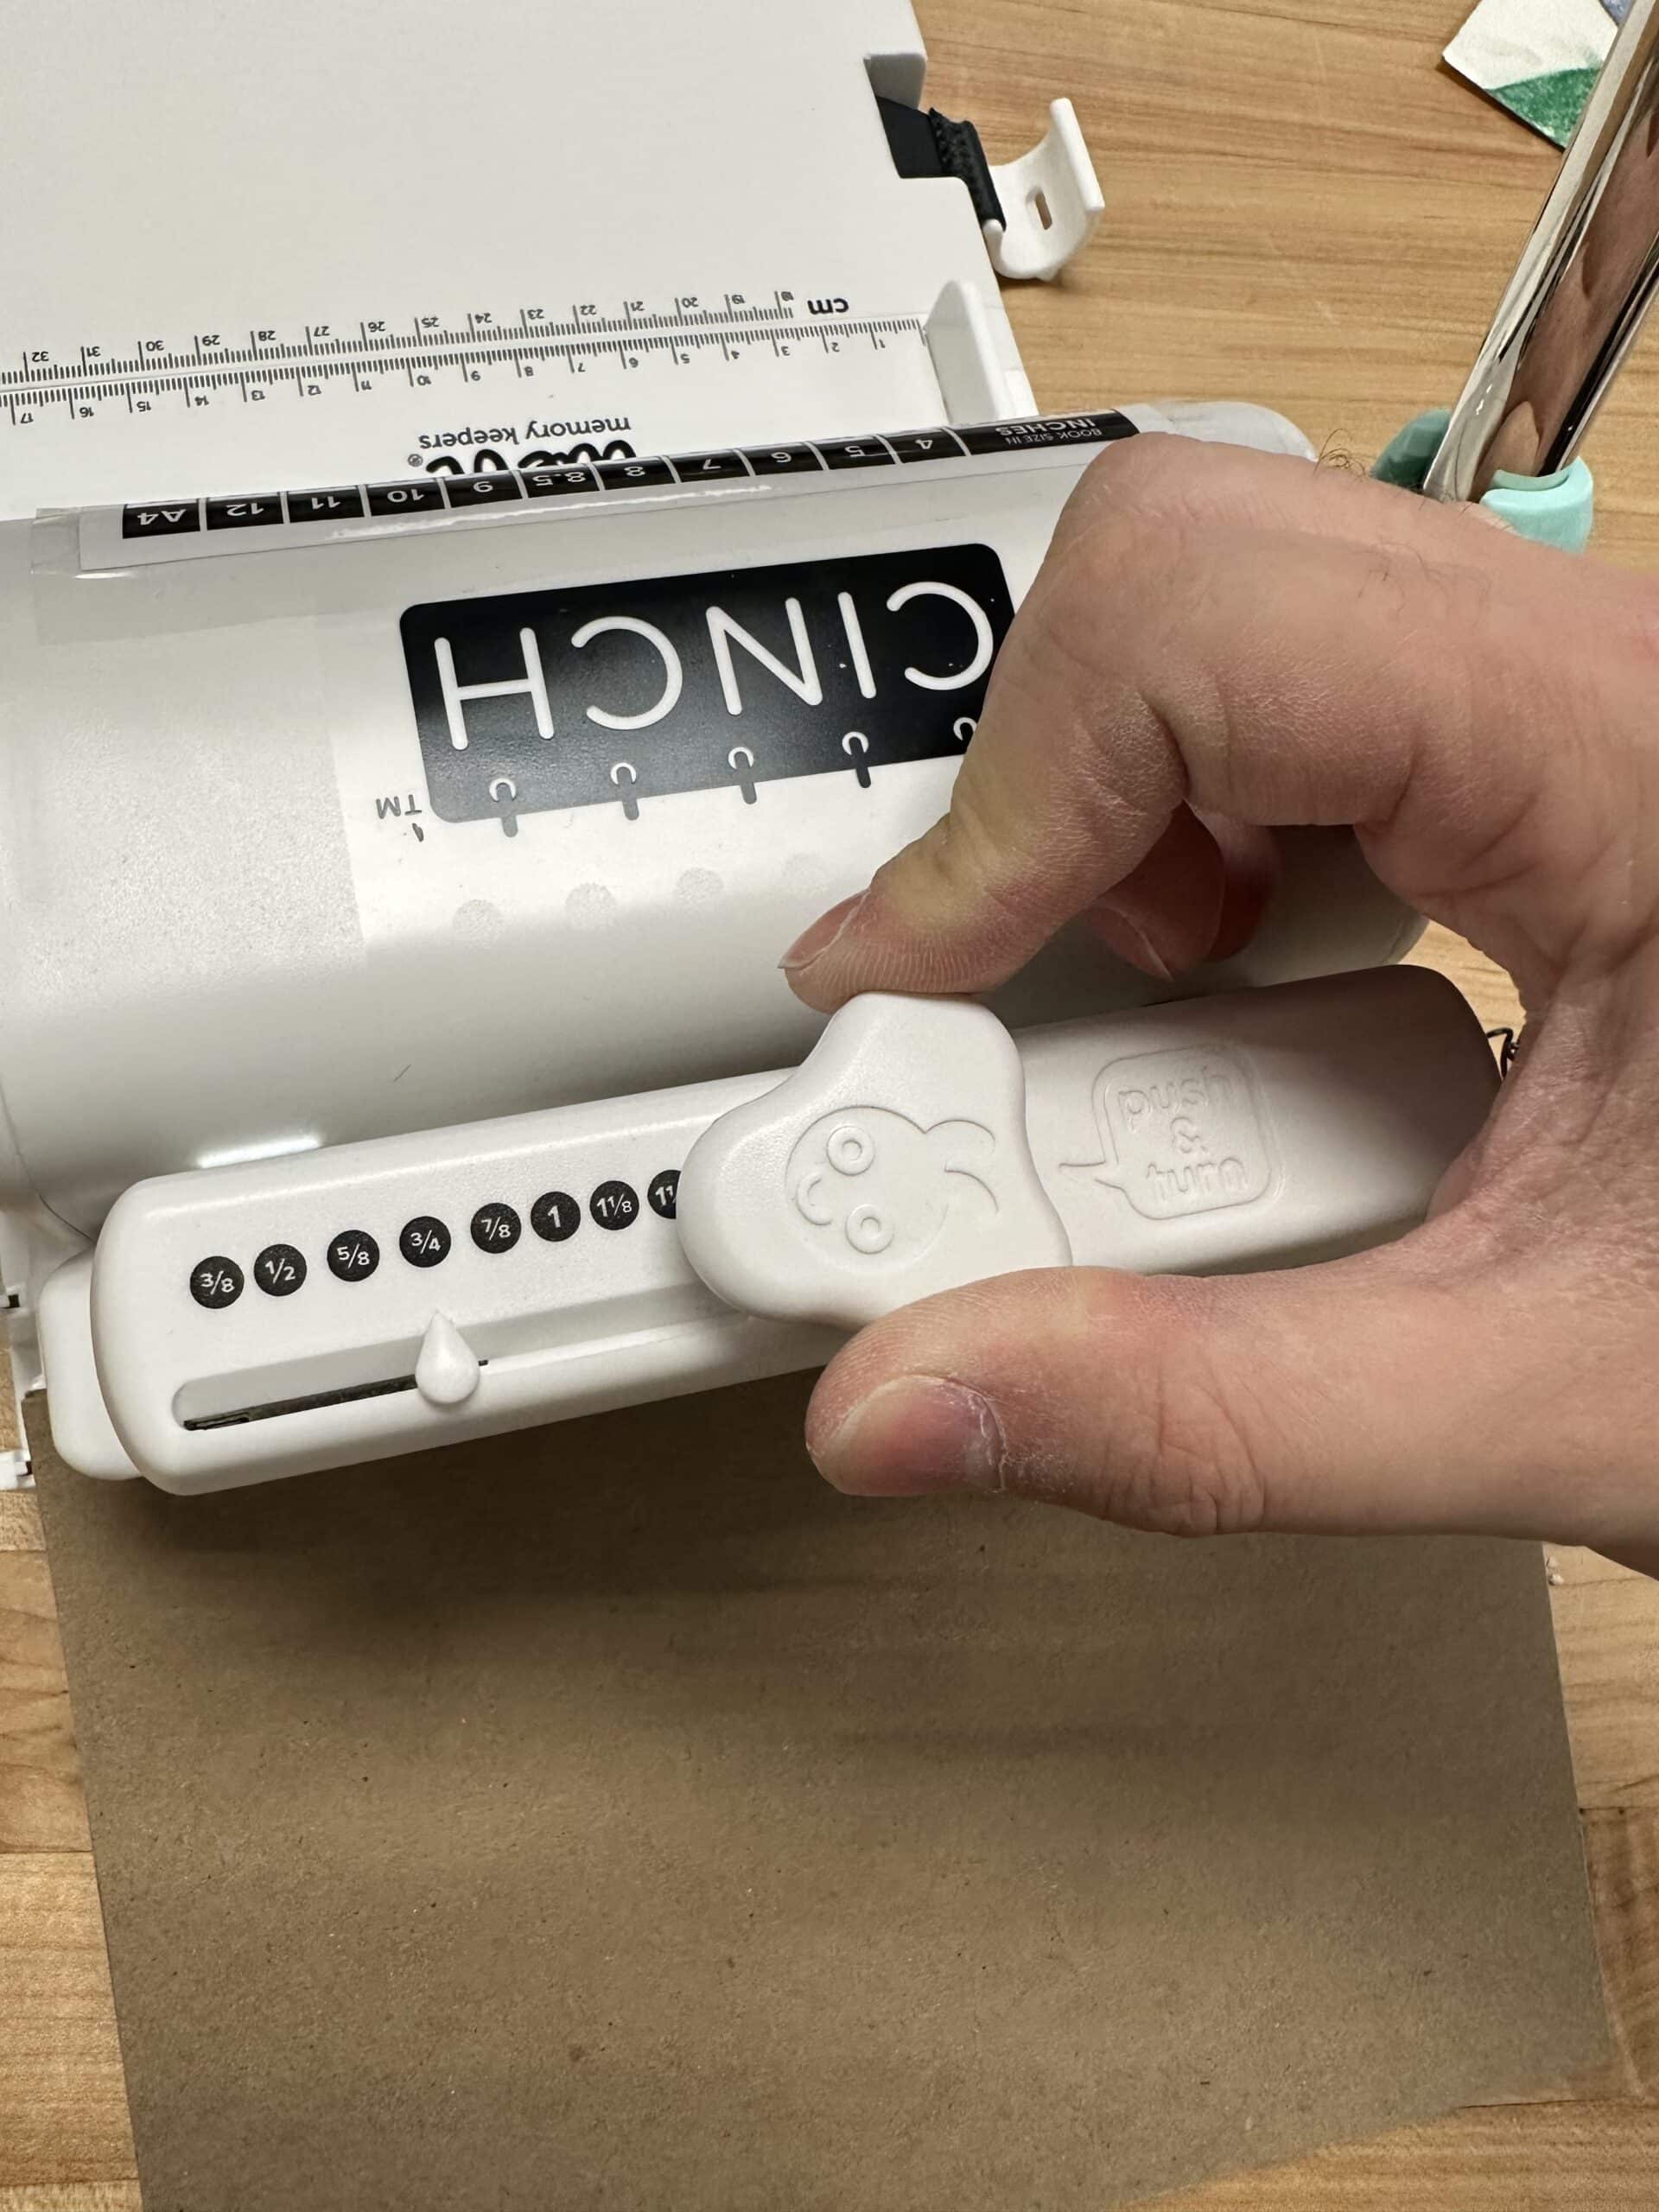
Pick up your book and place it inside the clamp. Try to keep both ends of the black binding up against the back wall of the machine. Pull the same lever to cinch the binding closed. Depending on the length of your book, you may need to slide your book down and pull the lever again to finish your book.

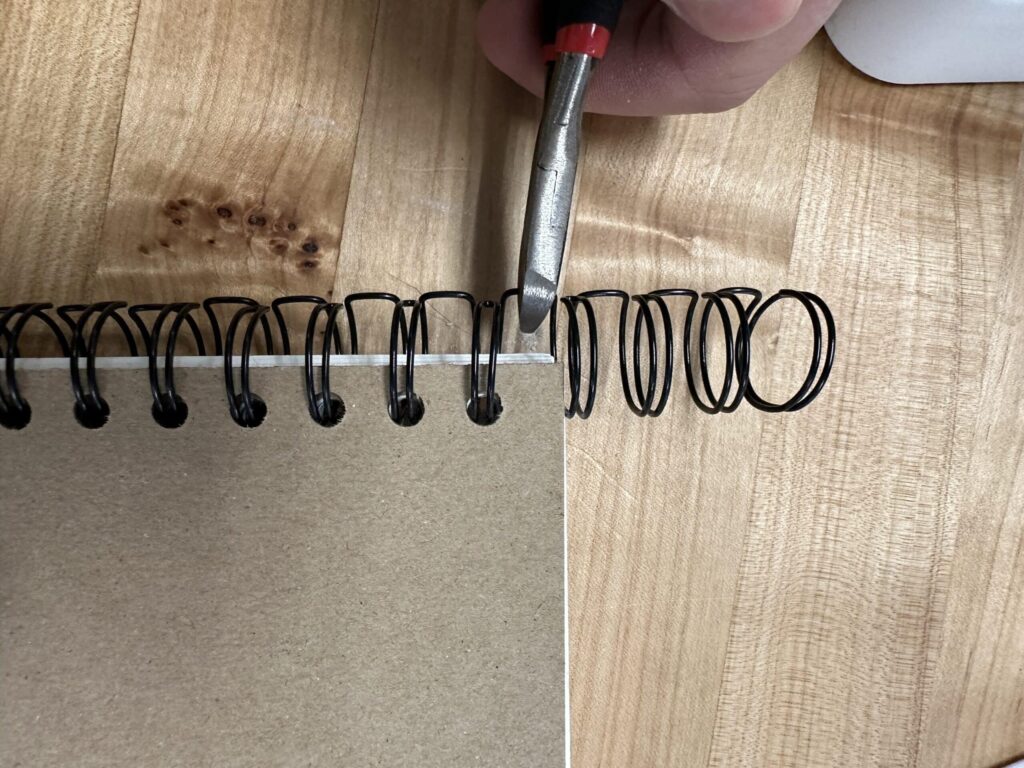
If there is excess binding, use some wire cutters to clip the end. Needle nose pliers can then be used to fold over the sharp end of the wire
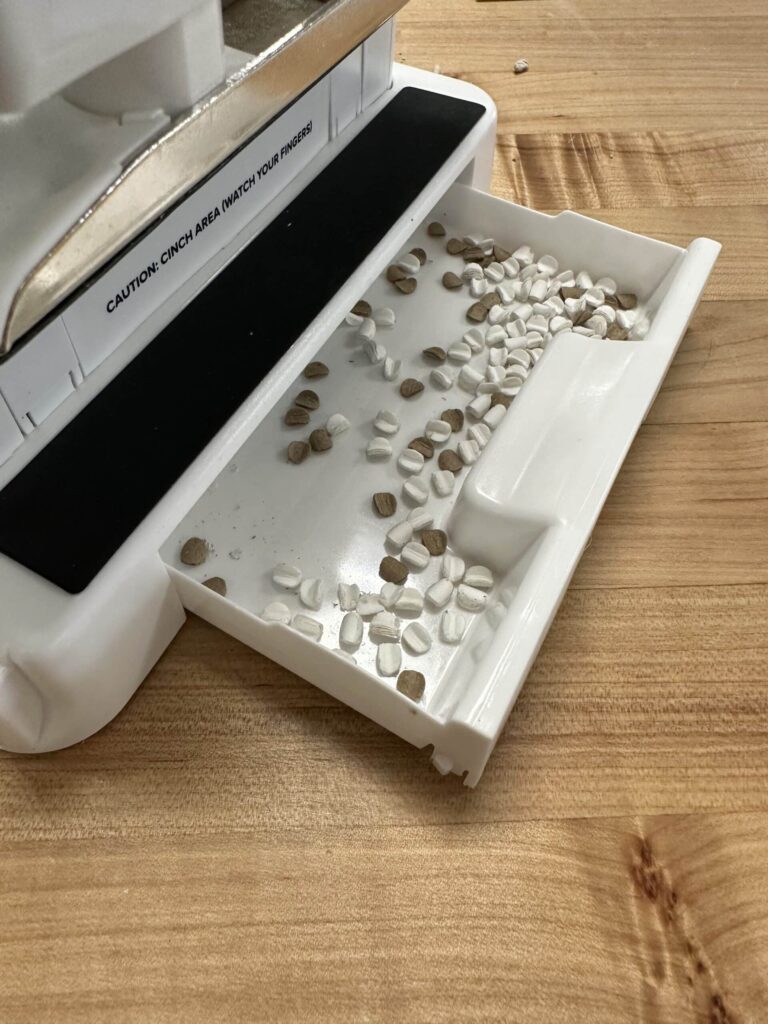
Don’t forget to clean out the hole punch tray when you’re finished. (Located under the cinch area)
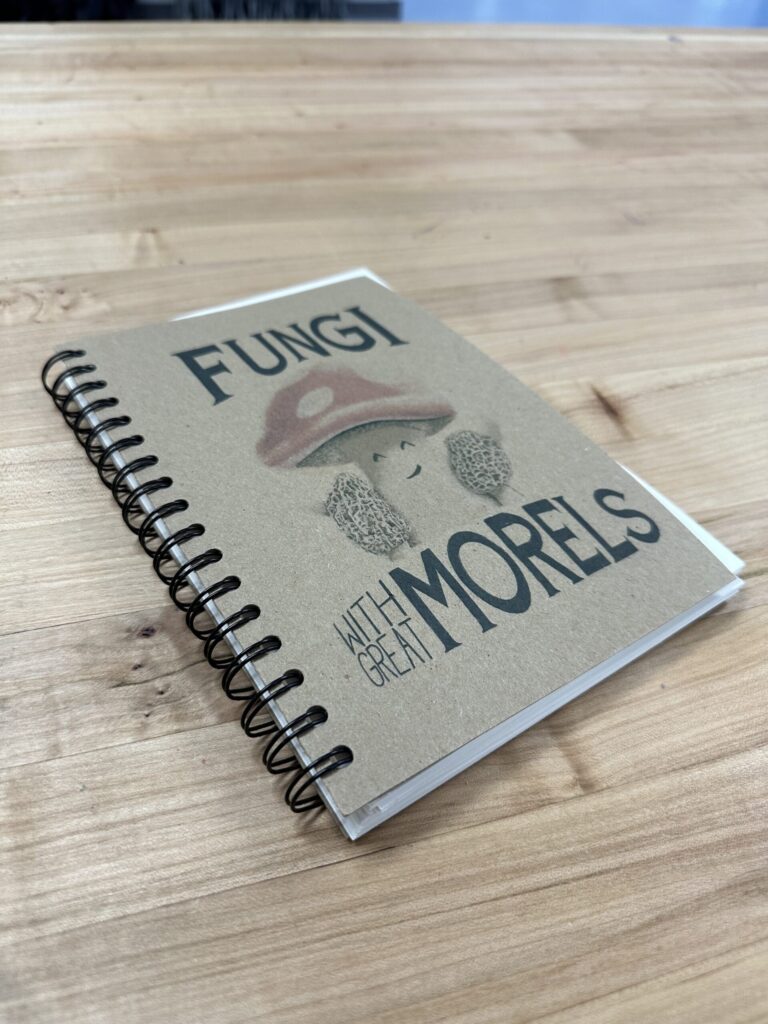
Now you can enjoy your finished book.
Try your hand a variety of book binding techniques in Ignite Studio. Share your creations with us on the Ignite Community Discussion Board on Facebook. Happy Making!
