

by Jared Hart
Many people wonder how to make stickers with a Cricut machine. This guide will help you to get started making your own die-cut stickers. The Cricut Makers have a “Print then Cut” feature; however, the computers in Ignite Studio are not connected to a printer. Because of this, a few extra steps will need to be taken in order to create stickers if you use our laptops to create your file.
How to Make Stickers with a Cricut
Before you get started there are a few items you’ll need.
1. Printable Vinyl
2. A Printer
3. Clear Protective Vinyl–Matte or Glossy (optional)
4. Flash Drive (if creating your file on Ignite’s laptops)
In order to print, you’ll need a specific type of vinyl that is printer friendly. The vinyl I used in this tutorial can be found here. I used the matte version, but there is also a glossy version if you’d prefer.
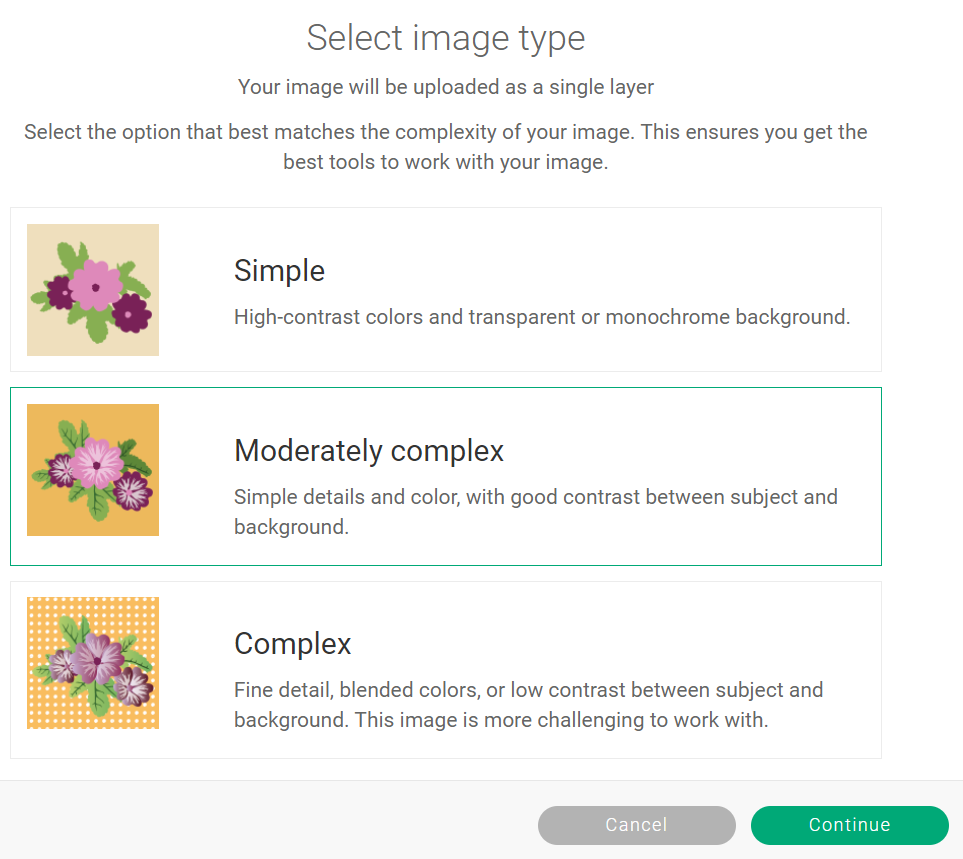
Begin by clicking upload on the left panel to open the graphics you would like to make into stickers. Click upload image. Browse for your file or drag it into the upload window. You’ll then be prompted to select the complexity of your image. Choose the one you feel best matches the image you uploaded and click the green continue button.
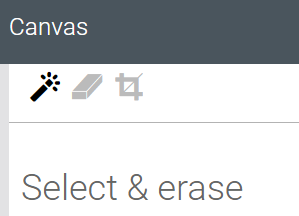
On the following page, you’ll be taken to the “Select & Erase” screen. Here you can click on the background to erase it. (A blue and white checkboard will appear where you click. This checkerboard pattern is to notify you of transparent areas.) You can also use the “Eraser” and “Crop” tools if you need to get rid of more than just a solid background.
Once you click continue at the bottom, you’ll be asked if you’d like to “Cut Image” or “Print Then Cut Image.” Choose “Print Then Cut Image” and click upload. You should now see your graphic in the next window in the “Recent Uploads” section. Click your graphic, then click “Insert Image” in the lower right corner.
Scale your graphic to the approximate size you’d like your stickers to be. If you would like to create a small margin instead of the Cricut cutting right along the edge of your graphic, then click the Offset button in the top menu. Adjust the slider until you’re happy with the size of the margin and click apply.
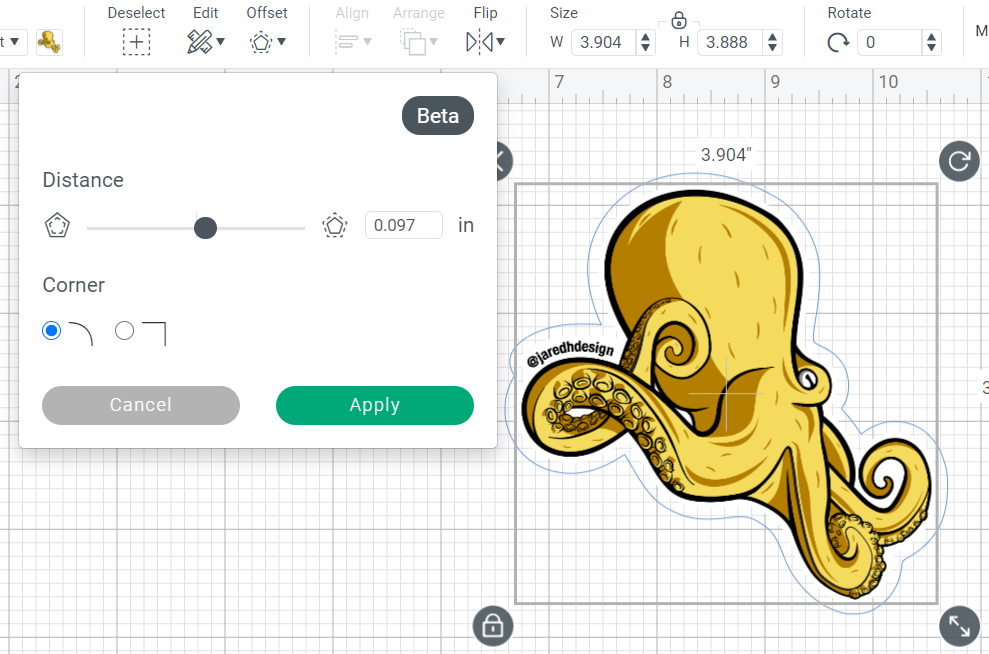
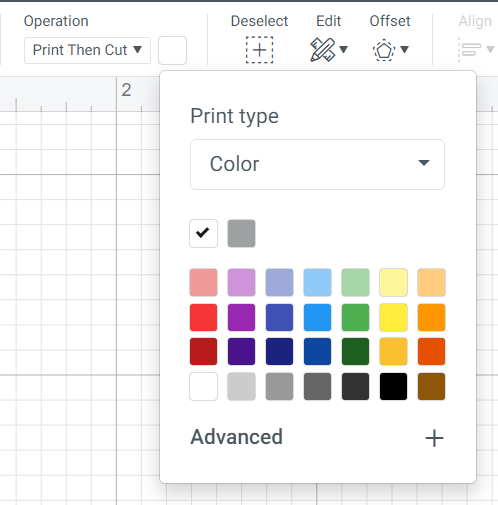
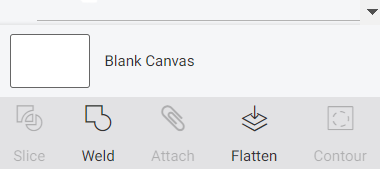
This will create an additional shape behind your artwork that you can see in the layers panel. Select the color you’d like this shape to print by clicking the small square in the operation section. For my stickers I chose white. After choosing the color, select both your artwork, and the new offset layer and click “Flatten.” This will combine your image with the outline so that the Cricut Maker knows to only cut around the offset layer and not the edges of the image as well.
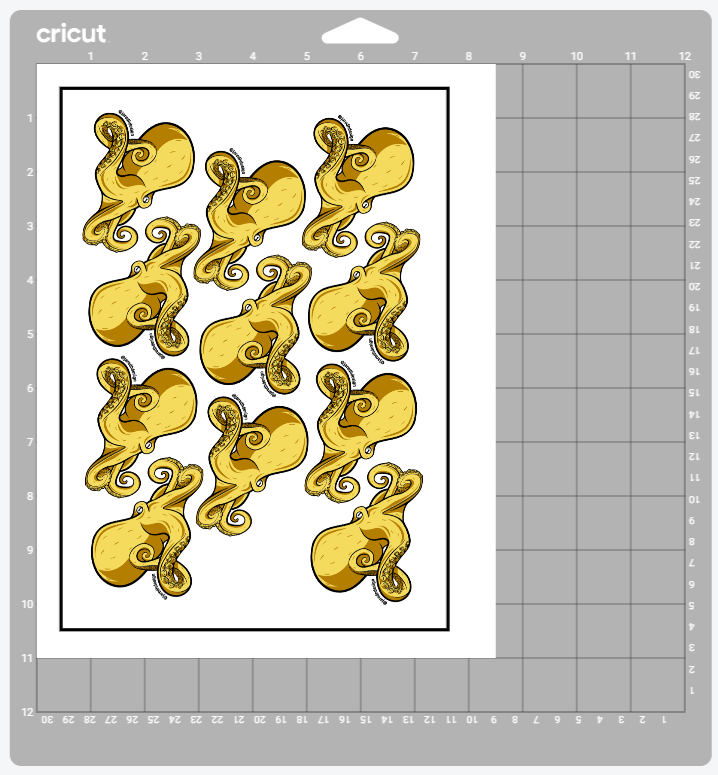
Arrange all of your graphics so that you fit as many as you can within a rectangle that is 6.75” by 9.25”. (This is the maximum size because the Cricut needs a set amount of room on your vinyl to print a registration box so it can line up your prints with the cut lines) To make this easier you can create a box with those dimensions so you know what space you have to work with.
Once you have them all arranged within that general shape, select them all and click “Attach” at the bottom of the layers panel. This will tell the machine that you want them to print and cut in the orientation you have placed them. If you don’t select them all and click “Attach” the software will arrange them for you. From my experience, I can usually get nearly twice as many stickers on each sheet when I arrange them myself.
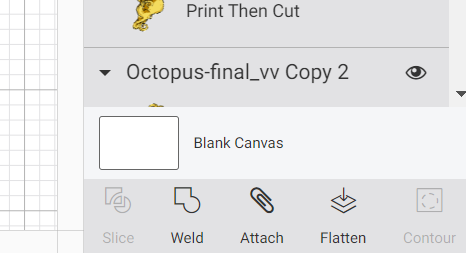
After you attach your images, if you’re artwork doesn’t fit within 6.75” by 9.25”, an error icon will appear at the top of your layers panel (seen in image below). You will not be able to proceed until you fix this issue.

At this point your stickers should be ready to print. Click the green “Make It” button in the top right.
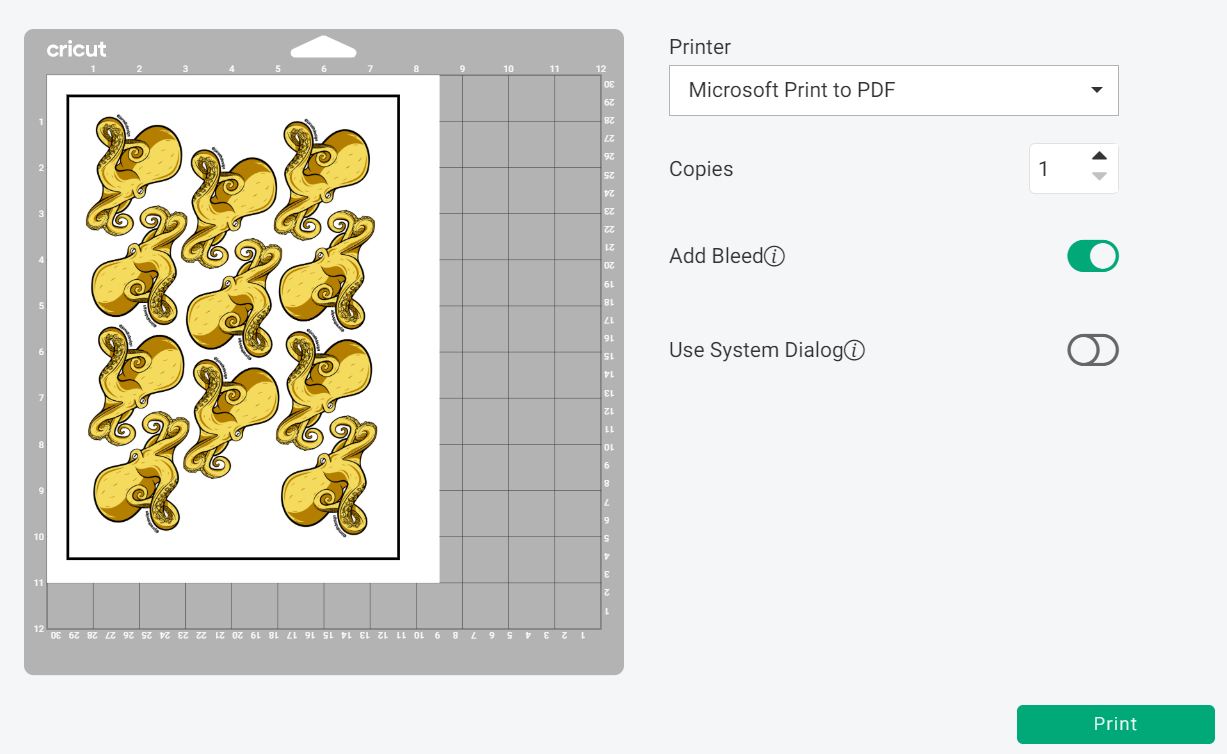
The next page shows a preview of what your vinyl sheet will look like once it has been placed on the cutting mat. Go ahead and click the green continue button in the lower right to move on to the printing stage. Then click the green “Send to Printer” button.
If you are using the laptops at Ignite Studio, this is where you’ll have an extra step. Select “Microsoft Print to PDF” in the printer dropdown. This will prompt the computer to save it as a file instead of printing. Save the file onto a flash drive so you can print it out on a printer of your choice.
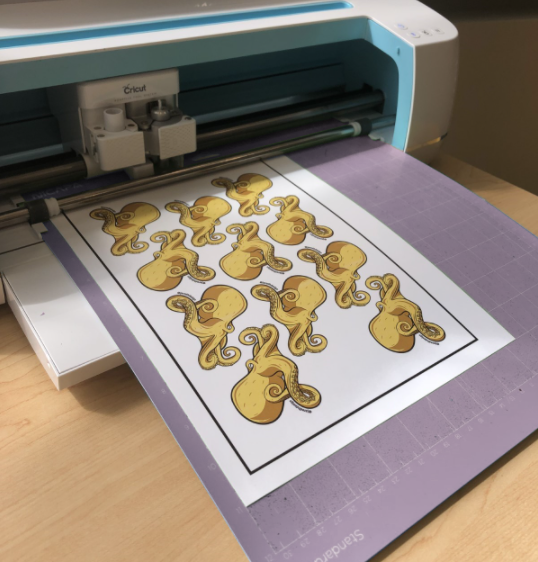
It is important to print on the correct side of the vinyl. To check for the correct side, you can peel a corner up slightly. You want your graphic to print on the side that has a sticky back. Once you’ve figured that out, place the vinyl sheet into your printer accordingly and print your file.
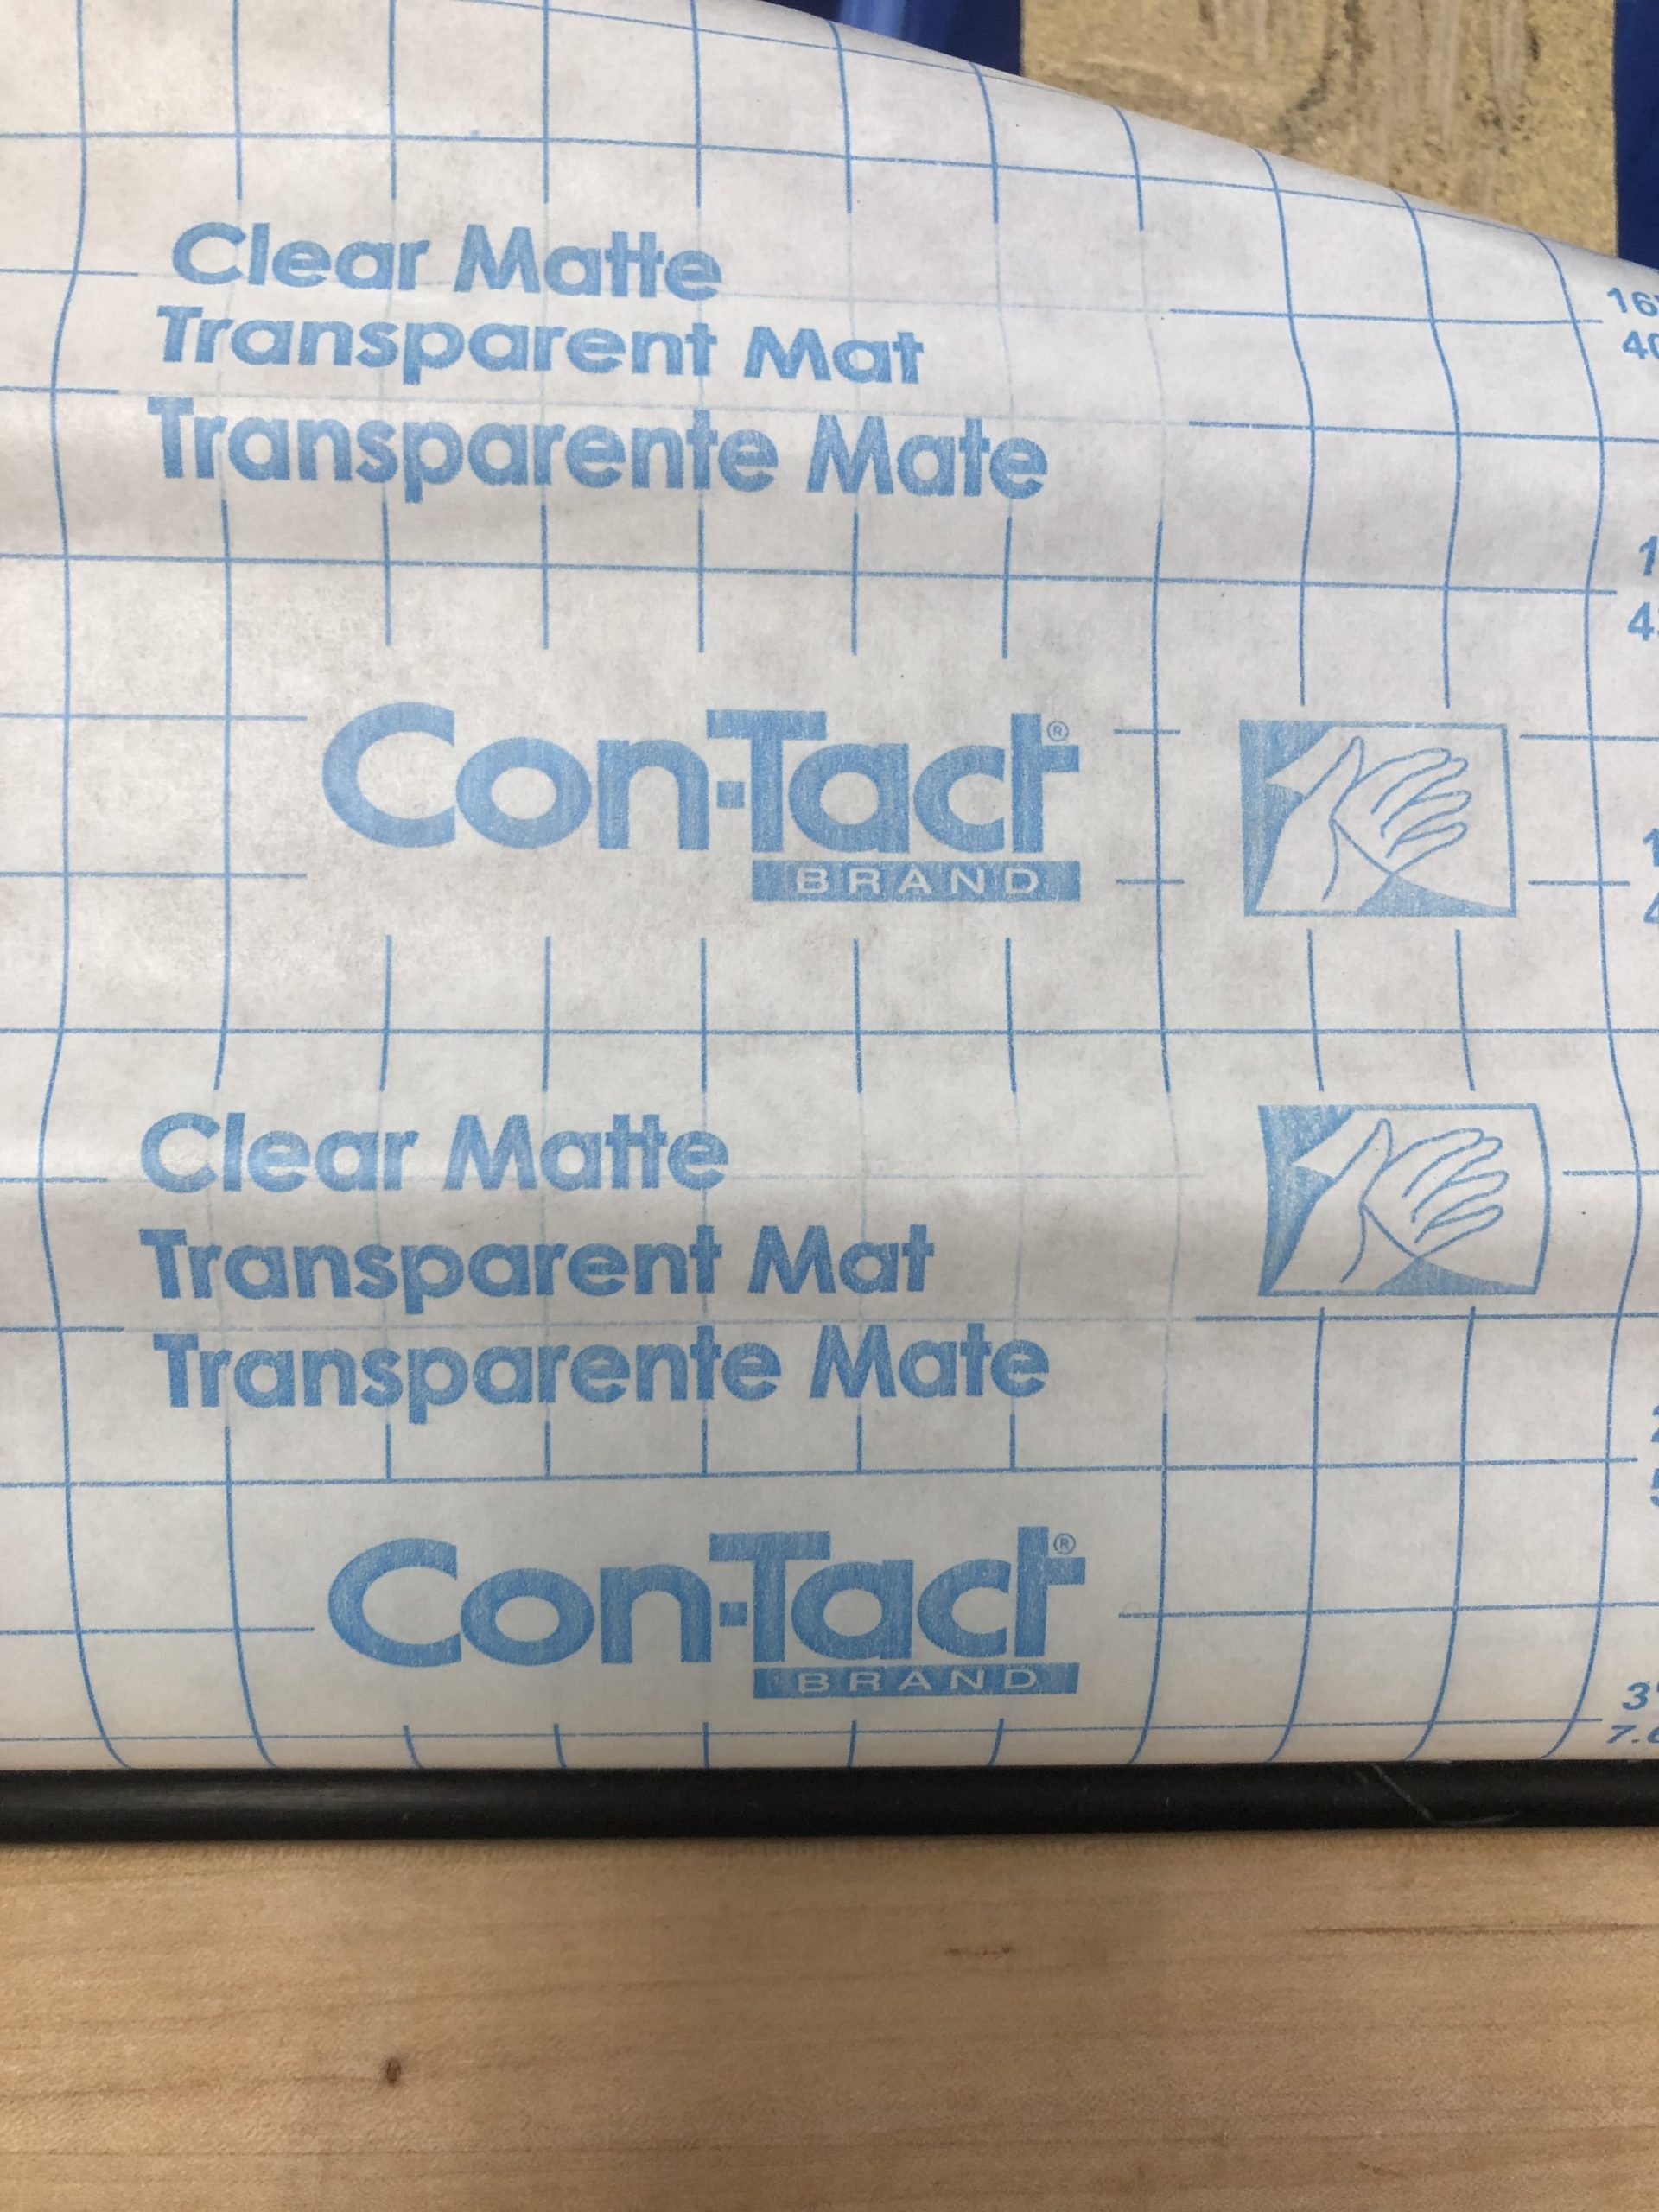
Before taking the print to the Cricut to cut them out, apply a layer of Con-Tact Brand Clear Matte Protective Vinyl, which can be purchased here. While this step is not mandatory to make stickers, it will increase the quality and durability of the stickers. Just like the Vinyl sheets, this can also be purchased as either matte or glossy. Note that this step can be somewhat challenging and if not done well can leave wrinkles or air bubbles on your stickers. Follow this link if you’d like a detailed guide with tips on how to apply this to your vinyl stickers.
Once you’re ready to cut out the stickers, bring up your file and connect your computer to a Cricut Maker. This time, when you click “Make It” and you’re prompted to print, click the green “I’ve Already Printed” text on the right to move on to the cutting step.

Attach your vinyl to a mat as it’s shown in the preview window. Cricut Design Space will prompt you to select the material you are cutting. In order to completely cut out your design, I’ve found that selecting posterboard will apply enough pressure to cut through the vinyl and backing paper to create a die-cut sticker. If instead you would like to have a kiss-cut sticker sheet, select Vinyl and it won’t cut through the backing paper.
Once you’ve selected your material, follow the prompts on screen to continue the cutting process. The machine will take a minute to get started because it will need to read the black lines to determine where exactly it should cut in the event that your sheet isn’t perfectly aligned on the cutting mat.
Once the Cricut Maker has finished cutting, you will have either your kiss-cut sticker sheet or your die-cut stickers. Happy Making!
