

By Sydney Brink
A very long time ago, I found this post by Evermore Studio that outlined how to make a flower press using a laser engraver. I loved the idea and wanted to make one for a family member for a holiday gift! You can too, if you are certified to use the laser engraver at Ignite.
How to Make a Flower Press
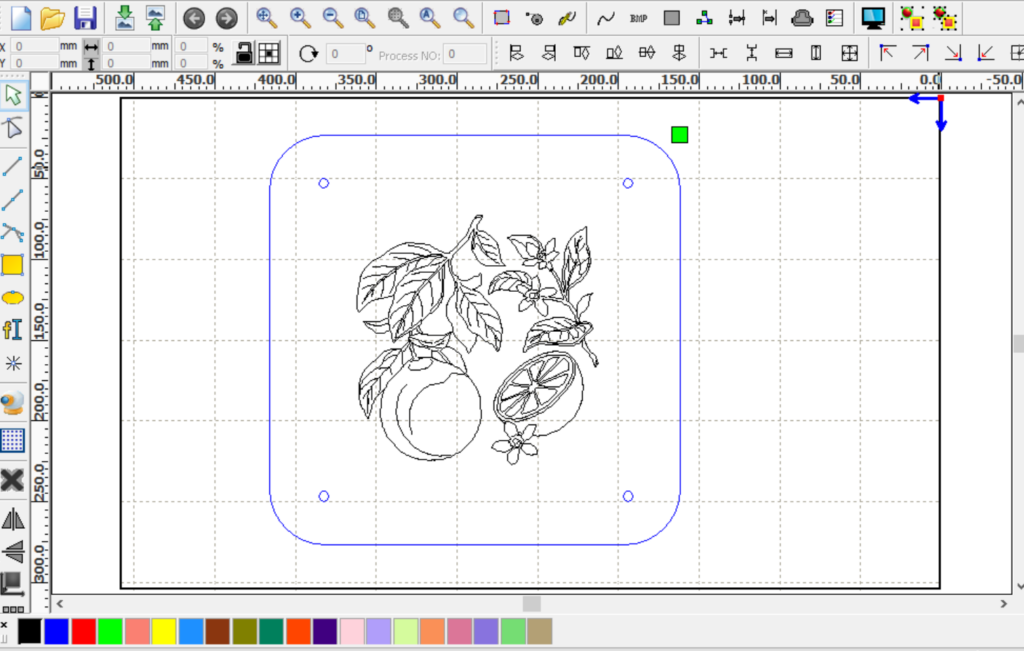
I bought all of the materials and started on the project. The problem I ran into immediately is that the files provided by the creator of the original press were SVG – Scalable Vector Graphics – which is ideal for a laser, but unfortunately, not ideal for RDWorks, the software Ignite Studio uses to manage the laser. RDWorks can’t import SVG files. So, I tried to design my own based on an approximation of the original SVG files, and got some…unusable parts, to say the least.
I took a break. A long break. And a year later, I finally came back to the file, and with the simplest align tool, fixed all of the problems I had imagined were totally a lost cause. I had built up the problem to be a huge monster, but after developing more skills and practicing a bit, returning to it had suddenly become so easy. I also edited my original file with a free clip art line drawing that I thought was appropriately plant-y and cute.
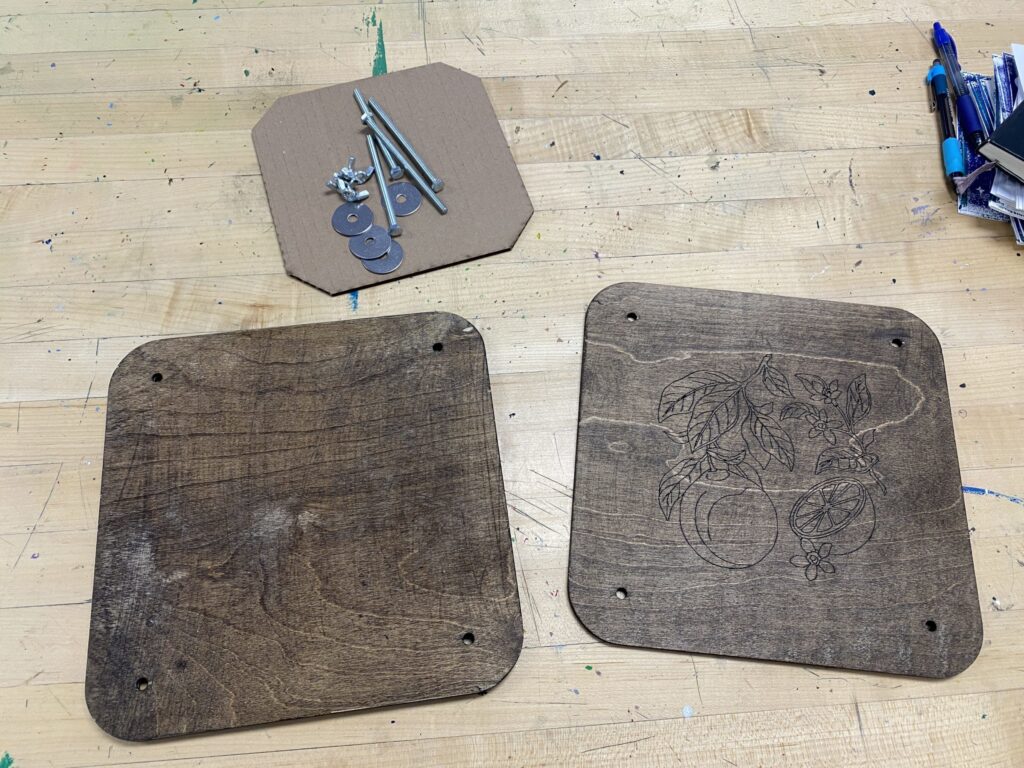
Anyway – suddenly less daunting tasks and lessons about skill growth aside – I proceeded with the cutting. I used the 3mm birch plywood Ignite has available for purchase for the hex layer and top of the press, and the 6mm plywood for the magnet/washer layer in the middle. I had also bought the hardware the original blog post had described:
- 4 3”x ¼” hex head bolts
- 8 1¼” flat washers with ¼” holes
- 4 ¼” wing nuts
- Small magnets
And I had also bought a dark stain for the plywood. I would ALWAYS recommend staining your wood AFTER cutting on the laser – especially if you’re using oil-based stains, which the majority of popular brands are. Any petroleum vapors left on the plywood are extremely flammable, and the safest thing to do is engrave first, stain later.
There’s not much to say about the cutting – I used the reference materials located in the Fab Lab in Ignite Studio to find the appropriate cut/scan power and speed settings, as the cut settings the original creator had were not formatted for RDWorks either. I just had to make sure that the engraving on the washer layer would be deep enough to house the thickness of the washers and magnets. I had to use a fairly high power and low speed to achieve this on the first go.

After I had all of the pieces finished on the engraver, I followed Evermore’s video instructions to glue in washers and magnets.


And then I used wood glue to sandwich the hex layer and the washer layer together. I clamped them for a couple of hours to keep the pieces flat while the glue dried.

Then I stained the front and back of the wood according to the manufacturer’s instructions.**
And started assembly!

The hex bolt heads fit very snug inside the six-sided cutouts for them on the bottom. Then, the cardboard and some blotting paper gets stacked in the middle. The flowers will go in between each of the cardboard inserts to make pressing multiple layers of flowers/plants at a time possible. Then on go the washers on top to protect the wood finish, and the wing nuts to top it off!

And some beauty shots, before I had to disassemble it all again to ship it off across the country:

I ended up loving the final product, for what it was worth in all twelve months of lamenting I did over it. The dark stain really makes the grain of the plywood pop, and makes it look (in my opinion) much more expensive. Thanks to Evermore Studio for the design idea!
Let us know what you’re making on the Ignite Studio Facebook group!
** I stained the back sides (inside of the press) with wood stain, which may not have been a great idea. I was worried after the fact that the stain, which is oil based, would eventually seep onto the cardboard inserts, especially with the pressure put on it from the tightened wing nuts, and make greasy spots on the cardboard, or even worse, ruin the plant material inside. Before I shipped this off to the family member, I used a clear coat wood finish to seal it all in to try to prevent this.
