
by Jared Hart
If you’re planning a themed party, it’s pretty easy to create custom cork coasters using our laser engraver. All you need are some cork coasters, and a little bit of laser engraving experience. Prior to using Ignite’s laser engraver for the first time, we require that you take our short certification course. If you need to do that, you can get started on our website HERE. Read on to learn how to laser engrave cork coasters.
How to Laser Engrave Cork Coasters
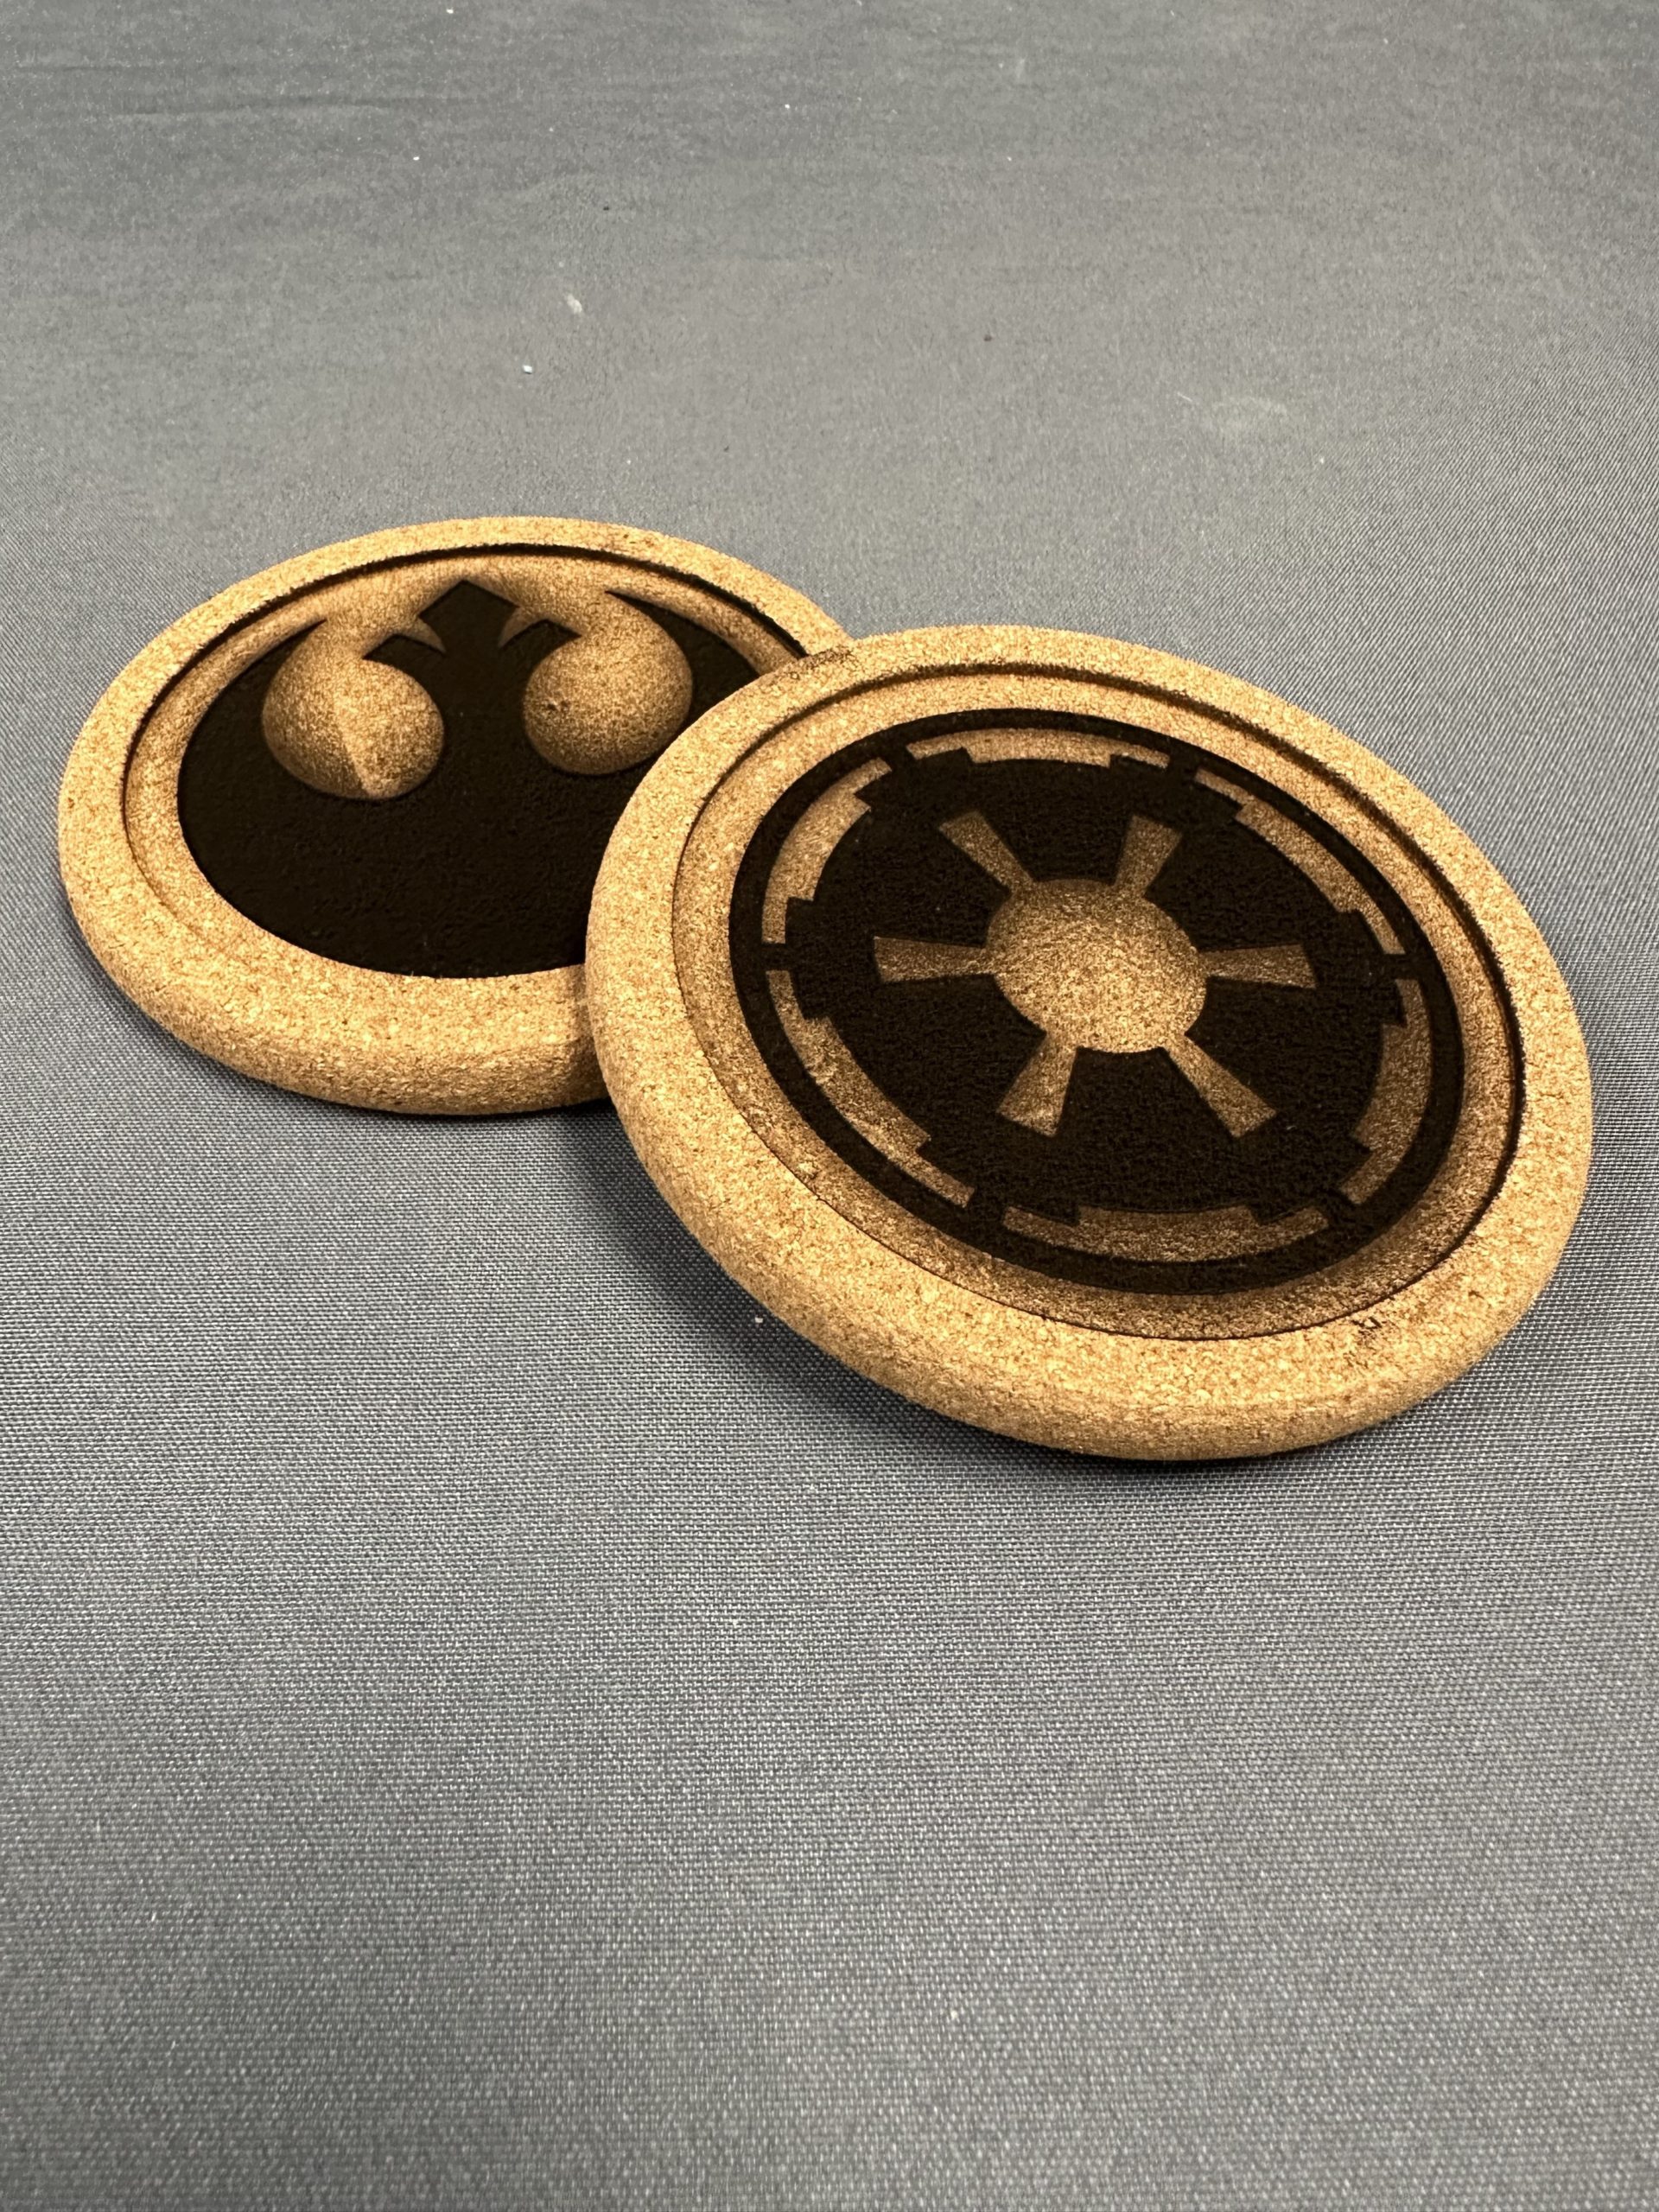
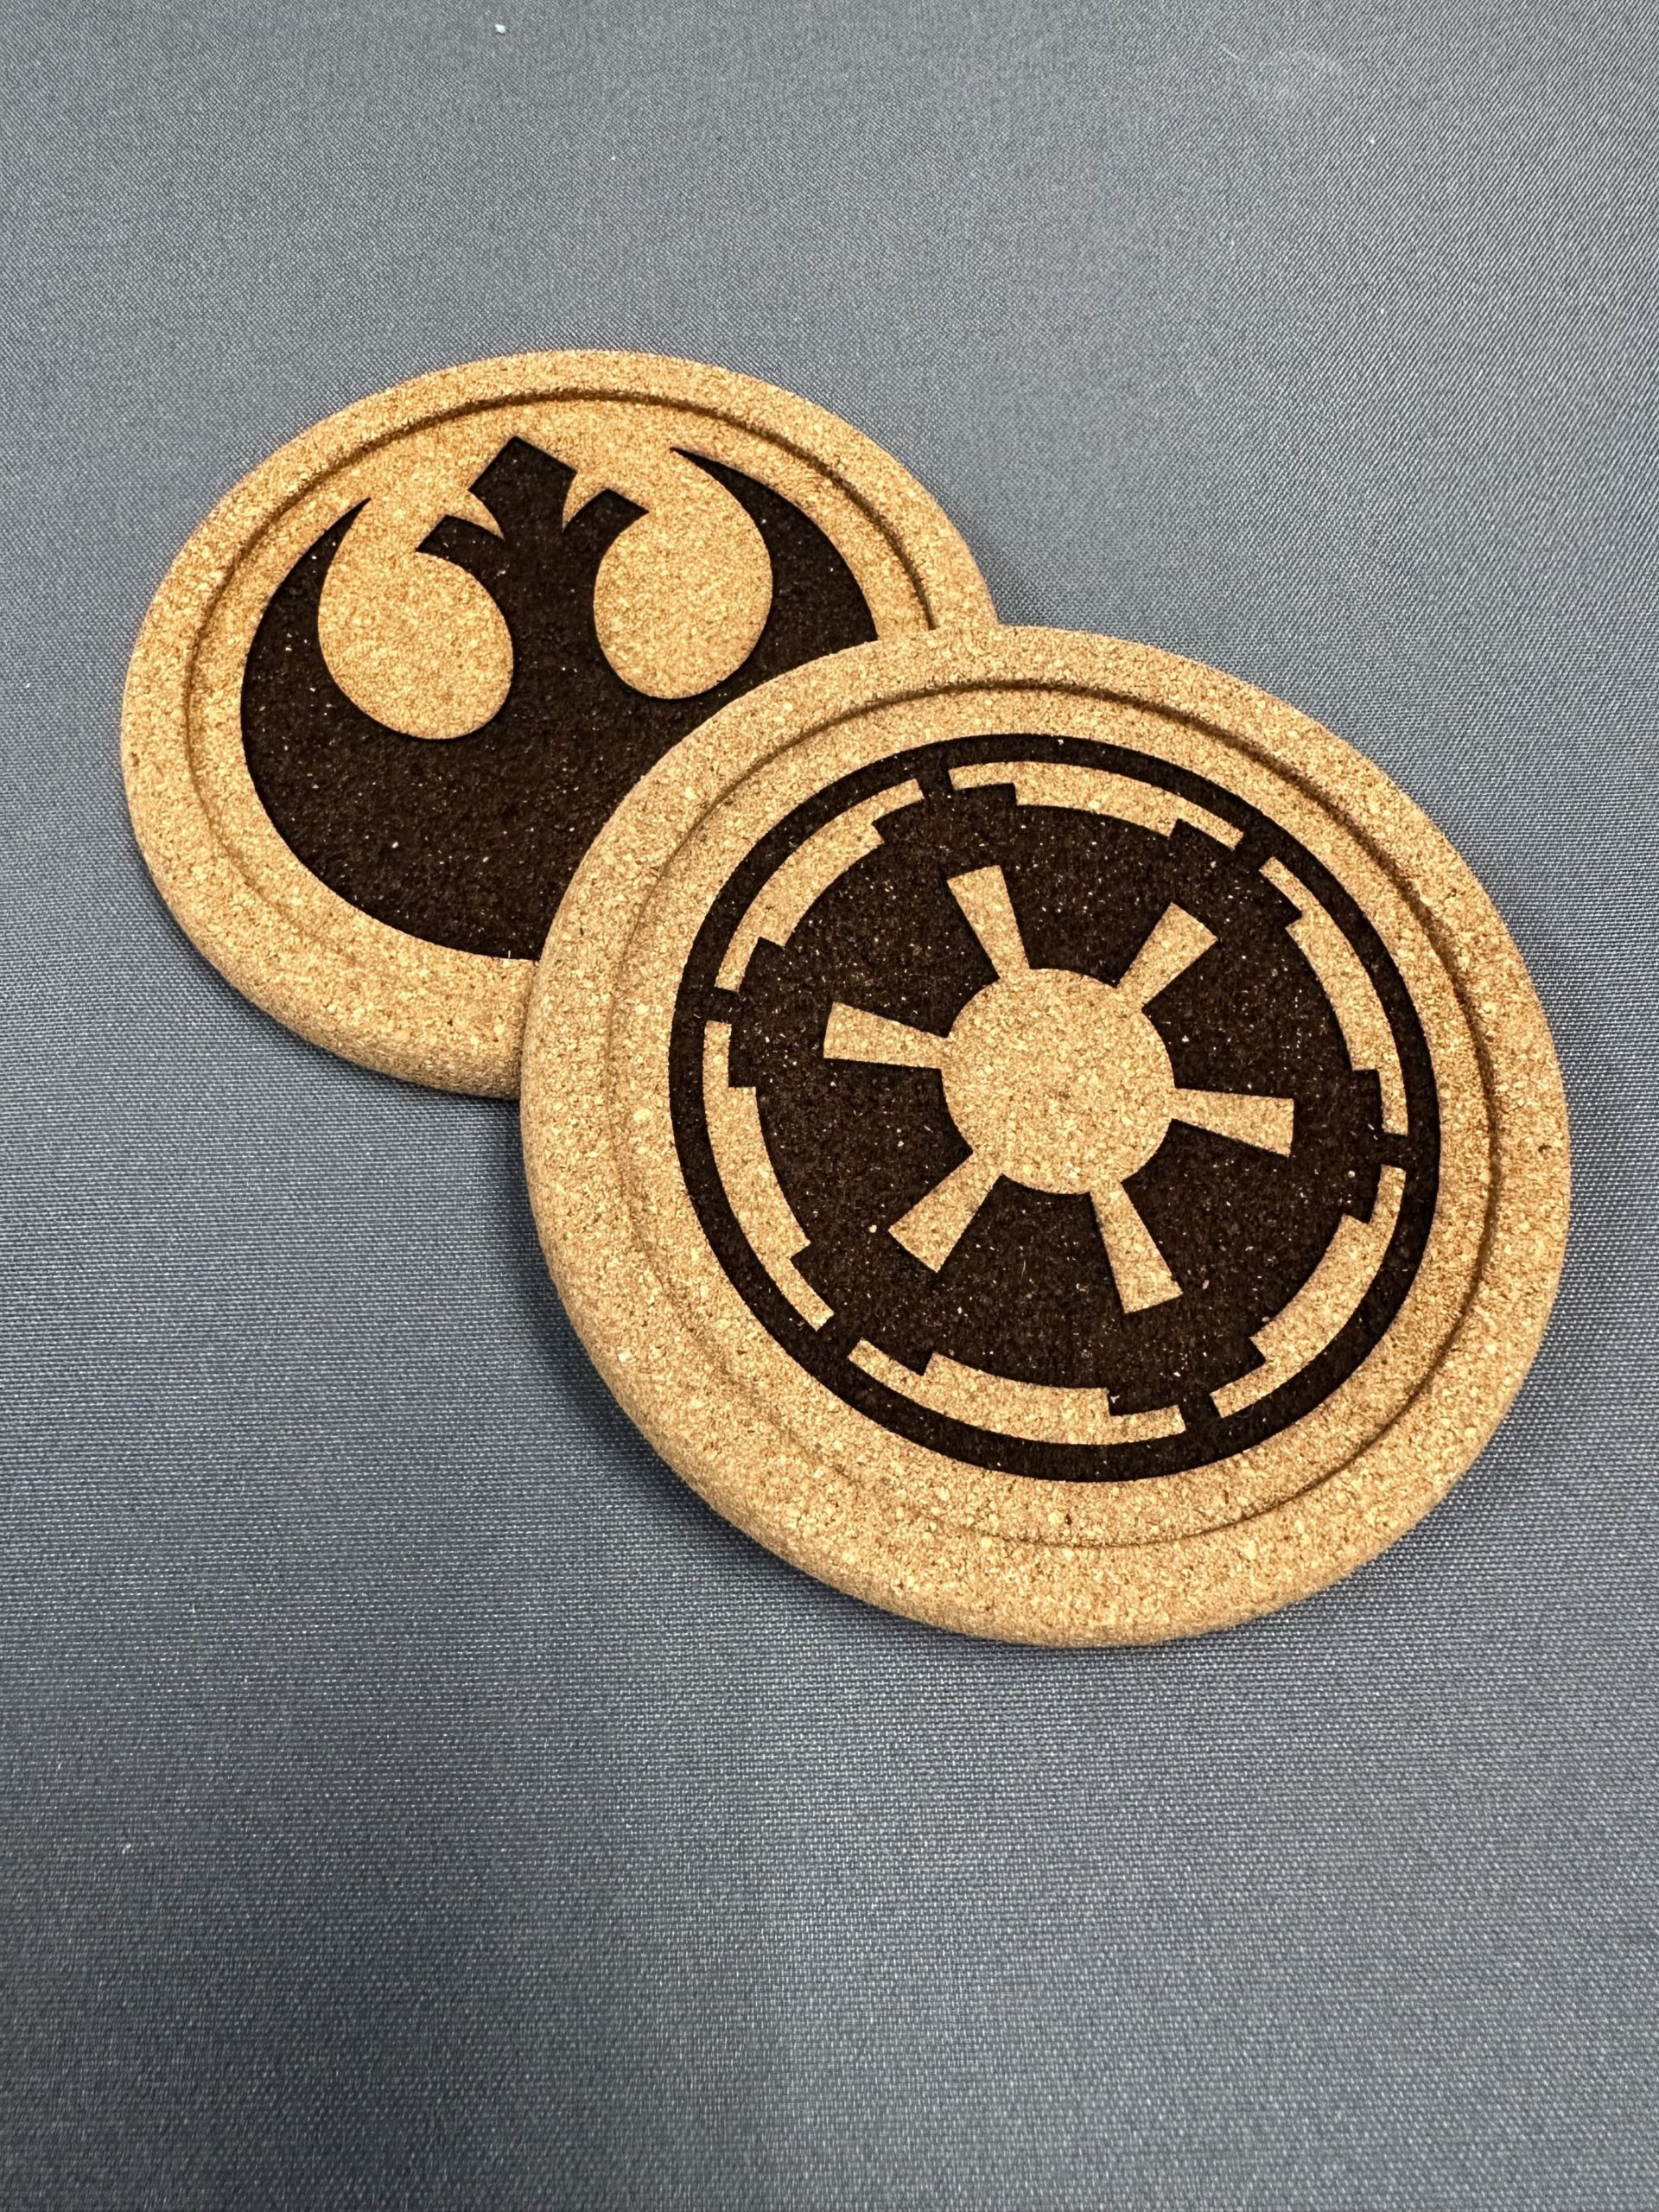
Whatever cork coasters you are using, you’ll probably achieve similar results if you use the settings I share below. However, since I had never engraved cork before, I wanted to do some speed and power tests before I jumped in on my actual project design. I quickly discovered that the power needed was way less than I originally anticipated. It requires so little power that using tape to reduce charring drastically affects the results. In fact, covering the coaster in tape to avoid charring isn’t even necessary because it washes off so easily with water and a sponge. You can see the difference in photos at the end of this blog.
Prepare Artwork in RDWorks
If you are using the same coasters I am, the surface inside the lip of the coaster is approximately 84mm in diameter. Make sure your design fits well in this space.
Create Registration Template
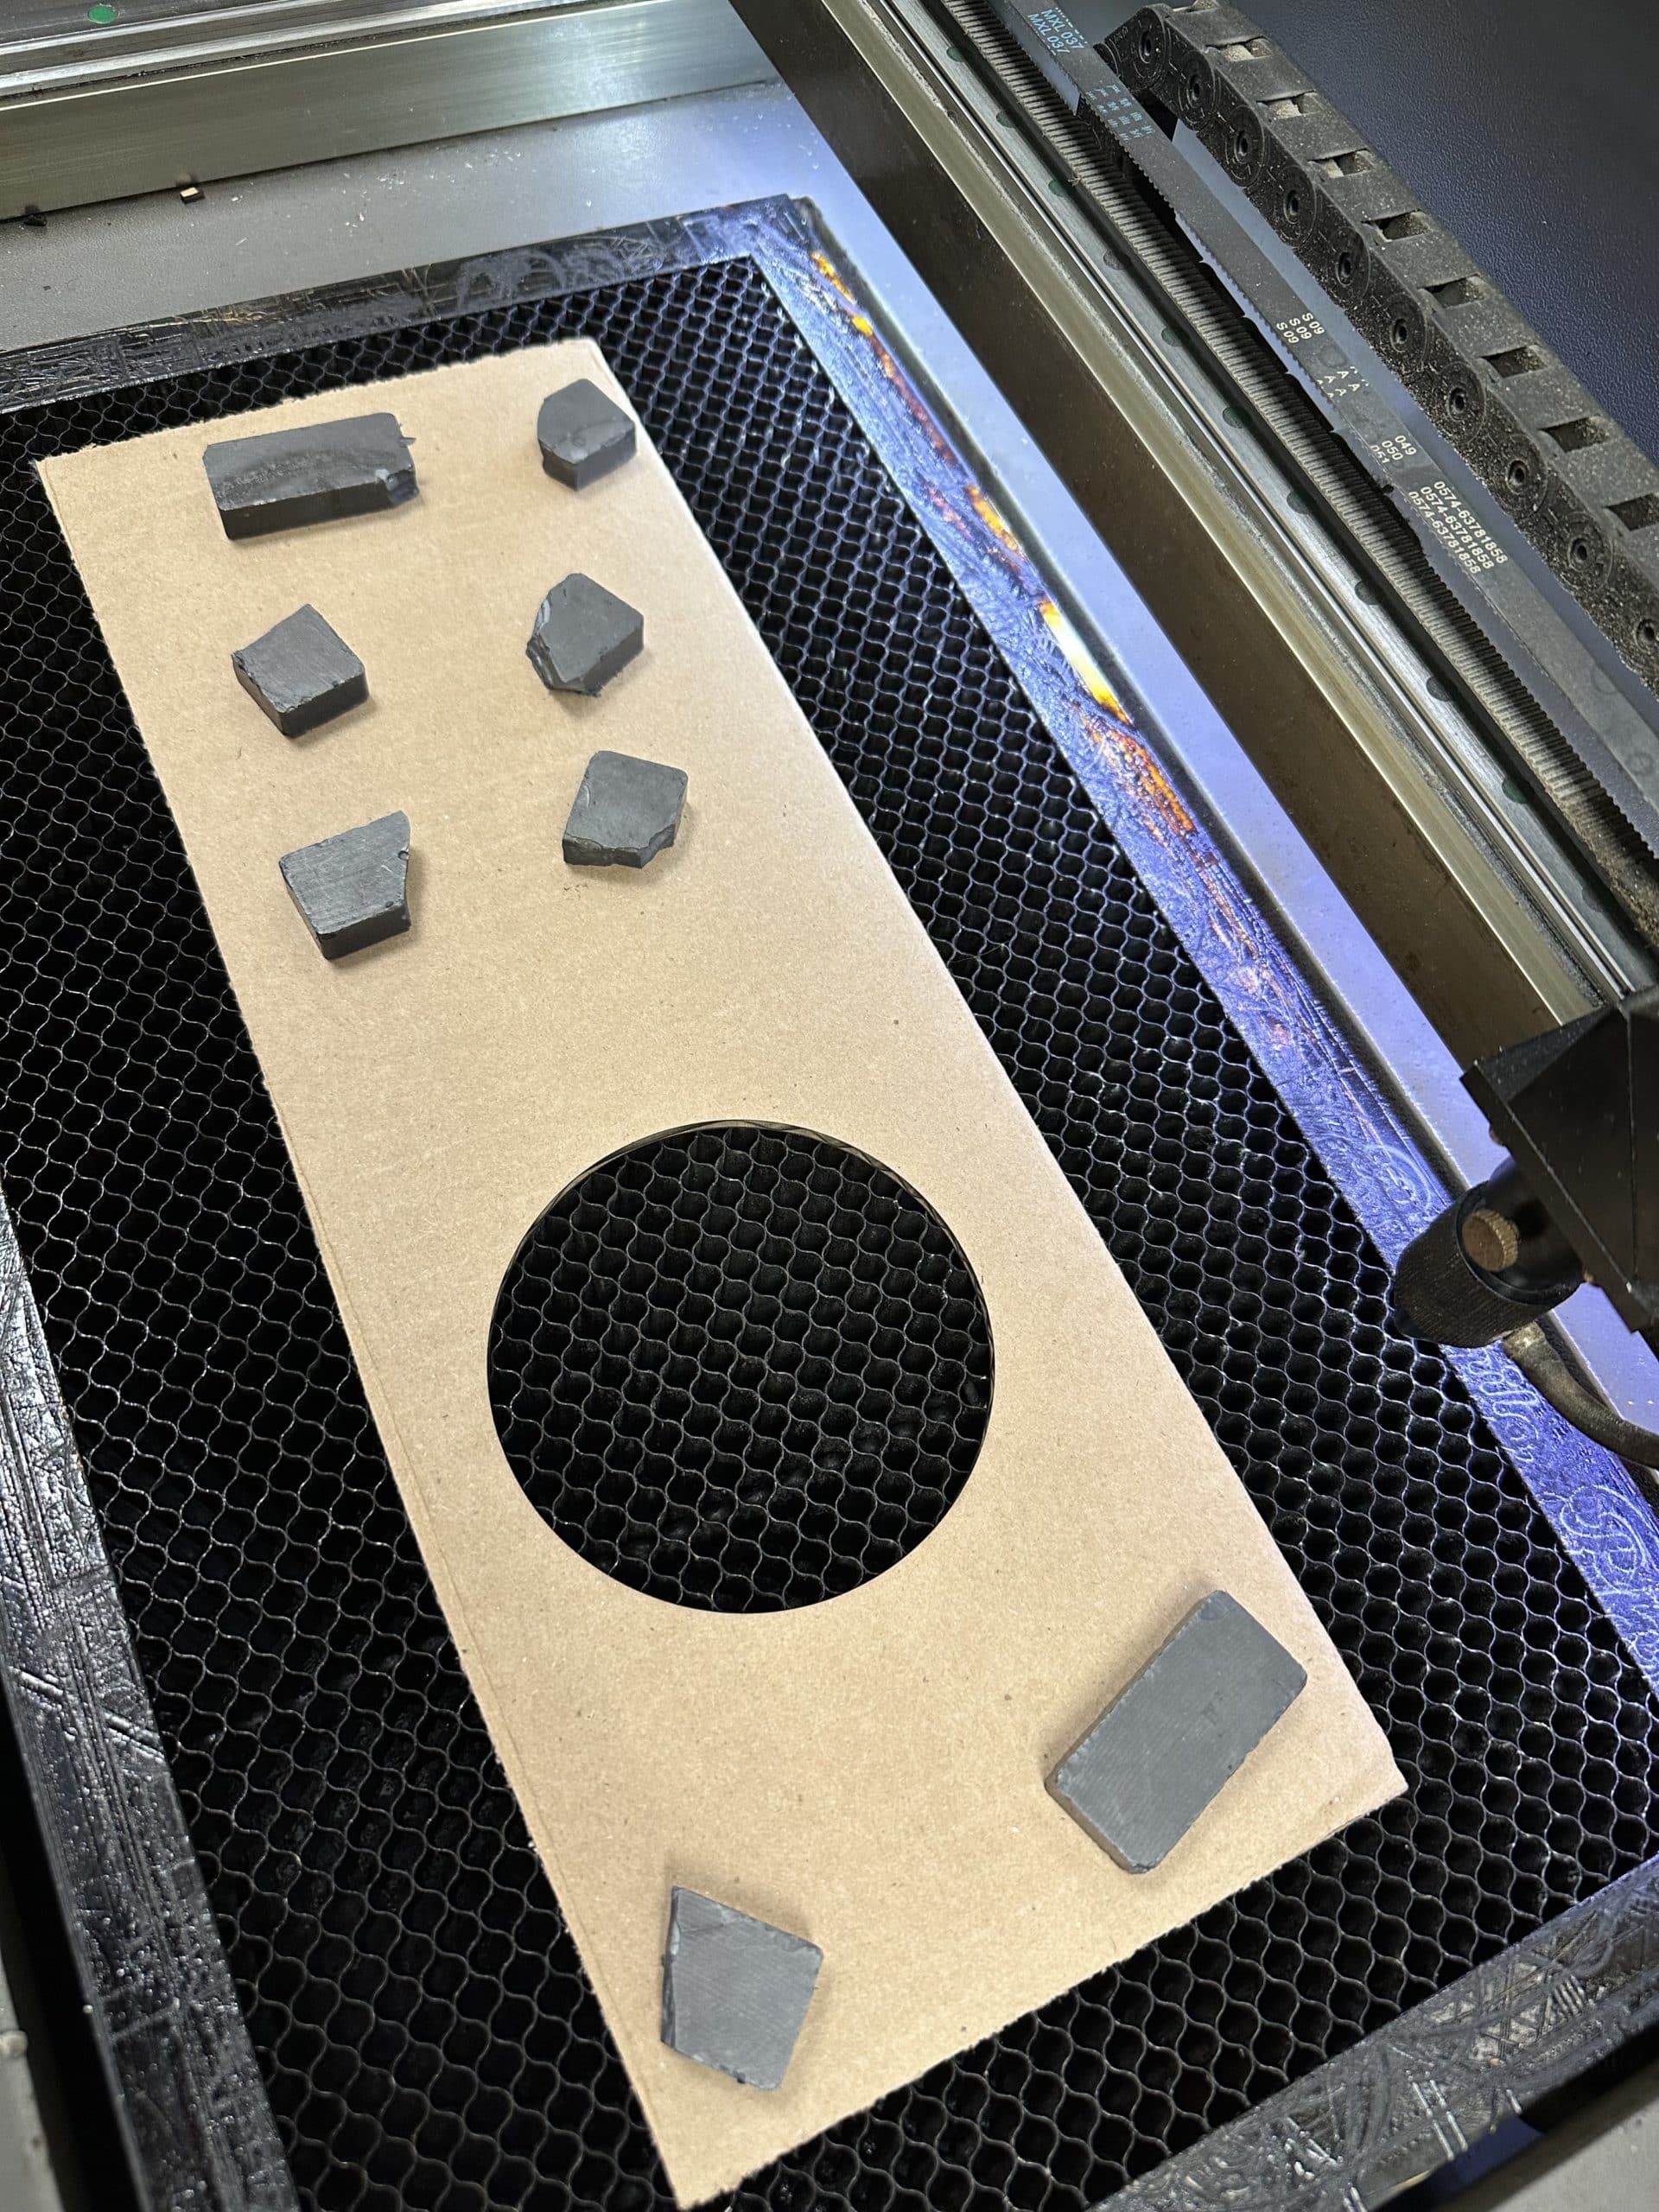
This is a little trick I use to make sure my design is as close to centered as possible. I start by putting in a piece of cardboard that covers a large portion of the laser bed. Set the origin and focus the laser head somewhere towards the center of the cardboard. Once I create the registration template, I need to make sure the cardboard doesn’t move at all or else I will later incorrectly place my coaster. To help hold it in position, I place several magnets on the cardboard. I’ll still need to be careful when placing my coaster on the cardboard later, but these magnets will significantly reduce the chance of the cardboard shifting.
To make the template, I created a circle the size of my coaster in RDWorks. My coasters are approximately 100mm in diameter. I then adjusted the settings to cut a circle out of the cardboard (Speed: 40, Power: 60).
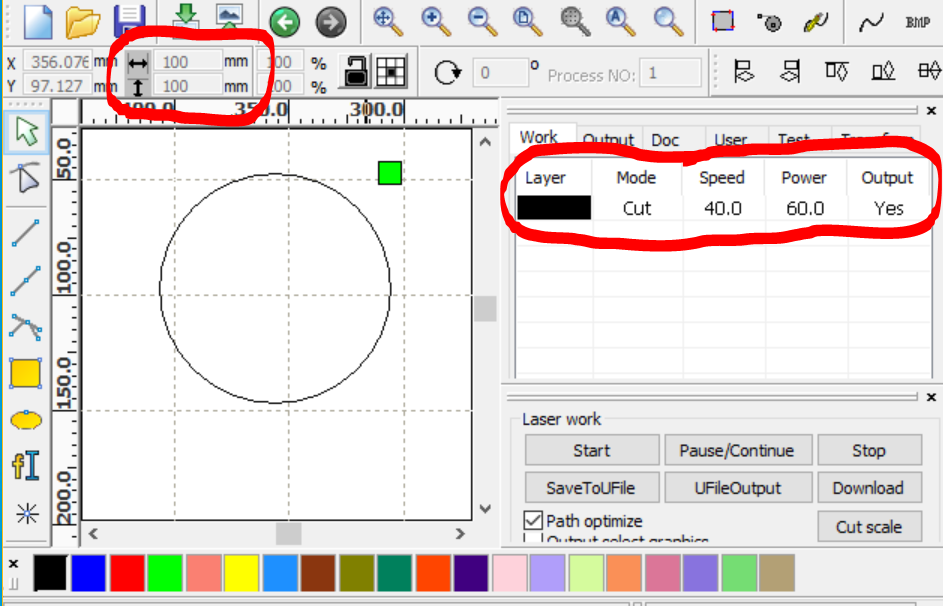
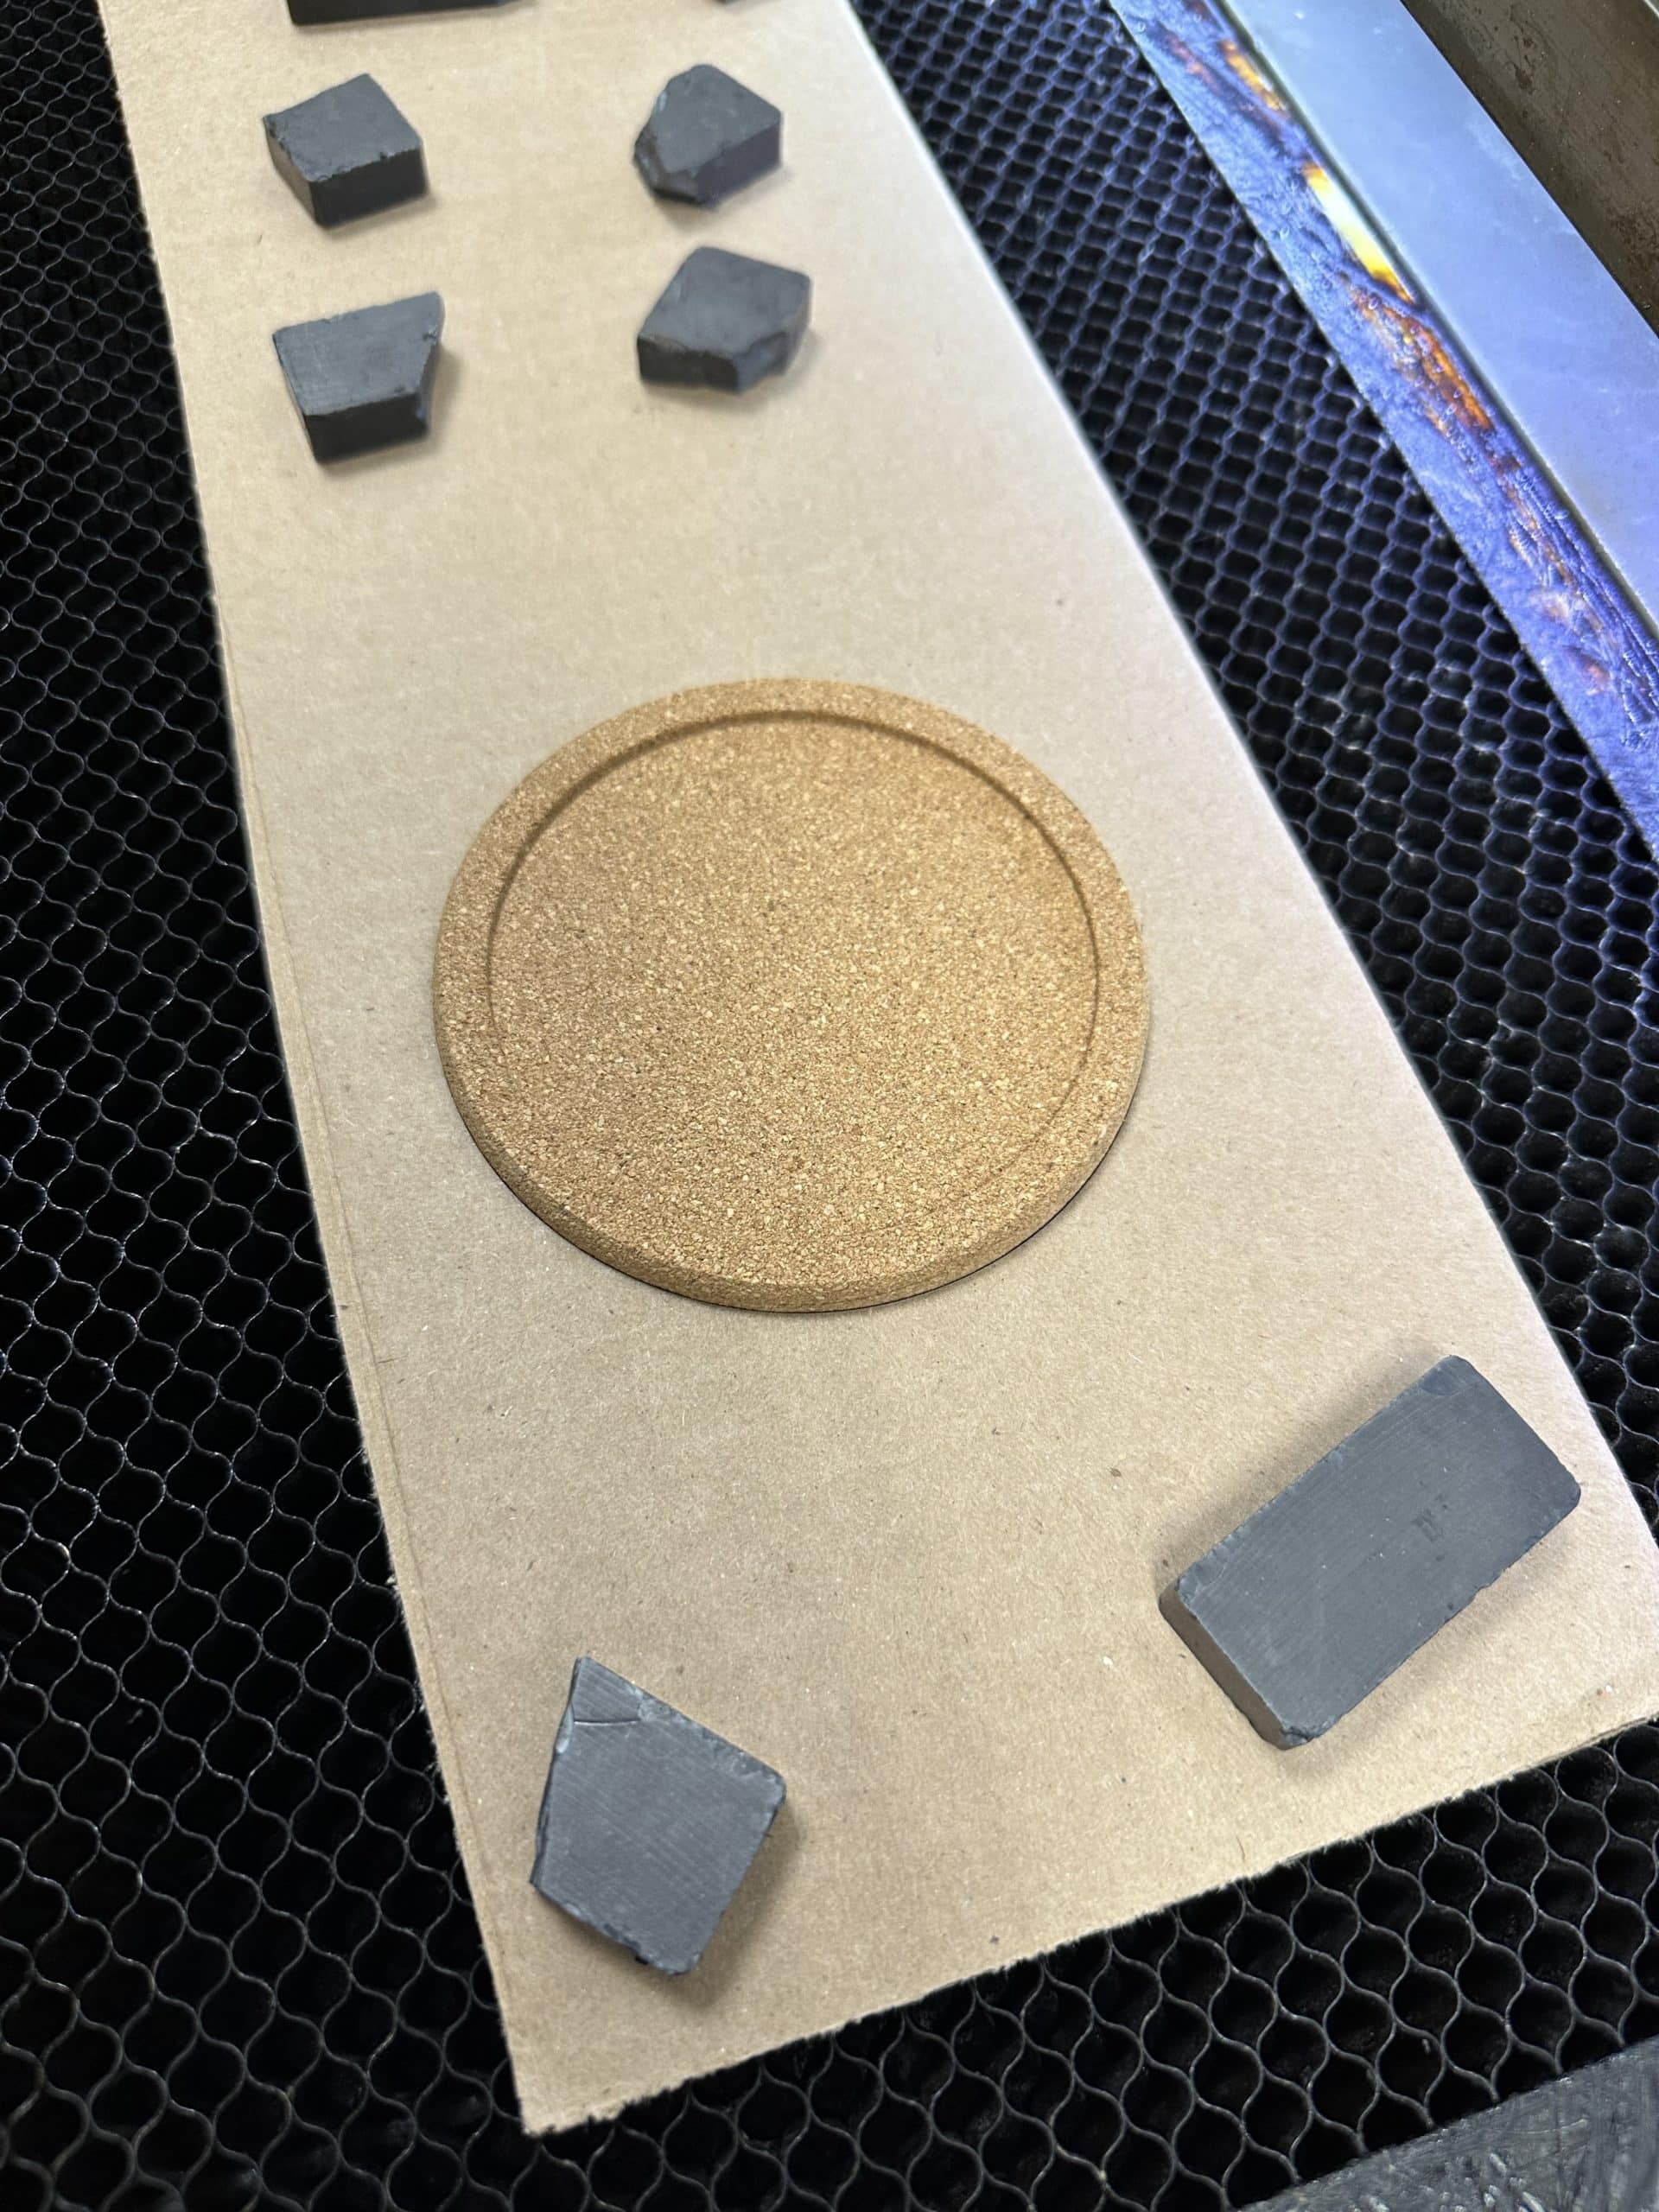
After running the cut, I carefully removed the circle without moving the rest of the cardboard. This gave me a perfect template to set my coaster in.
Engraver Settings
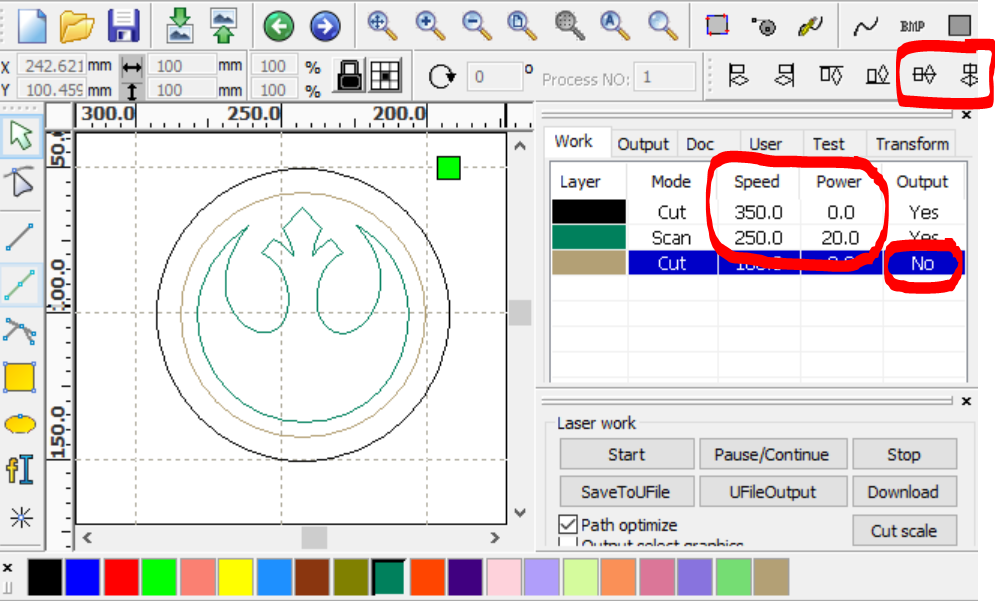
After doing my speed and power tests, I discovered that Speed 250, Power 20 worked really well for the way I wanted my coasters to look. It left a shallow indent, but still made a very dark burn. To start my project, I created the following three layers (seen in the screenshot below):
BLACK- The same as it was from the previous step except, I reduced the power to 0 and increased the speed to 350. It is important to leave the layer active because this is what is keeping everything in position according to the template I made in the previous step.
GREEN- The design I want engraved. Set to “Scan” at speed 250 and power 20
TAN- This layer is unnecessary, but I like to have it to help me visualize my final product. This 84mm circle represents the lip of the coaster. Since it is only here for my visual reference, I changed the “is output” setting to “no”. This way, the engraver will not read the layer when I send it over.
To get each of the layers perfectly centered among one another, I selected all three layers and clicked both horizontal and vertical alignment tools (![]() ).
).
Preparing the Coaster
I gently placed the coaster into the cardboard template making sure not to move the cardboard at all. The origin point is still set where I want it, so all I need to do now is focus the laser to the surface of the coaster and start the project.

Washing
Once engraved, they were a bit dirty. To finish them, all that I needed was some water and a soft sponge. Depending on how deeply the cork is engraved, they may give off a potent smell for a few days.
If you engrave some cork coasters on our laser engraver we’d love to see them! Share them with us on the Ignite Community Discussion Board on Facebook. Happy Making!
