by Cindy P.
The Book Binding Station
Our book binding station here at the Ignite Maker Lab in Noblesville has 3 machines, a paper guillotine, paper creaser, a thermal binding press. These machines can be used all together to make a book from start to finish, or they can be used separately for different types of projects.
These machines don’t need a certification, just make a reservation to use it with us!
If you want to cut paper, the paper cutting guillotine is the tool for you!
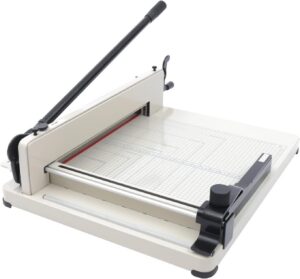
Getting Started with Paper Guillotine
- You first want to start preparing your paper stack. Tap the edges of the stack against a flat surface to line them up.
2. Next, put your paper stack on the paper guillotine and use the measurement grid to align your cut.
3. Then tighten the bar to the size of your paper. Turn the knob to the right to tighten or turn to the left to untighten it.
4. Once you have your papers aligned, lower the clamp by turning the handle clockwise until the paper is secured.
5. Now it’s time to cut your paper stack. You first want to start by lifting the safety clip. To lift the safety clip, press down on it.
6. Next, grab the handle and lower the blade until it passes through your paper stack. Then return the handle to its upright position. The safety clip should go back into place.
7. Now you are finished! Inspect the edges of the paper, if they are not to your liking, repeat the steps again.
If you need to crease the cover of your book or crease pages, the paper creaser machine is for you!
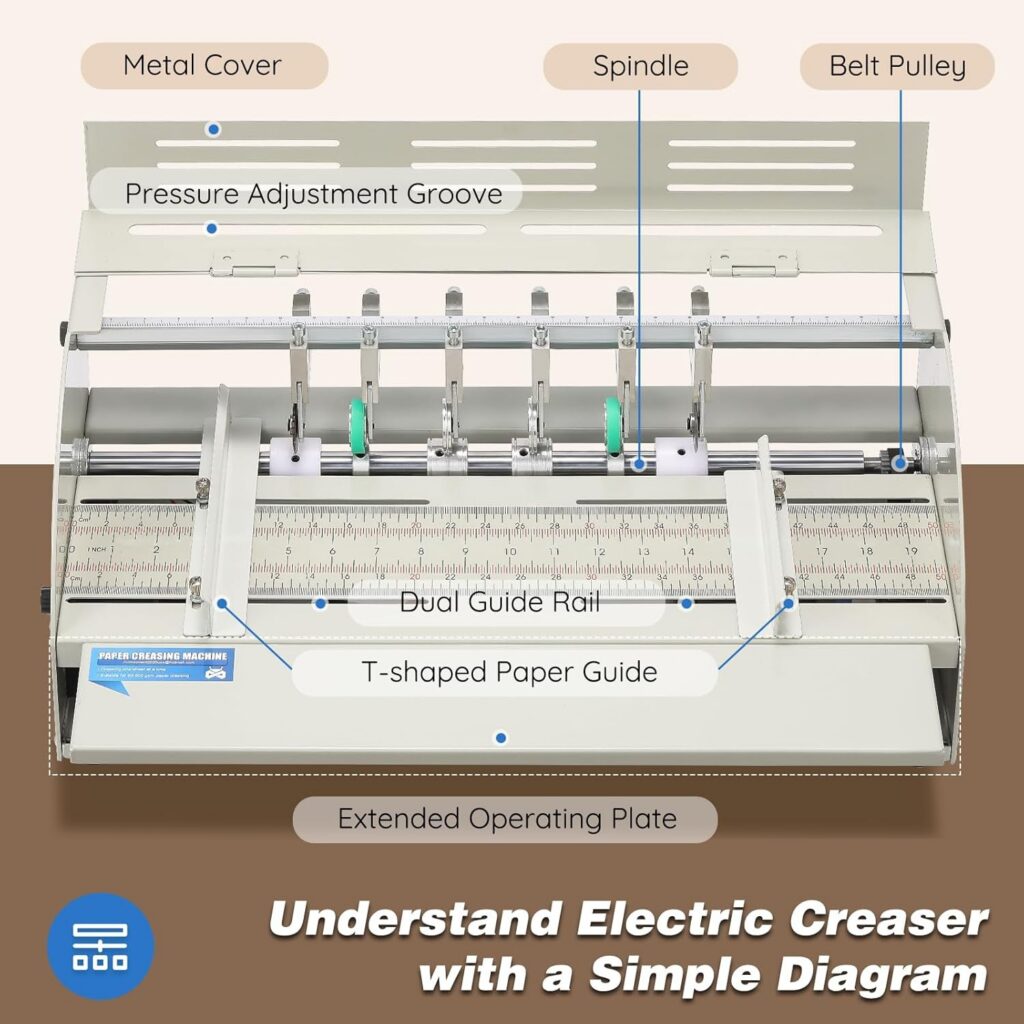
Getting Started with Paper Creaser
- Before turning the machine on, you first want to make your adjustments to the machine to the settings that you want.
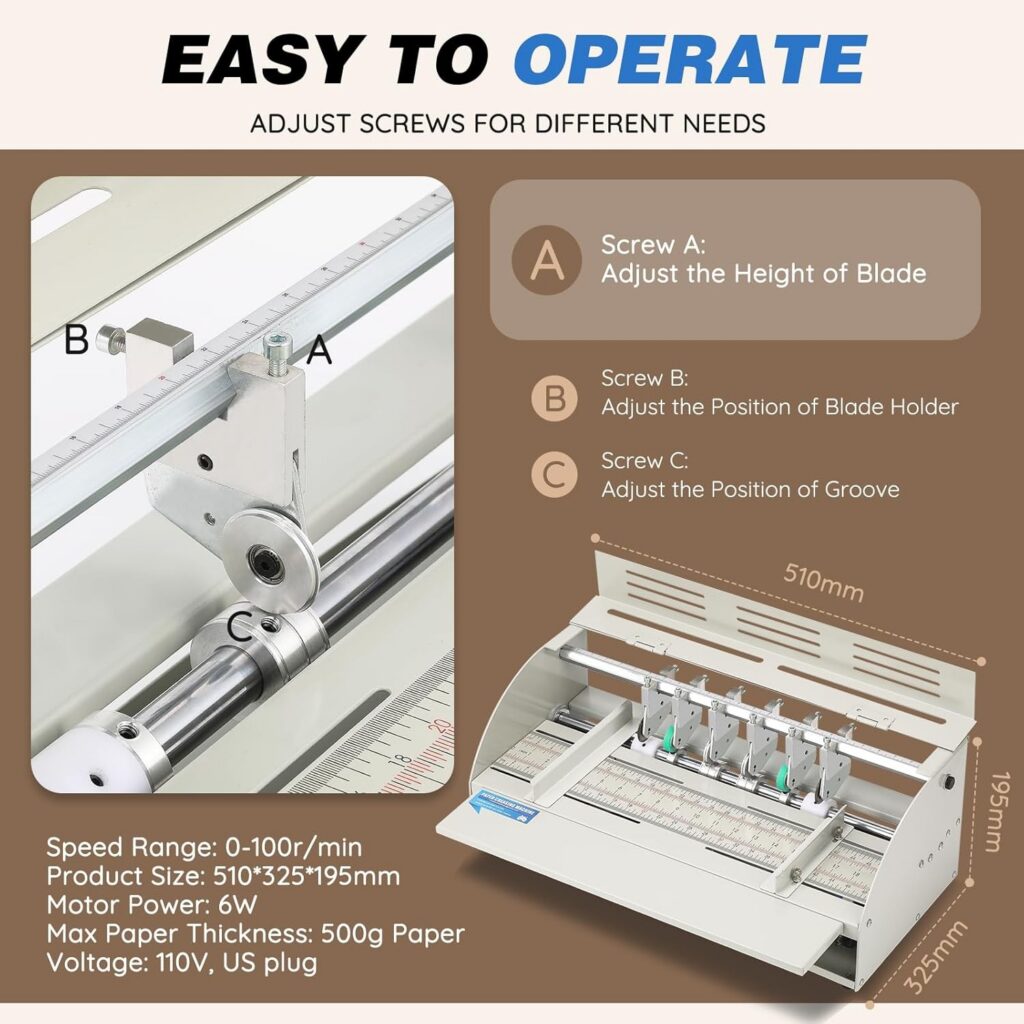
2. To adjust the height of the blade, turn screw A at the top of the blade.
3. To adjust the support wheel, adjust screw C.
4. To adjust the placement of the blade, unscrew screw B behind the blade and move it to where you want.
5. Next, move the T shape paper guides to the size of your paper to where you want the crease to fall and to hold your paper in place. Use the black knobs to loosen or tighten.
6. Now it’s time to send the paper into the creaser. First, flip the power switch on the right side of the machine. Then place your paper into the machine and use both hands at the bottom of the page to hold it in place while the machine sends it through. You could first test it with a scrap piece of paper to make sure all your adjustments are correct.
7. Finally, take your paper out from the other side of the machine. Then turn the machine off.
Ever wanted to make your own journal or book? The Thermobind machine is great for those projects plus whatever booklet projects you want to create!
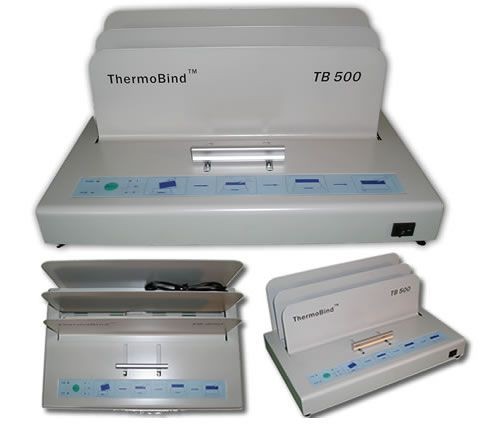
Getting started with Thermobind
- First gather all your materials, glue strip, book cover, and pages.
2. Cut your glue strip to the length of your spine. Leave about 1 cm off each end of the glue strip so that when it melts it won’t go spilling off the edges of the spine.
3. Place the glue strip in the spine.
4. Place the pages inside your book on top of the glue strip, making sure all the pages are touching the glue strip.
5. Turn on the machine by flipping the power switch on the front right-hand side of the machine. The machine will beep when it’s ready, which takes about 3 minutes.
6. Once it’s ready, select how much time you want it to heat up. I for 60 seconds II for 120 seconds, or III for 180 seconds.
7. Pull the level to open the slot and place the spine of the book into the binding slot. Then slowly let go of the level to push it back into place, this will start the heating process.
8. When the heating process is finished, the machine will beep. After that you can take it out and place it into the cooling rack and let it cool for 1 minute.
9. Finally flip the off switch on the machine and you are done!
Happy Making!