by Lauren C.
Friendship bracelets have been a staple camp craft used to spread joy and kindness through their crafting and exchange for years. As a non-camper, friendship bracelets were always very intriguing to me. When I became an adult, I started to dive into the surprisingly expansive world of friendship bracelets. Now, I am constantly knotting new bracelets and using them to spread joy via exchanging them. I also wear them myself! I find that one of the best ways to spread the joy of friendship bracelets is by spreading the “how-to” as much as possible, which is precisely what I’ll be doing in this blog. If you have ever wanted to get into friendship bracelets, follow along with my tutorial below. Check out one of the friendship bracelet kits in the Ignite Studio and you’ll be able to complete a basic friendship bracelet. You’ll learn some general bracelet basics as well!
What You’ll Need
All these supplies are included in the friendship bracelet kits in the Ignite Studio, but you may also use your own supplies if you have the items listed below:
- Embroidery Floss (2 colors)
- Tape (or something to hold your bracelet steady)
- Scissors
Selecting, Measuring, and Cutting the Embroidery Floss
For the specific pattern we will be following, originally found on Bracelet Book which I modified. I will be using black and white embroidery floss to demonstrate contrast within the pattern in an effective manner. The pattern diagram also uses those colors. I like to use the same or similar colors as the pattern so I can follow along easily, but feel free to use any colors you like as long as you’re able to follow the pattern.
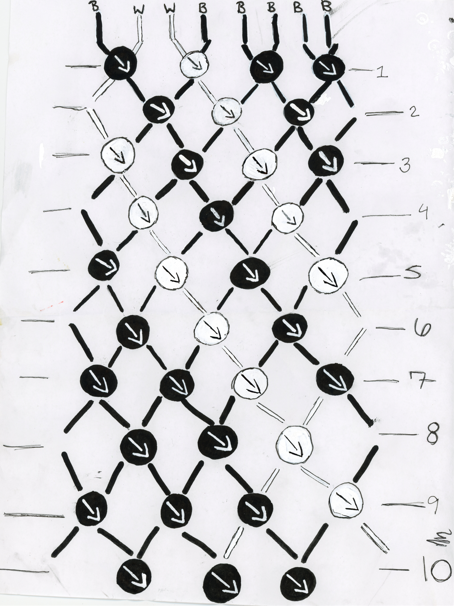
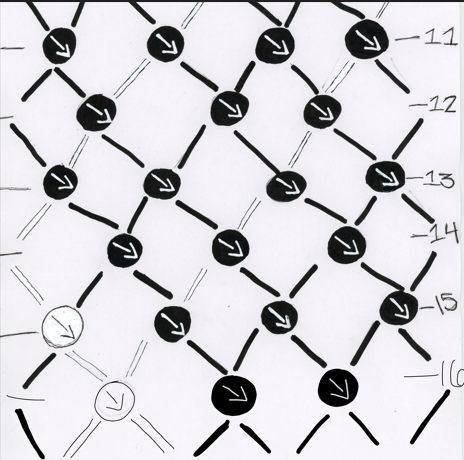
This specific pattern, Bracelet Book Pattern #1, Variation #437573, will require 3 “wingspan” length strands of black embroidery floss and 1 “wingspan” length strand of white embroidery floss.
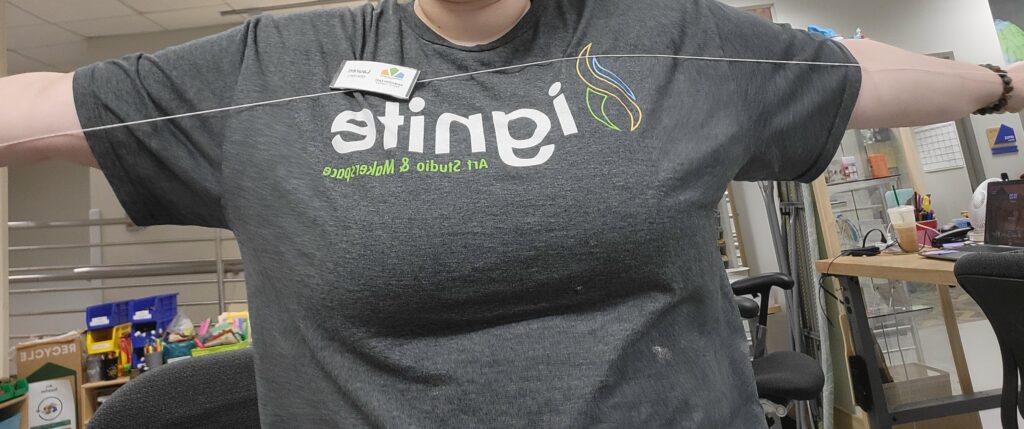
The first step to a successful friendship bracelet is to make sure you have the appropriate length of embroidery floss. The easiest way to do this is to measure your embroidery floss with your own “wingspan.” This is the length between your fingertips when your arms are stretched out at your sides. I find it helpful to stretch my floss across my body from fingertip to fingertip and cut about 1 to 2 inches past that length to ensure I have enough material.
Starting the Bracelet
Now that you have cut all the strands required, it is time to start the beginning stages of your bracelet. First, you will gather all 4 of your strings and line them all up by one end so that they have the same starting point.
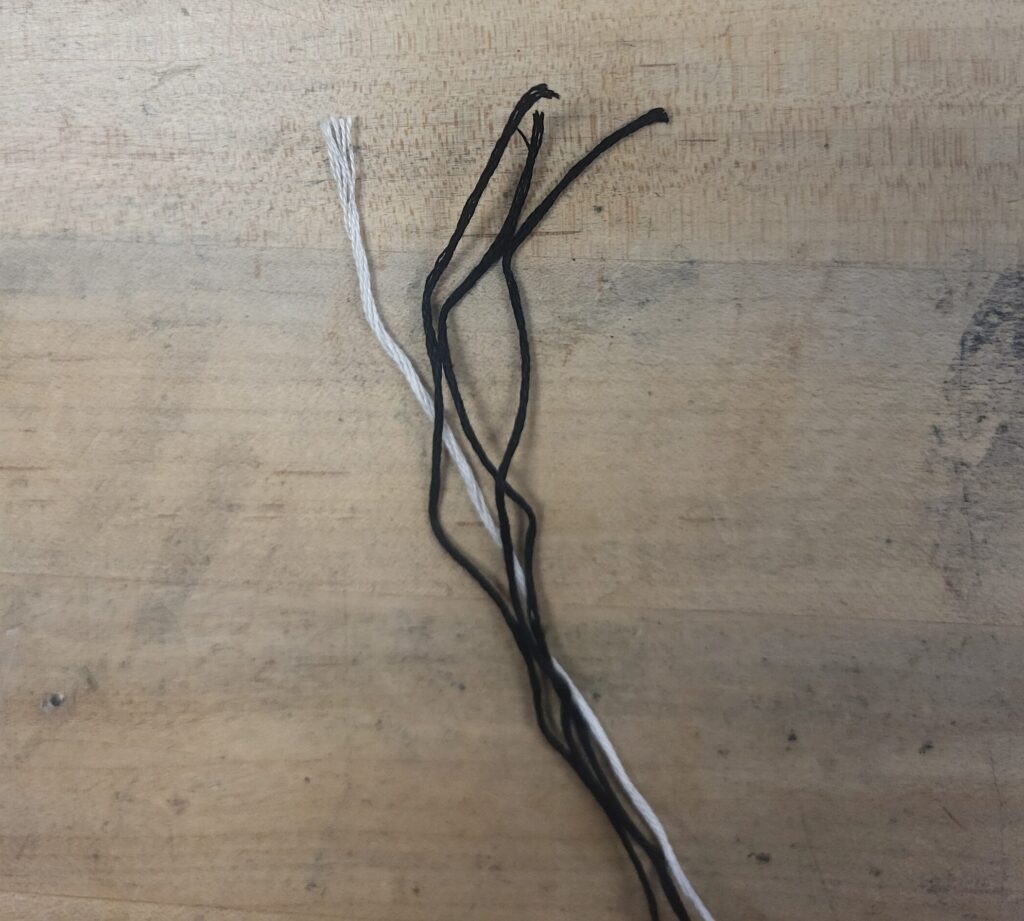
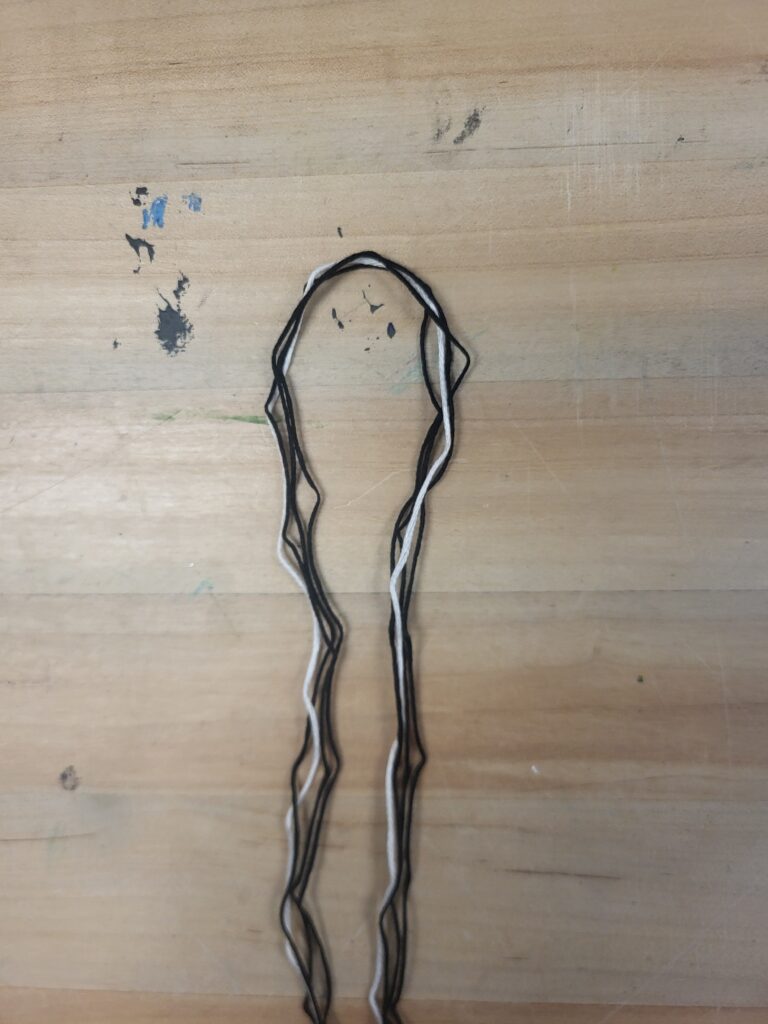
Next, fold all four strings in half so that the ends meet at one spot, and you have a central curved point at the top of your string group.
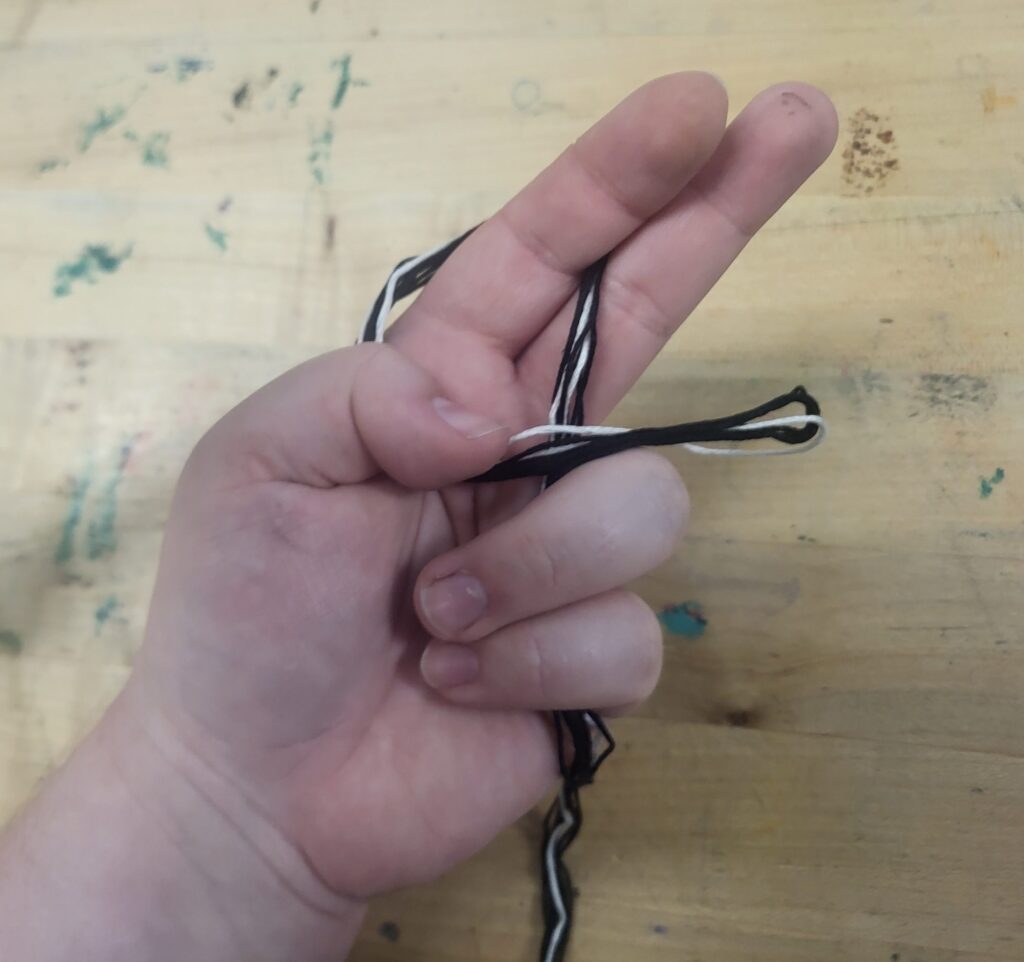
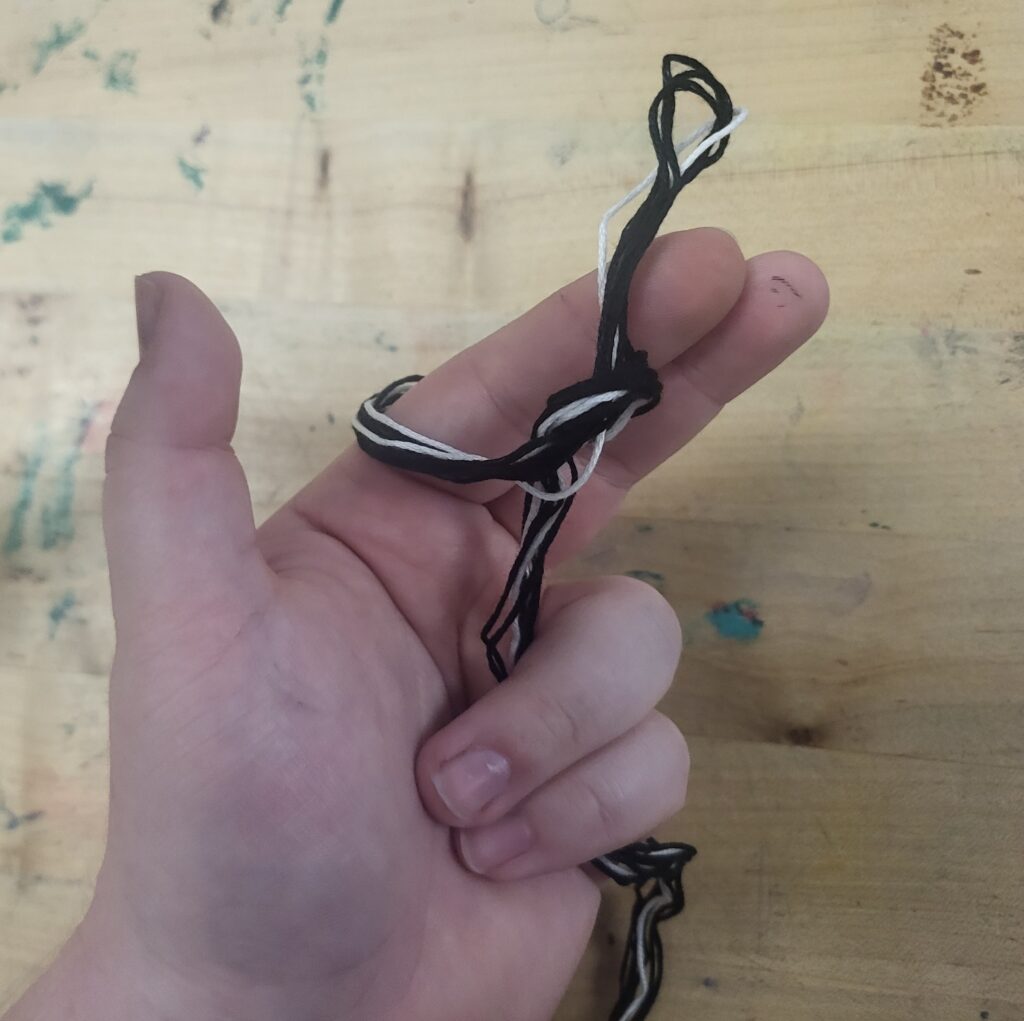
At the central point we will create our fastening loop by twisting the group of strings around our fingers and passing the ends through the loop that forms. Make sure to pull tight to secure the knot so that it doesn’t come undone.
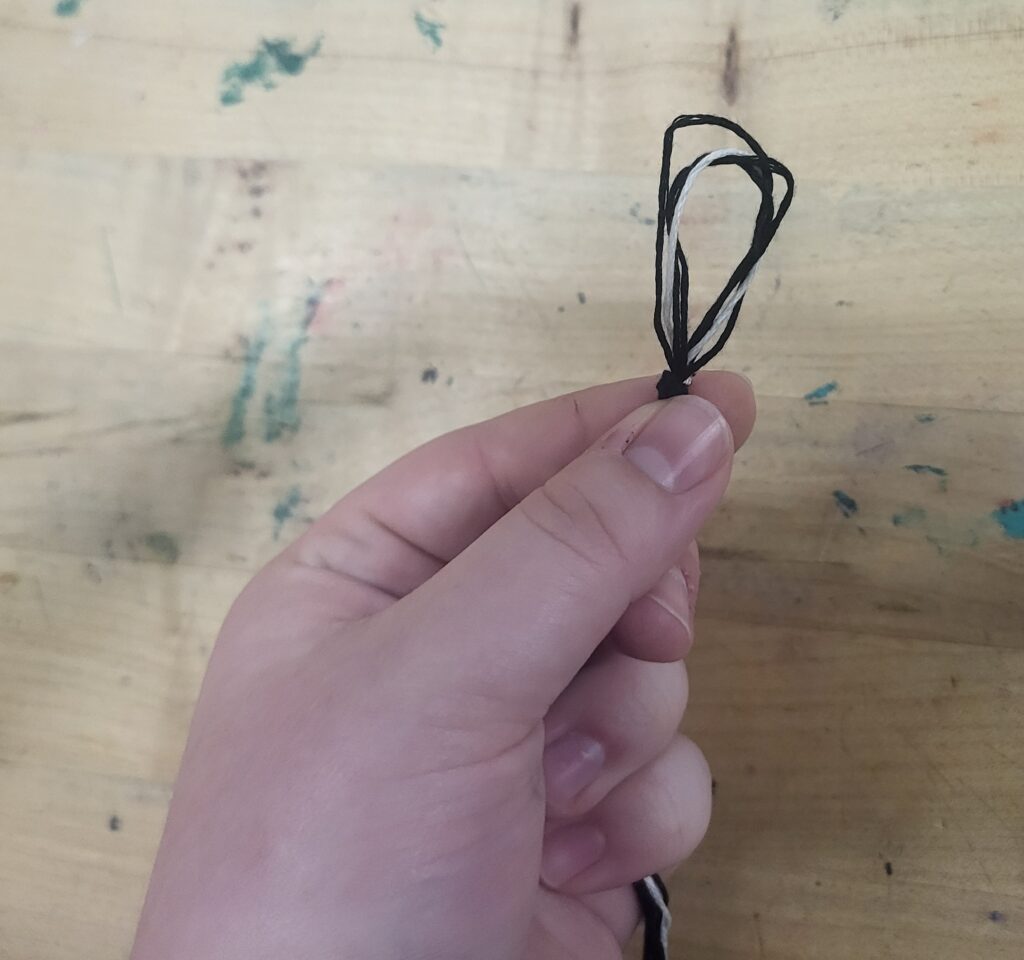
Next, tape down your group of strings or secure it in a way that allows you to move the strands around.
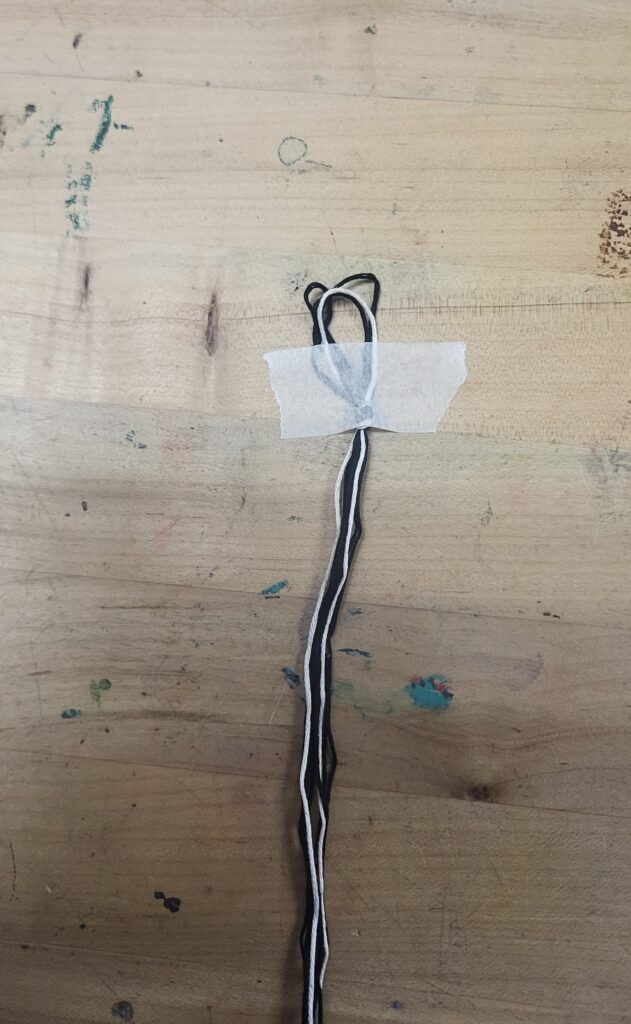
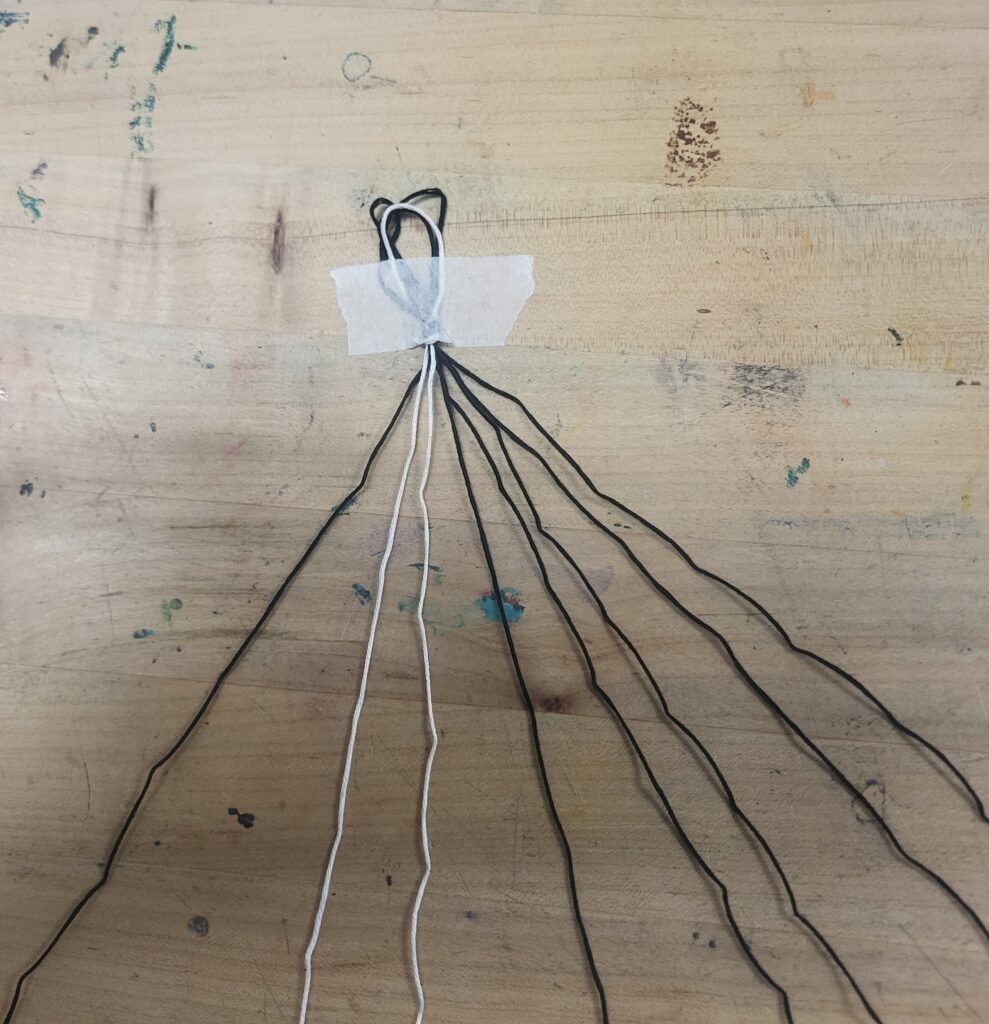
Once your strings are secure, they need to be arranged in the correct order to begin the bracelet pattern. The very first row of the pattern shows how your strings should be arranged at the start.
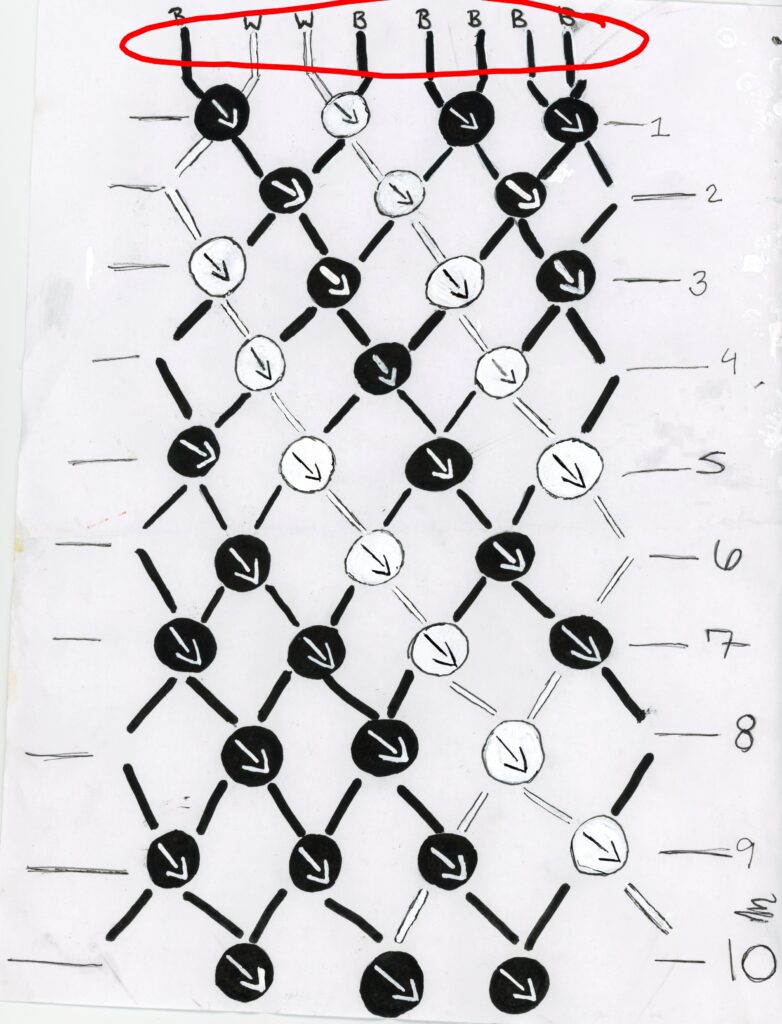
In this pattern, the strings are ordered as follows: black, white, white, black, black, black, black, black. If you are using other colors, arrange them in the same manner. Now you are appropriately prepped to begin knotting.
Knotting According to the Pattern
You can now begin following the bracelet pattern by creating knots. There are four total types of friendship bracelet knots. For this blog I have purposefully chosen a pattern that only uses one kind of knot so that we can establish the fundamentals. This pattern uses the forward knot (signified by an arrow pointing down and to the right).
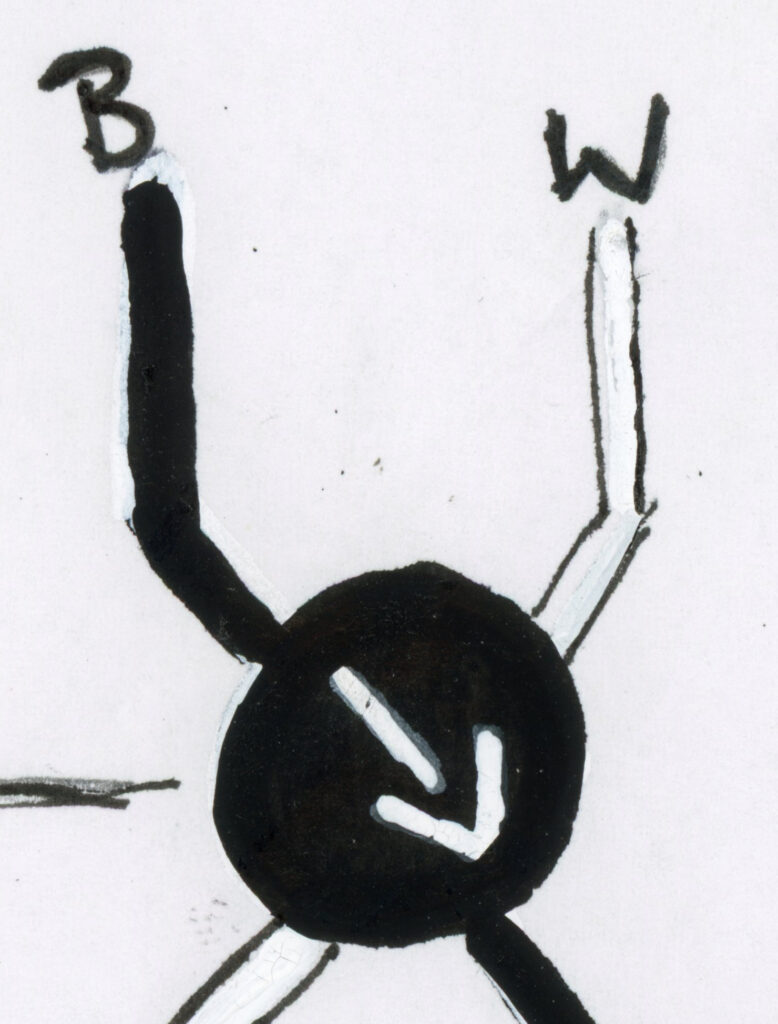
Every knot consists of two strings being knotted together in some fashion. This is indicated on the pattern by two different colored lines joining into the previously mentioned arrow symbol.
To make a forward knot you will take the left-most of your two strings (indicated in the pattern) and fold it over the right-most of your two strings to make a “4” shape.
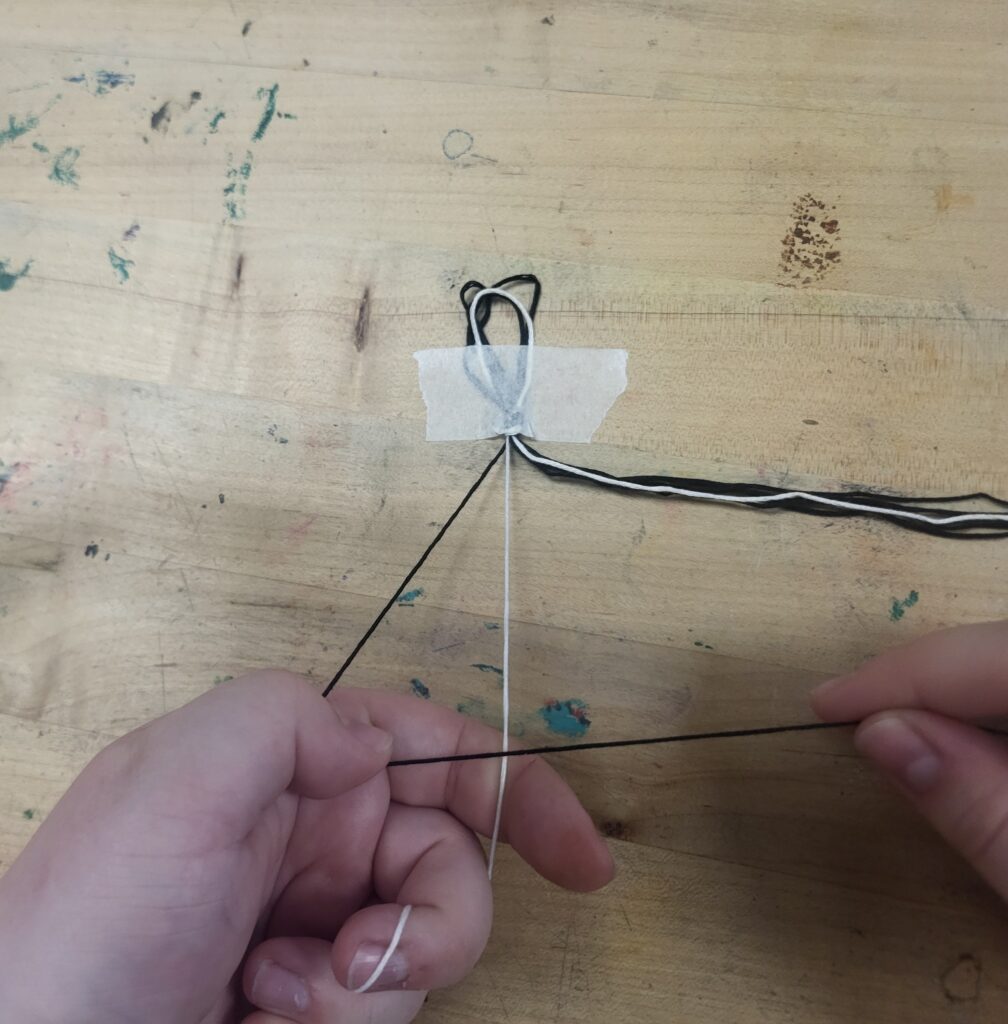
Next, you will pass the left string (now on top) under the right string (now on bottom) and pull the end through the opening in the “4” shape.
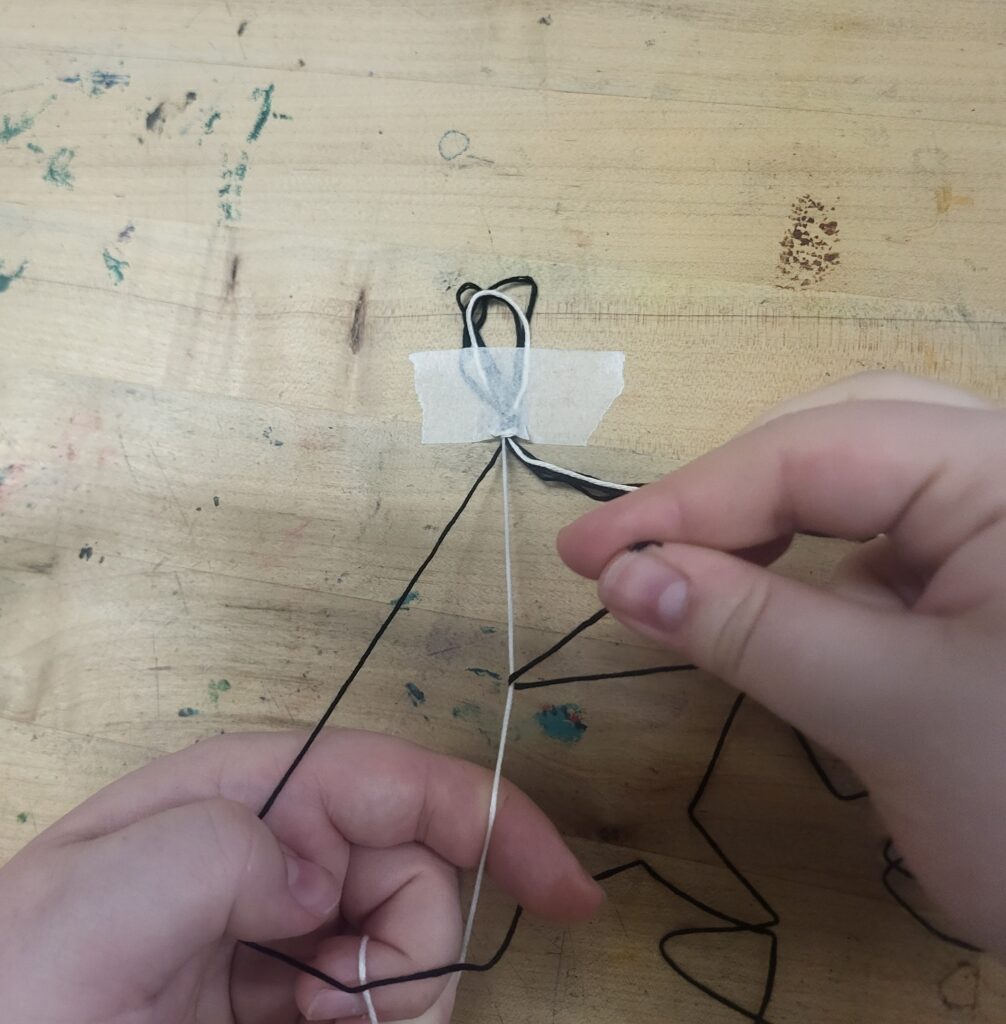
Pull the end of the string tight to create a knot and repeat that step with the exact same strings in the exact same positions to create one full forward knot. Each knot is essentially two knots, so make sure you are repeating that step.
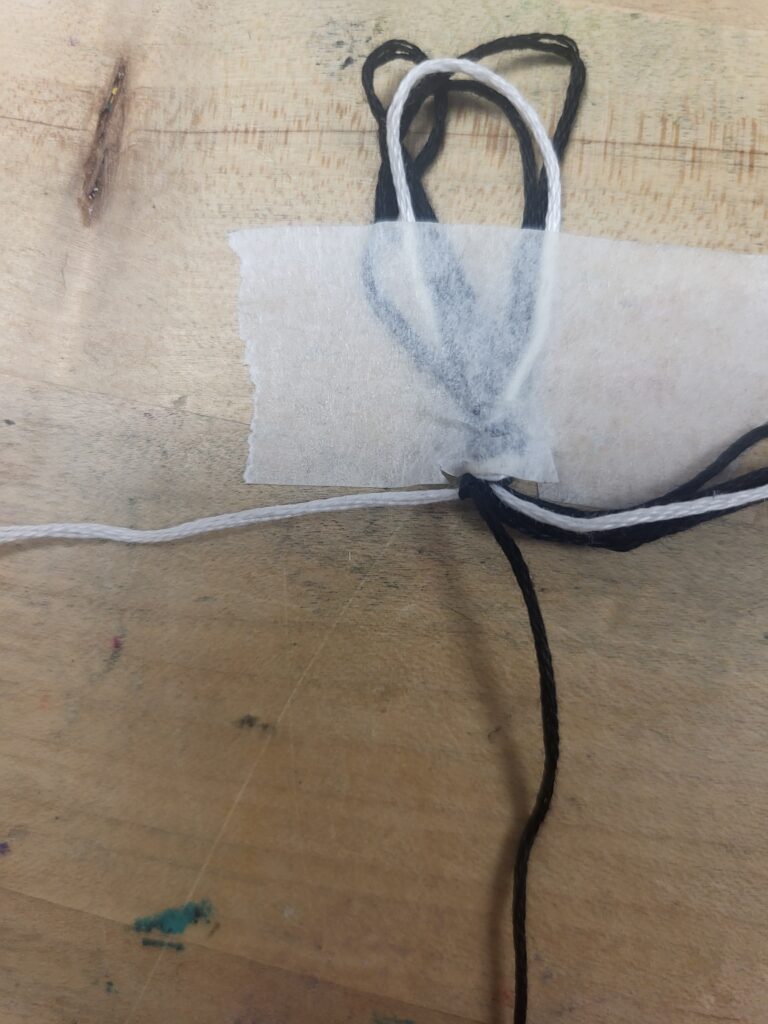
The First Row
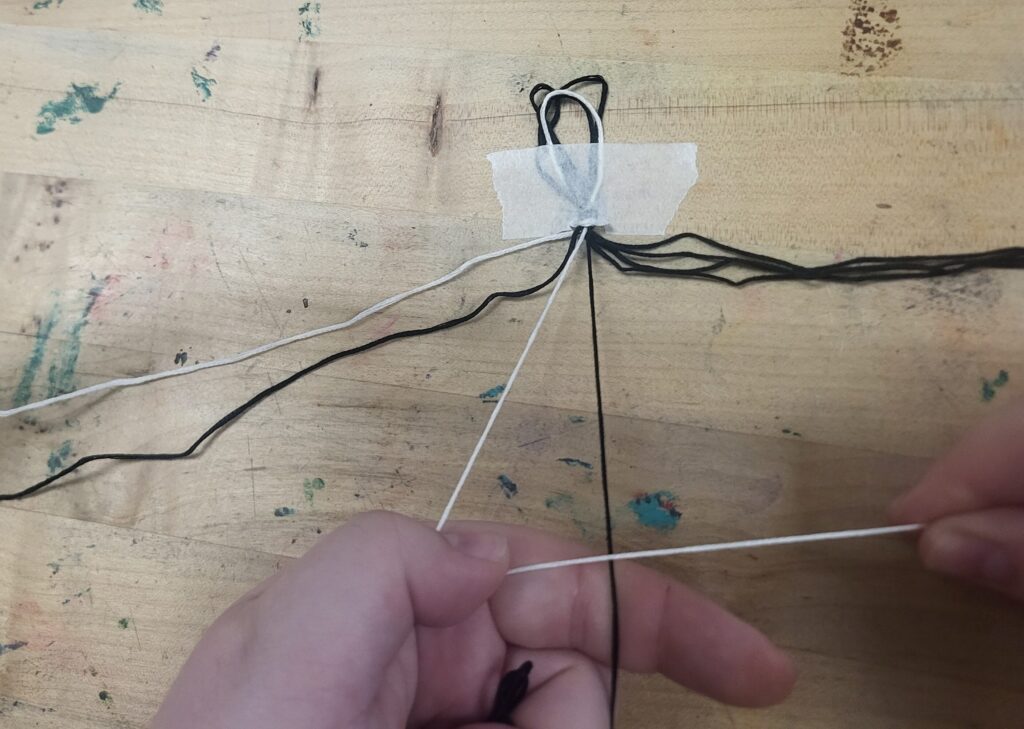
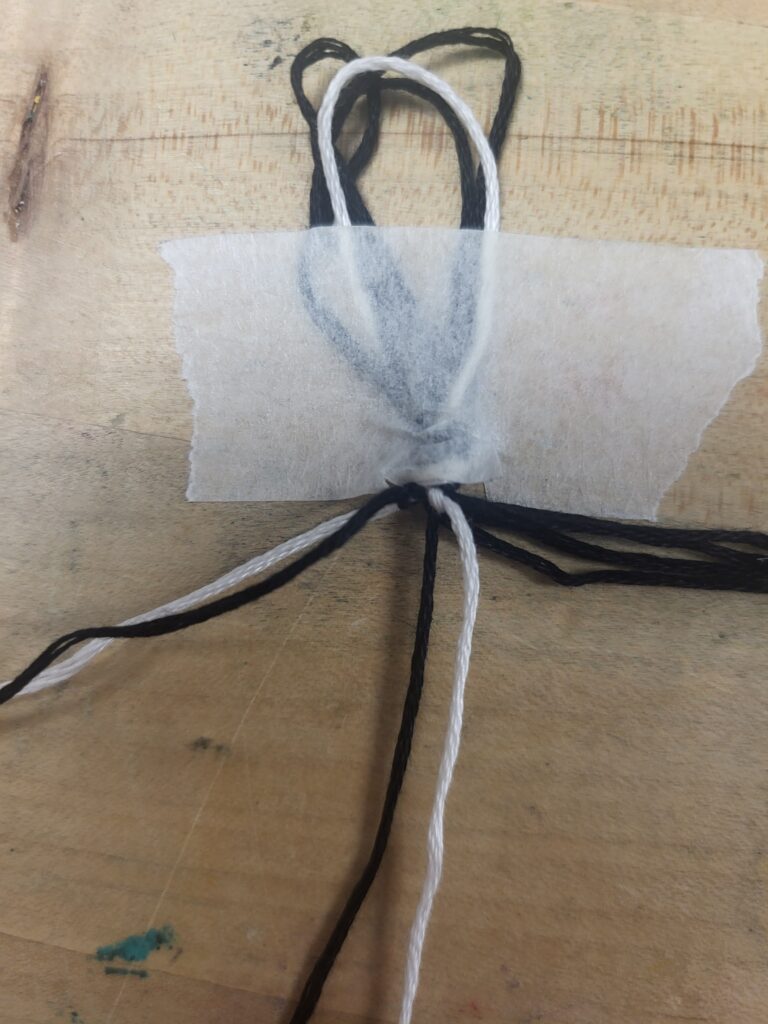
Friendship bracelet patterns are written as rows, and I personally find it easiest to knot row by row. Another common knotting technique is to follow a specific string instead. To complete your first row, you will simply follow the steps of your first knot but with the next pair(s) of strings. You will set the strings aside that you have already knotted for that row. Then move on to the others to create more forwards knots, as is the case of this pattern.
Following the same knotting technique from earlier, your second knot should be completed like this. You will then complete the row by using the same process and aligning the colors you’re using with the trajectory of the pattern.
The Second Row
After your first row is complete, you can begin the second row. Note that there is a slight difference in this row compared to the first. You will see this concept throughout the pattern in every other row, so it is important to understand it early. The very left side of the pattern shows a string that is not involved in the next knot. Fortunately, it is very simple to adjust for this. We will simply just set aside that left most string and start working with our next two strings.
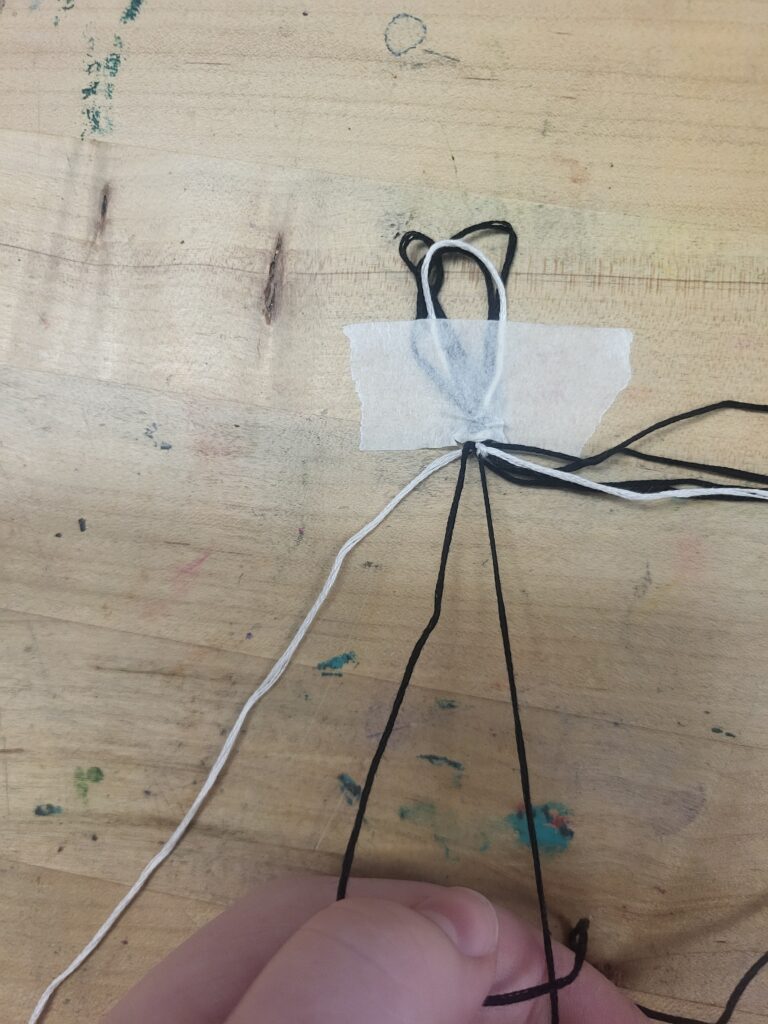
Setting aside the left most string.
Now we can knot through the row as we did with the first row until we reach the last string, which also is not involved in a knot for this row, so it will just be set aside like the first string in the row.
Knotting the Bracelet to Length
Now that you know how to complete a forward knot and make both kinds of rows in this pattern, you have everything you need to knot your bracelet to its desired length. You will follow along with the pattern until you have completed all four rows. Now, this is obviously not long enough to be a bracelet on its own, but you will see after you have finished the pattern accordingly, the colors will be back in their starting positions. This design is intentional as the pattern is meant to be repeated as many times as necessary to reach bracelet length.
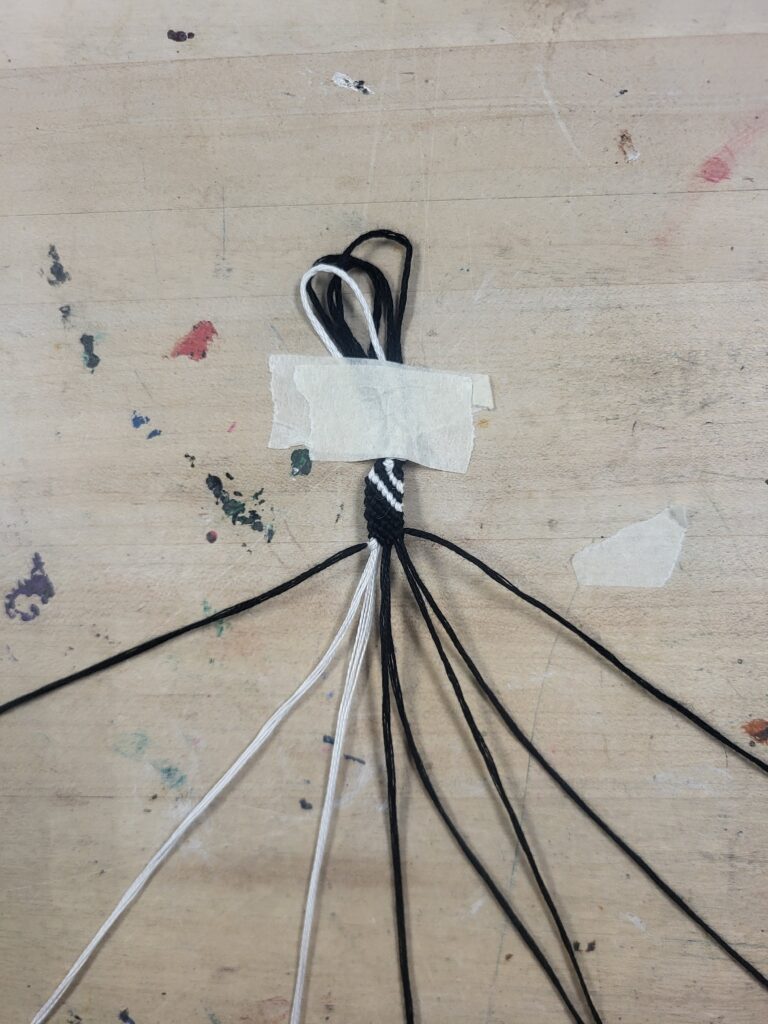
There is no set number of times you should repeat the pattern, so once it starts getting long, I like to wrap it around my wrist to help visualize if I need to continue knotting or not. Once you reach your desired length you can stop creating knots even if you are in the middle of your pattern (just don’t stop in the middle of a row, make sure all your rows are finished).
Finishing Touches
Now that all your knots are complete, it is time to make your bracelet wearable! Start by separating your remaining strings into two groups evenly. In this case, each group should consist of four strings.
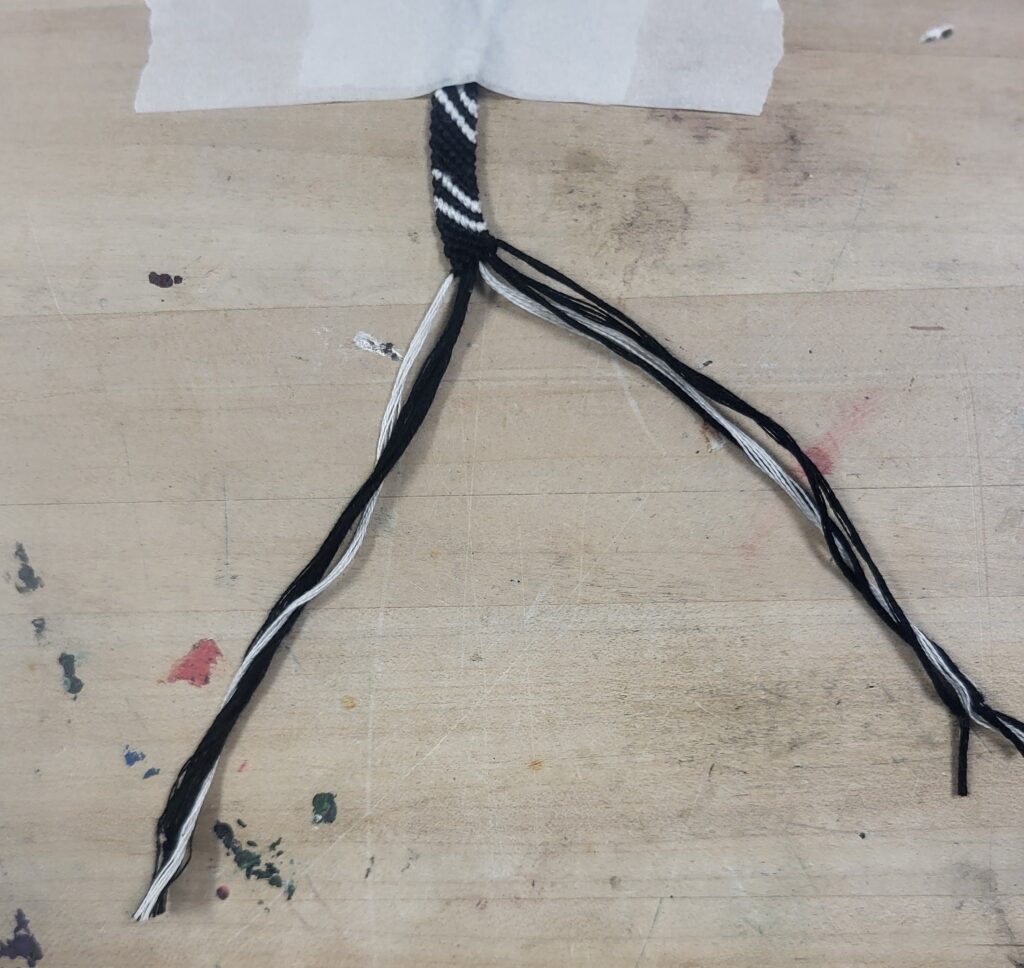
Personally, I like to braid the ends of my bracelets, but this is not necessary. You can also twist the strings or just leave them straight if braiding is not for you. I take my set of four strings and braid them to my desired length and then finish it with a simple knot.
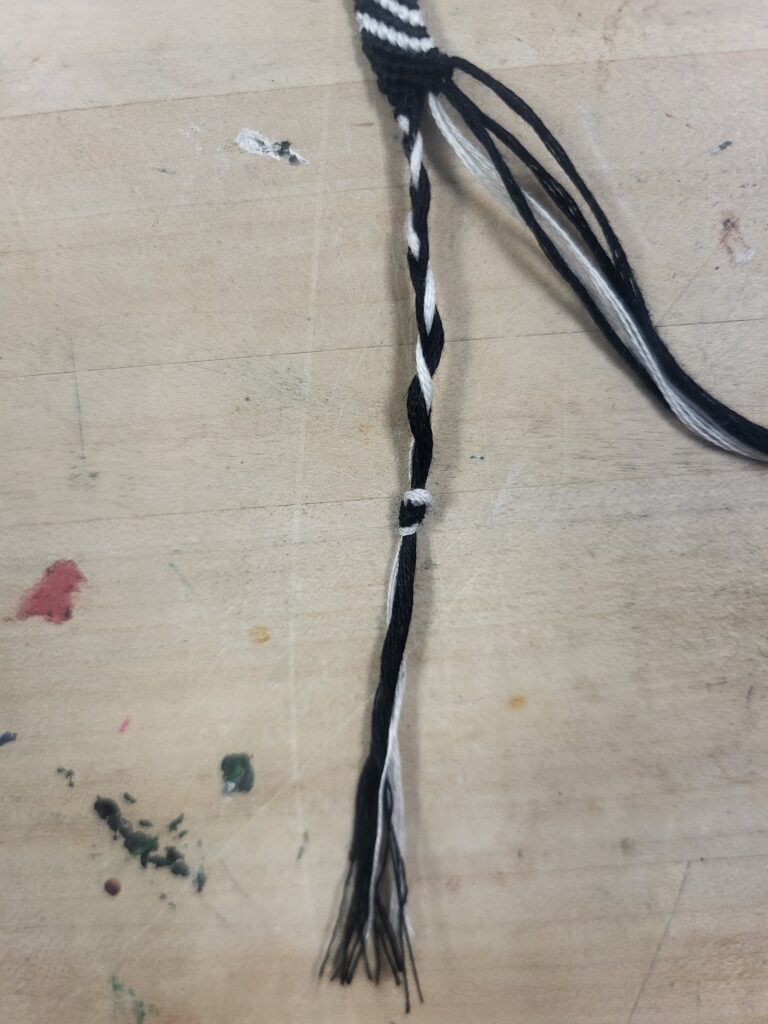
This step is then repeated with the other set of four strings in order to create two “tails.” These will help us tie our bracelet onto someone’s wrist.
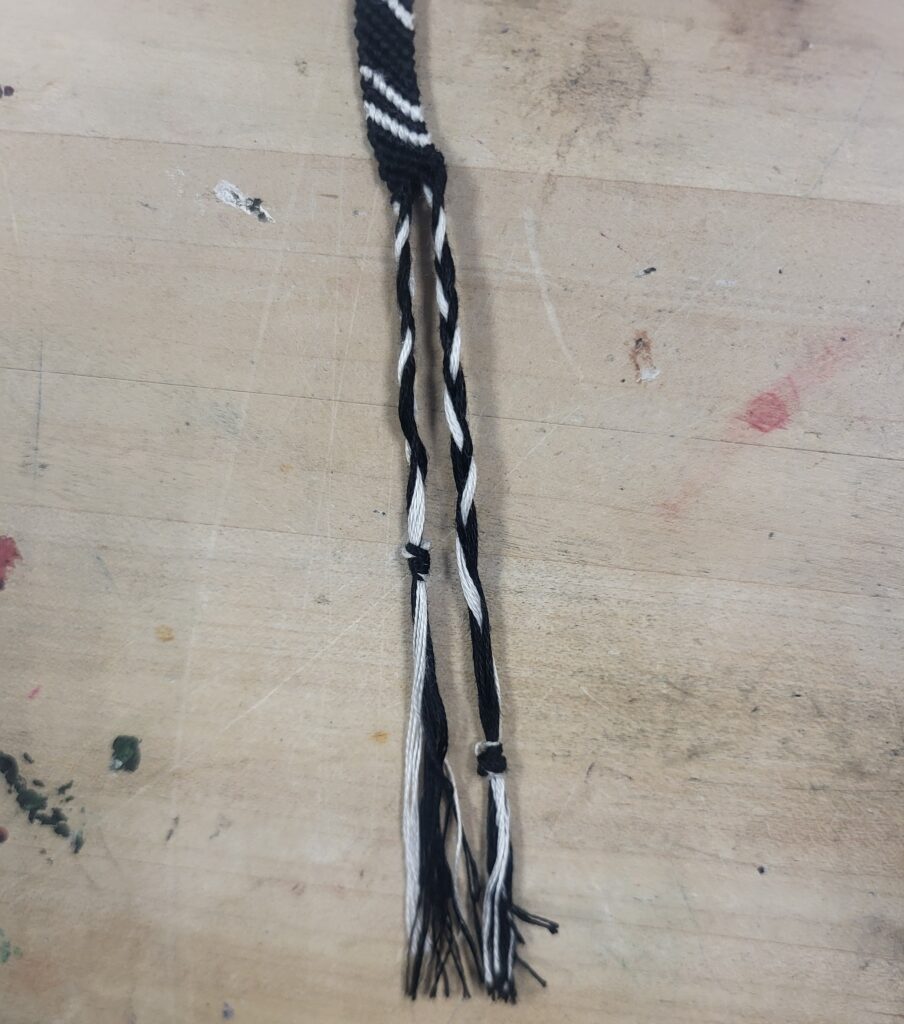
Now your bracelet is complete and the last thing to do is to wear it and spread joy!
If you would like to make your own friendship bracelet, you can do so in the Ignite Studio by checking out one of our friendship bracelet kits. Thank you for following along with this tutorial! We can’t wait to see you in the studio to create and wear some new handmade jewelry! Post your makes to the Ignite Community Discussion Board on Facebook. Happy Making!