by Jared H.
We’re asked a lot of questions about our floor loom, and a lot of those times the loom isn’t loaded and ready to use. What many people might not realize is how involved the setup process is. It takes a lot of time and meticulous planning just to start a project. The process is very technical, but hopefully after reading or just skimming through, you’ll have a higher appreciation for the art of weaving.
Over the past month, I have been learning the process, documenting the steps and taking a lot of notes. Here’s a collection of everything I have learned.
Calculate How Much Yarn to Buy
For our project, we didn’t go out to buy any specific yarn; we just used what we had on hand. We wanted to prioritize length over width in order to accommodate more people and have the loom loaded for a longer period of time.
However, this is an important step if you do need to buy yarn or have specific project size in mind. The first step is to calculate the ends-per-inch.
Ends-per-inch (EPI)
Line up your thread side-by-side and count how many strands it takes to get an inch. In this case, our yarn has an EPI of 12. When planning the width of our project, this tells us that for every foot, we will need 144 strands (12 EPI X 12 inches = 144 ends per foot).
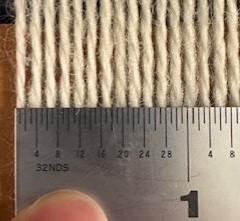
12 yarns making up 1 inch.
If you have a desired length, you’ll first add an additional 2 yards to account for the waste on each end. Multiply that with your desired width. The “waste” refers to any yarn not considered part of your finished project. This includes the lengths of yarn that are tied to the loom at the beginning and end of your project length. For example, if I want a 2-foot-wide project (288 strands) that is 5 yards long (7 after compensating for waste), you’ll need 288 strands at 7 yards each. 288 X 7= 2,016 yards of yarn.
Measuring the Yarn
This will consist of wrapping yarn around the pegs of a warping board. I’ve broken this phase of the process down into four steps with diagrams and notes to make it easier to follow along
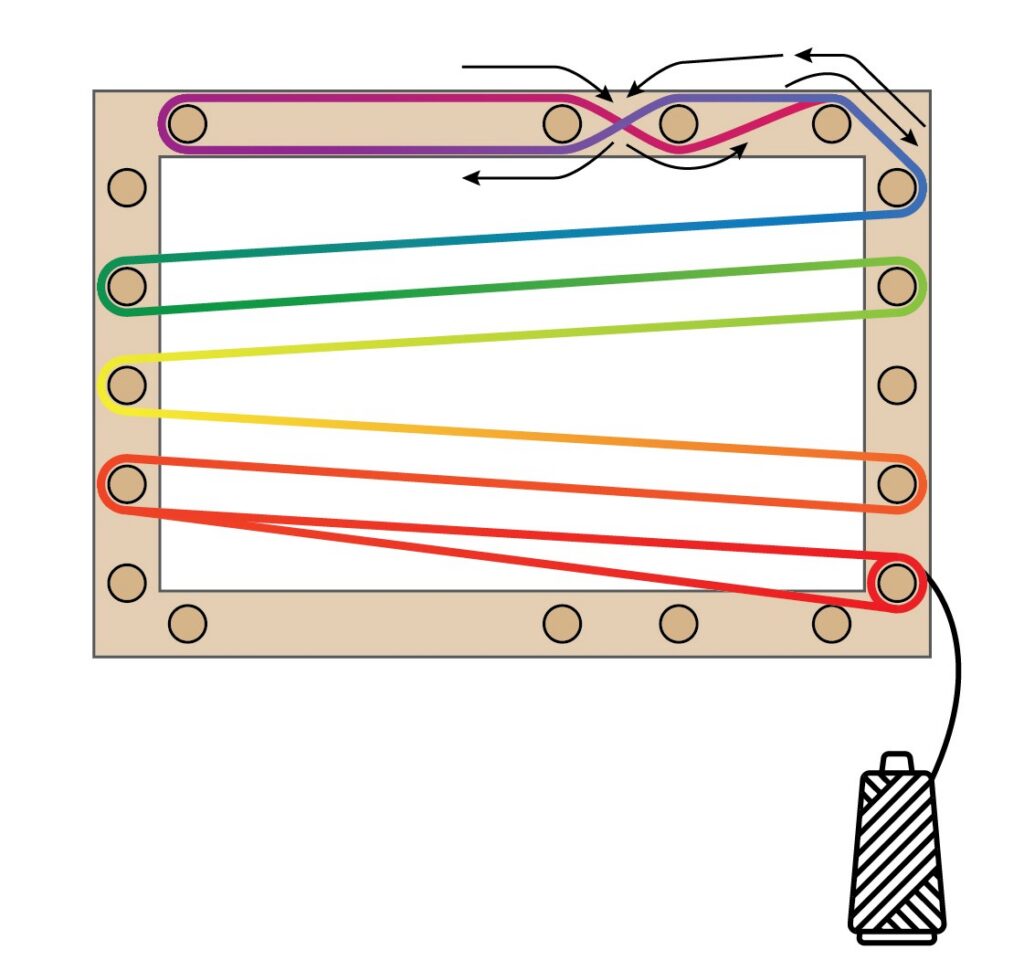
Each color represents one yard. Top row is “waste yarn”.
- Use a contrasting color yarn to set up the path guide. Each horizontal is approximately 1 yard. The setup shown above is for a 5 yard project. In diagram below, the additional two yards at the top of the frame is excess to account for the waste. The crisscross at the top is an extremely important step in the winding process. This alternation ensures that all of the threads stay in order.
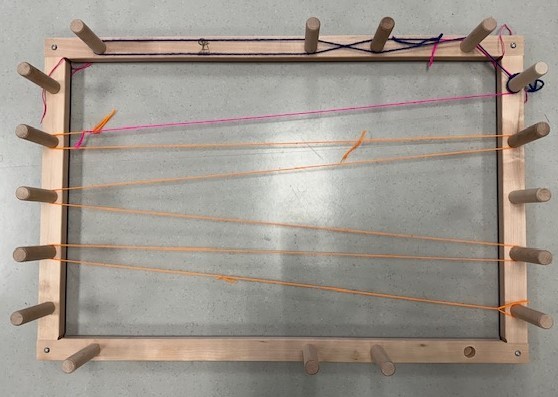
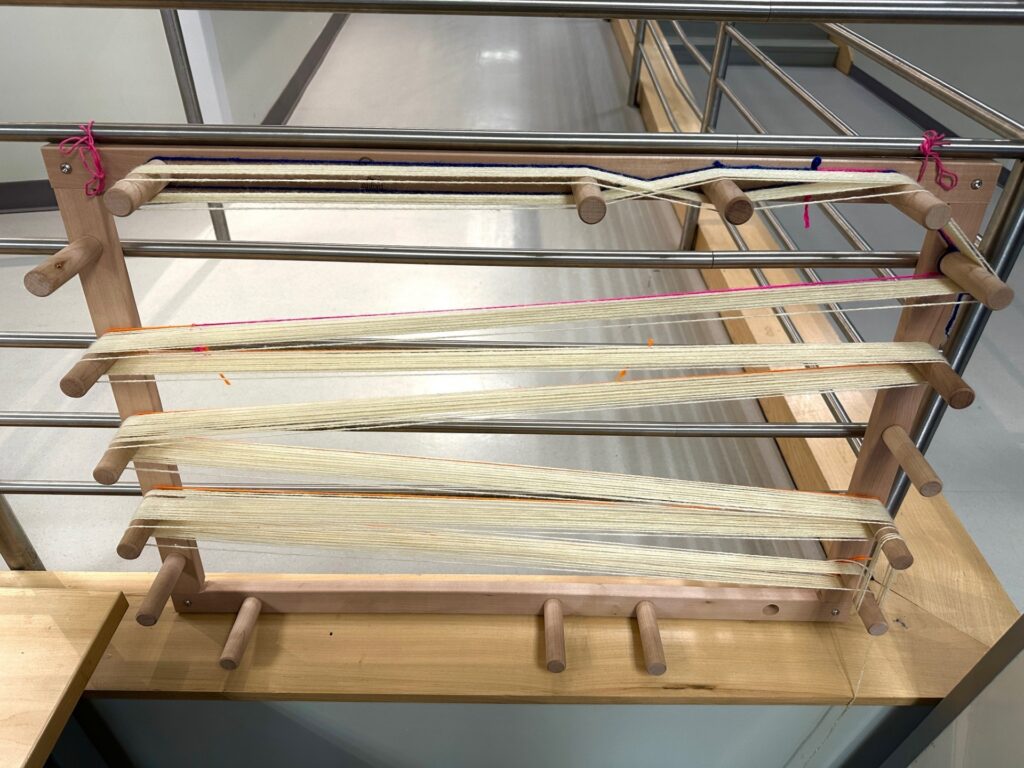
Warping board with guide yard noting desired length.
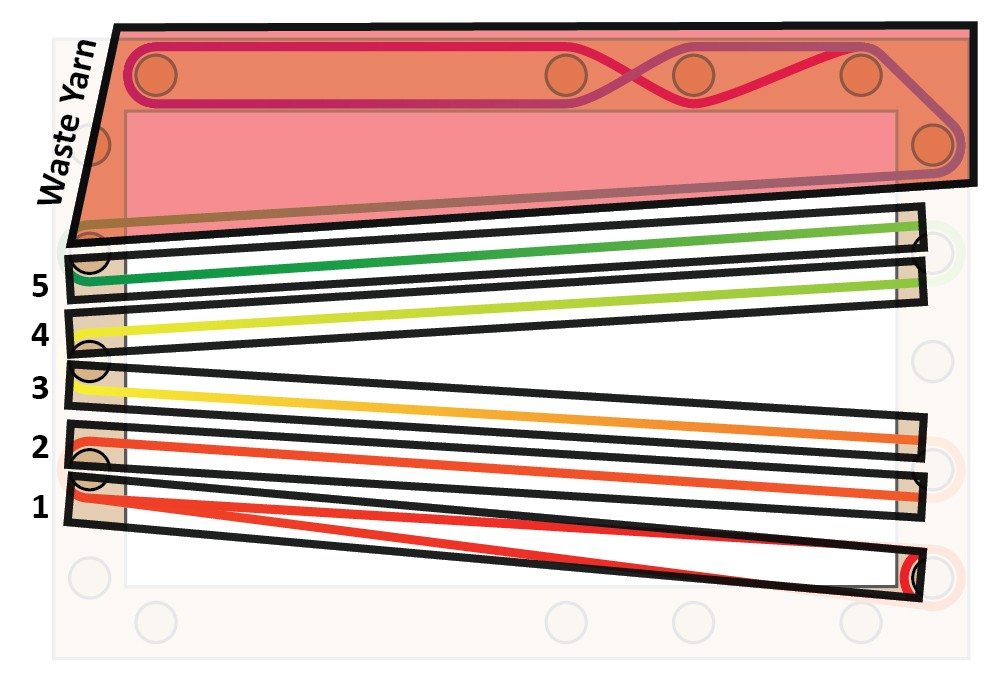
Color coded diagram showing 5 yards of yarn and waste yarn.
After setting up the guide path, start with your warp thread by tying a knot around the bottom right rung and follow the path up and back down repeatedly. For the example I used previously, you would follow the path up 144 times and back down 144 times to get your 288 strands at 7 yards each.
2. After several passes, you’ll want to use some scrap yarn to tie together groupings on the top left rung. This will make thread organization easier in later steps. One method is to tie up groups equal to your EPI. For example, with this thread having 12 EPI, I tied together groups of 6 strings (each string accounts for the path up and the path down)
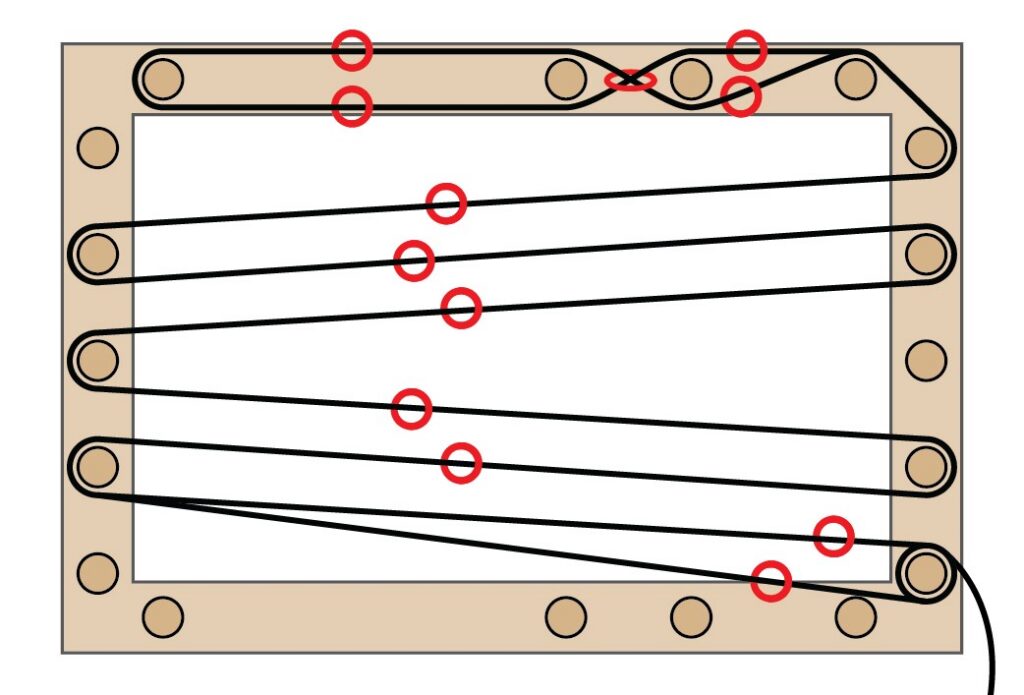
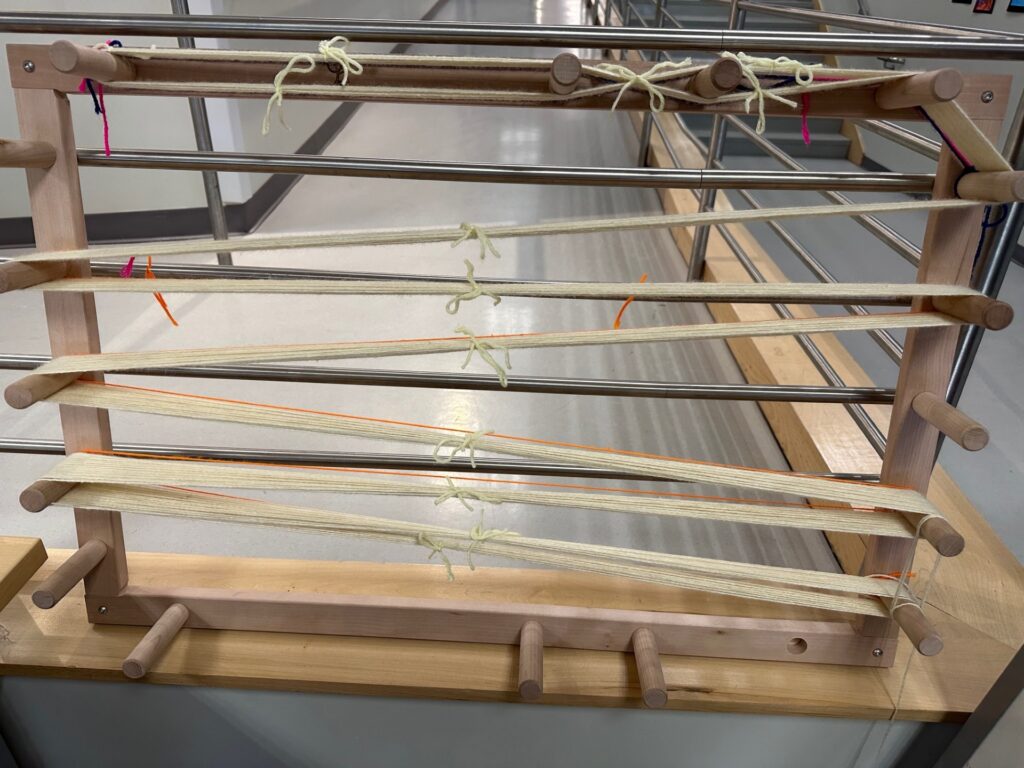
3. After wrapping up a few sets and the rungs are getting full, before removing the threads from the frame, take more scrap yarn and tie double knots around all strings in each of the areas marked with a red circle in the diagram below.
4. After all those groupings are tied up, cut the thread going to your cone and tie the loose end to the lower group of strings by the bottom right rung.
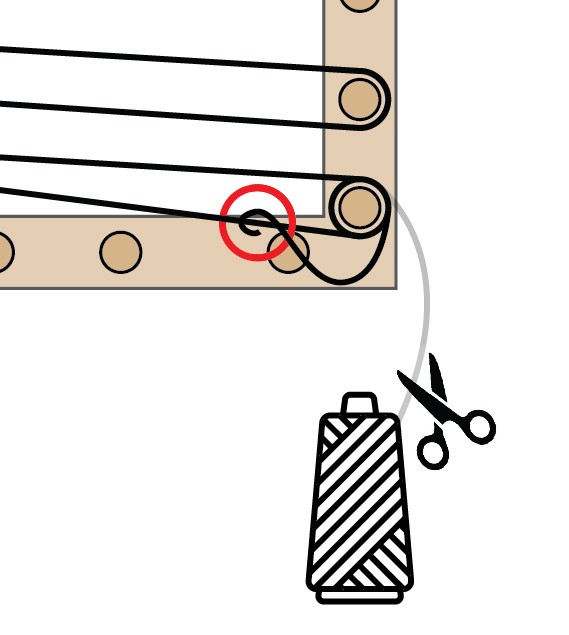
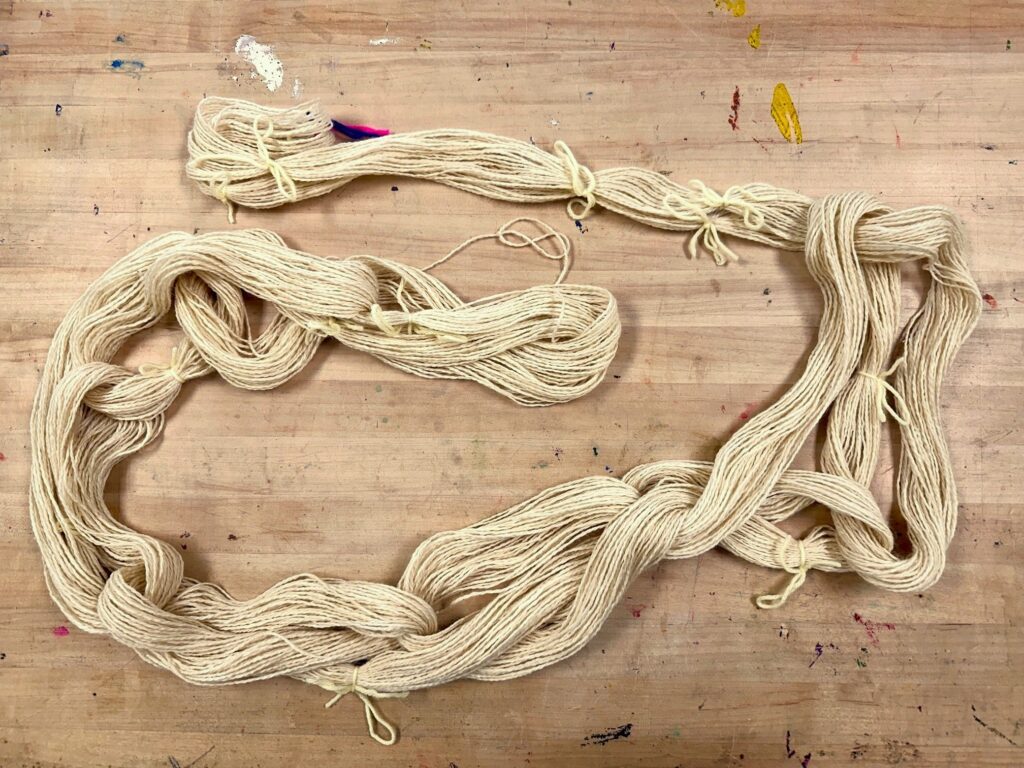
5. Start pulling it off the frame at the bottom right rung. Slip your arm through the ring the rung was through. With your arm inside the loop, daisy chain the strings up until the point of the crisscross. Leave this last section free. You’re now left with a nicely organized bundle. Keep repeating these steps until you have the desired number of threads.
Loading the Threads
- As I mentioned previously, the crisscross section of the winding process is a crucial step. Before we start loading anything else, we want to make sure this section doesn’t get messed up. We’ll do this by sliding the two slats known as “lease sticks” through the two loops on either end of the “X”. Lock them onto the slats with the large key rings.
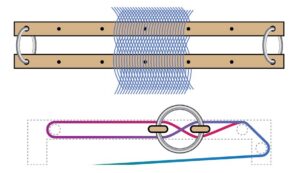
2. At the back of the loom, there are two more slats connected by strings. This is known as the Tie-up bar.
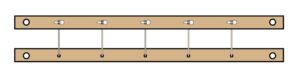
Remove all of the white pegs except for the center one.
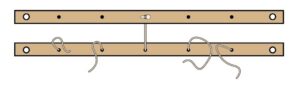
Slide the thread bundles on either side, making sure the same number of threads are on each side of center.
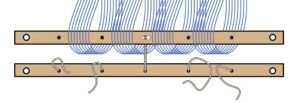
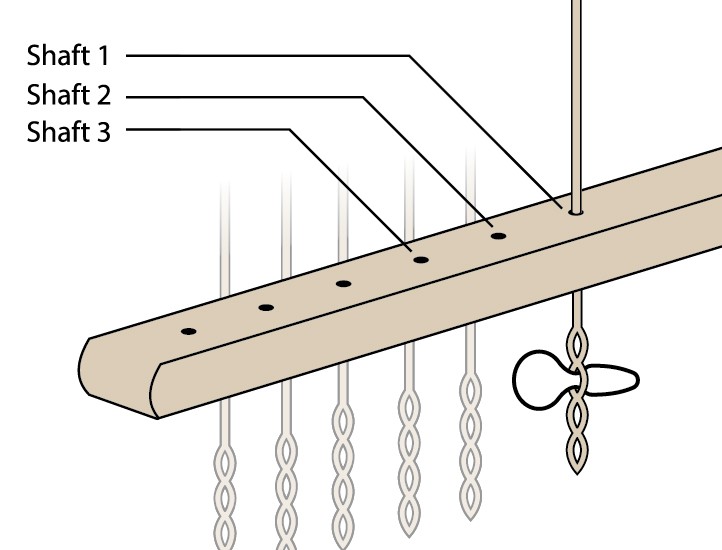
Reconnect the two shafts by rethreading the strings and plugging the peg into the third opening on each string.
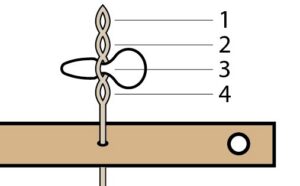
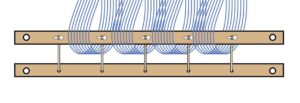
3. Evenly space out the threads from the previous step onto the raddle. Make sure you have the same number of threads on the left half of the center as you have on the right half. Also insure you space out the threads amongst the same number of nails on the left half as you do on the right half. Otherwise, just try to space the threads out somewhat evenly and as straight as possible.
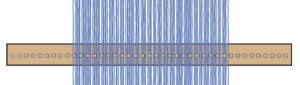
4. Pass the bundles of threads through the frame towards the seat-side of the loom.
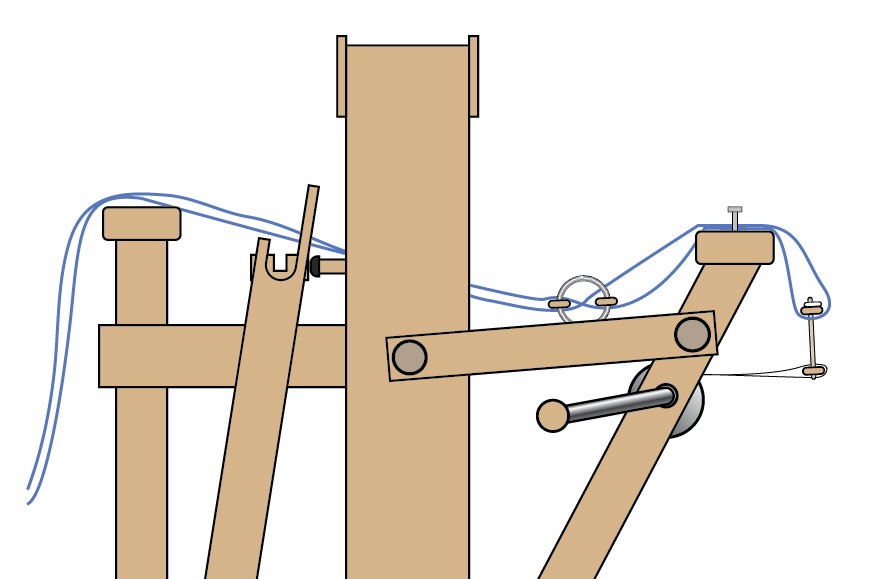
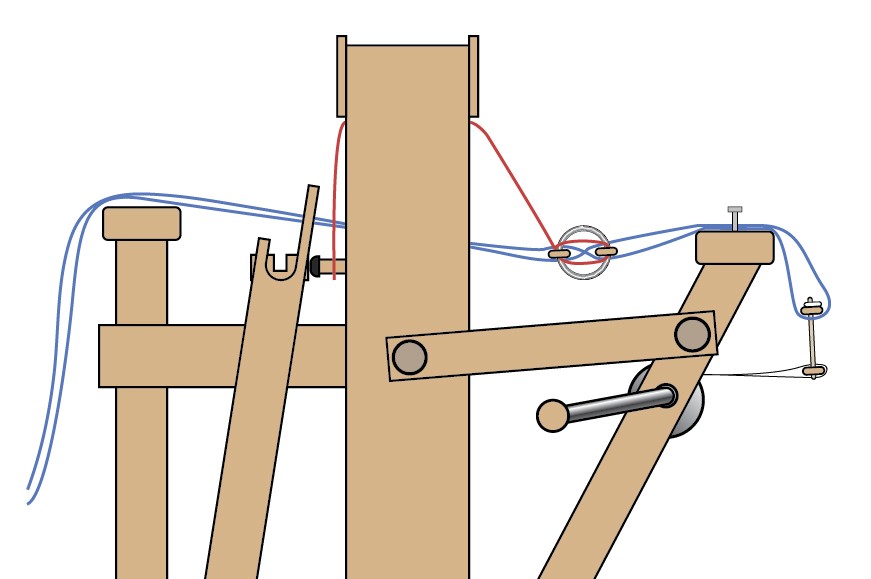
5. If your threads don’t span the whole way across the loom, the lease sticks holding the “X” have probably been hanging down awkwardly. It can be tied to the two sides of the loom to help keep the threading more organized.
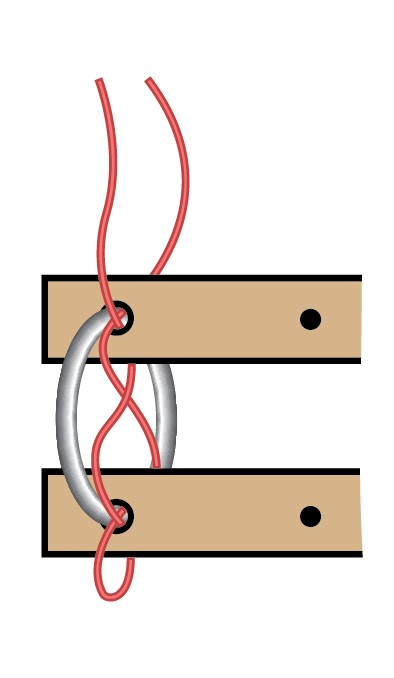
Run a single thread through the holes at the end of the lease stick (where the metal ring goes through). The first thread should enter from bottom to top through both holes. The other side of the string should enter from top to bottom through both holes. Pull both ends through and tie in a double square knot around the “castle” (across the top) or to the sides of the loom, above the heddles.
6. Add the cover over the raddle.
Winding the Warp
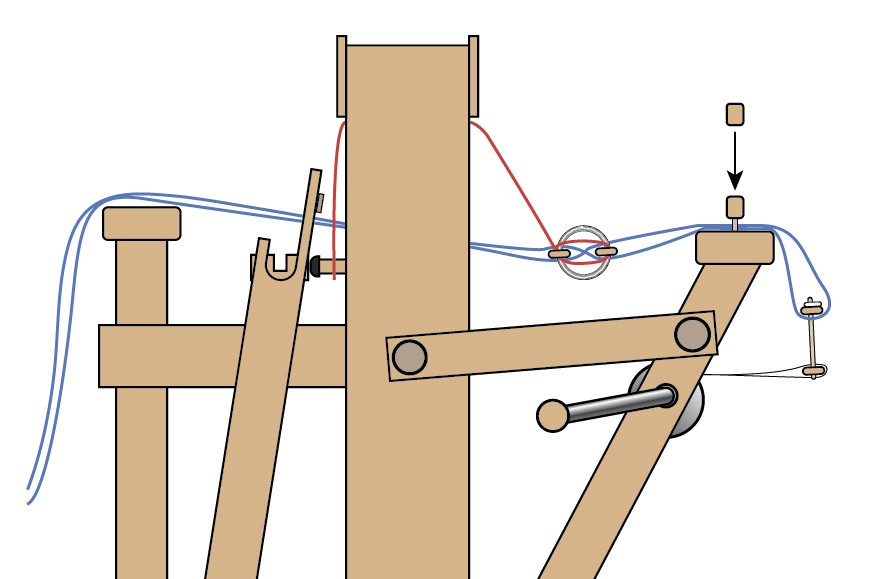
- This step will require two people. One at the bench with their hands on the strings, and the other to the side turning the crank. Grab the threads, dividing the yarn into somewhat evenly spaced chunks between each of your fingers and pull a bit to keep tension on the strings.

Always have tension on the strings while your helper is turning the crank. While they wind it, you’ll watch for any slack or tangles. Instruct your helper to stop turning so you can let go of the strings to work out any of the tangles and pull out the slack. This will be a slow process and there will be a lot of pauses to clean up the threads. The brake is on by default, do not press down on the brake-release during this step. The brake should be ON whenever the crank is not turning to keep the threads under tension and prevent unintended movement.

- As you go, you’ll occasionally need to untie or carefully cut the double knots that were tied before taking the strings off of the warping board. Grab the threads again and repeat. Keep doing this until the threads are near the front beam.
Threading the Heddles
Now that the threads are set up, it’s time to choose the pattern and designate each thread to a specific shaft .
In this loading, we decided to use the 4-Shaft Rosepath pattern. Now we need to calculate how many heddles will be used on each shaft.
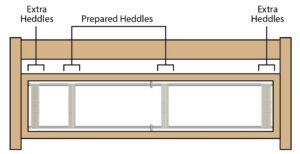
For example, if we have 288 strings in total. That’s 144 strings on each half of the loom. Divide that by the 4 shafts, and we get 36 heddles on each of the first four shafts on the left and 36 heddles on the first four shafts on the right half.
288 ÷ 2 = 144 (threads on each half)
144 ÷ 4 = 36 (heddles on each shaft [on left and right half])
To prepare the heddles, you’ll count and slide the needed heddles towards the left of each half as shown in the diagram below.
How to Read the Warp Threading Draft
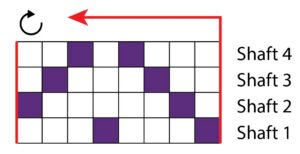
Each row on the chart represents the four shafts being used. The pattern is read from right to left. Likewise, the strands on the loom are threaded through the heddles from right to left. With this pattern, we thread the strings into the shaft heddles in a repeating pattern of 1,2,3,4,1,4,3,2. When threading the heddles, make sure to carefully thread the strings in the order they are laid out on the lease sticks. This is where the “X” that you created on the warping board comes in handy! The first yarn will be under the lease stick closest to you and the next will be over; you will continue choosing yarns in order as you thread across the heddles.
After threading some strings, slip-knot groups together to help with organization and double-check that everything is placed correctly. I preferred to tie off each set of 8 threads before I started to repeat the pattern.
Threading the Reed
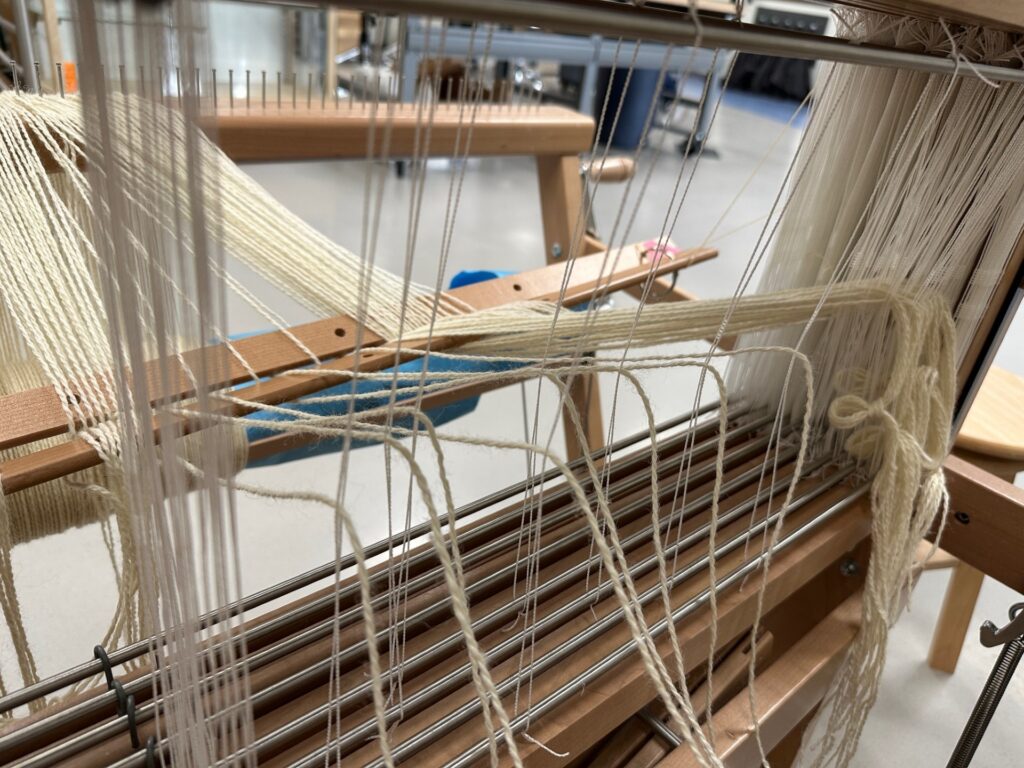
After all the threads have been carefully threaded through the heddles, attach the reed to the beater.
Roughly find the center point of the reed, and thread one string through each slot. Work from the middle outward towards each side. Once again, after threading a few, slipknot some groups together to help with organization and ensure threads don’t get pulled out of the comb/reed.
Remove the Lease Sticks
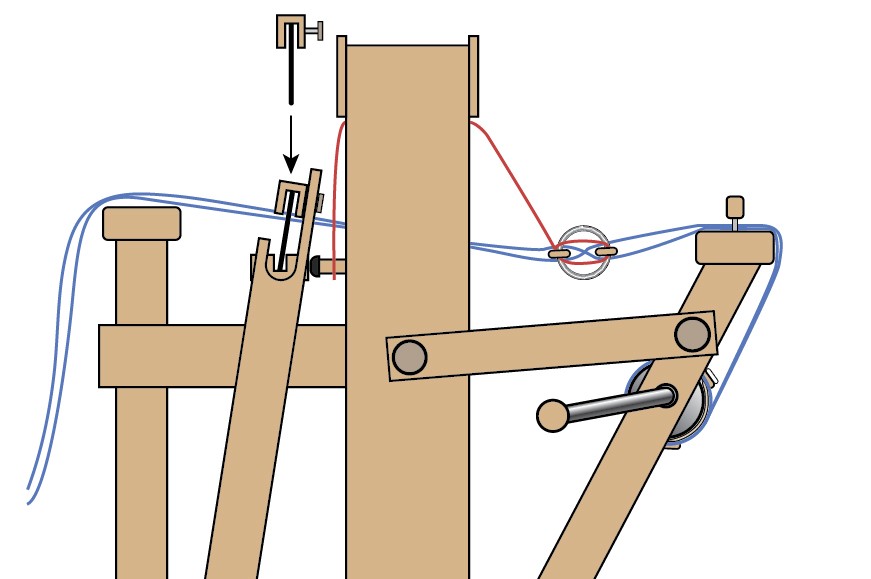
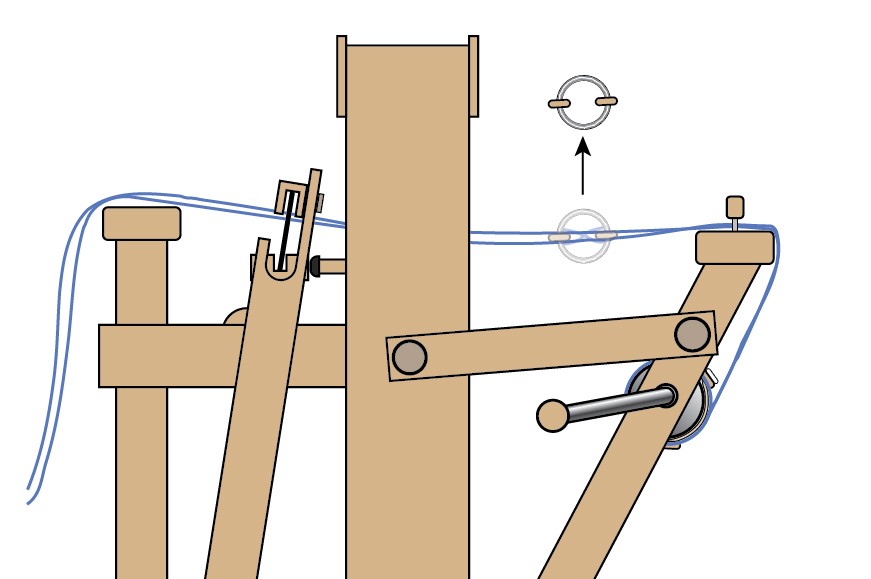
Now that everything has been threaded through the heddles and reed, all the strings are secure in their proper order. This means we can remove the central slats (or lease sticks) that were holding the “X”. Open one of the key rings and slide them out.
Secure the strings to the Take Up Wheel
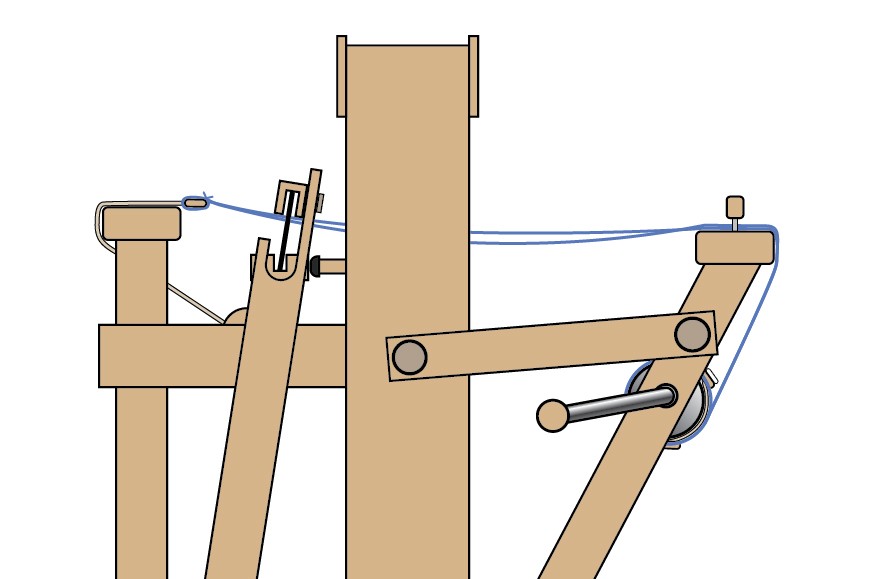
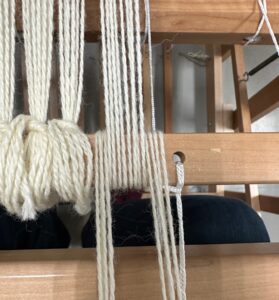
Wrap each group of strings over the front beam and prepare to attach to the take-up roll , Using even-numbered groups of yarns, separate the left half of the strings from the right half, run them over and around the leader rod, and half-knot them together on top of themselves. These half-knots will be secured later.
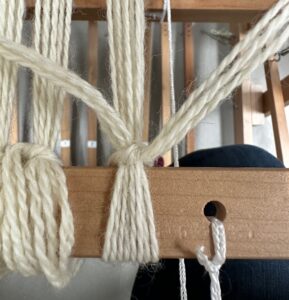
Tighten and Tie Off the Strands.
The loading is nearly complete. But first, the strings need to be set under tension and the tension must be uniform across all the yarns. Pull a group of strings towards the base of the loom and tighten the half-knot. Do not work from one side to the next. Instead, jump around between the groupings across the whole width. As you tighten some strings, others will gain more slack and need to be retightened. This step is very repetitive and feels like it will never end. Once all strings have a strong, even tension, tie a second half-knot on top of each of the groups again to create a square-knot or granny-knot. This will secure each group and lock in the proper tension.
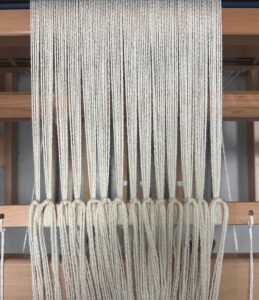
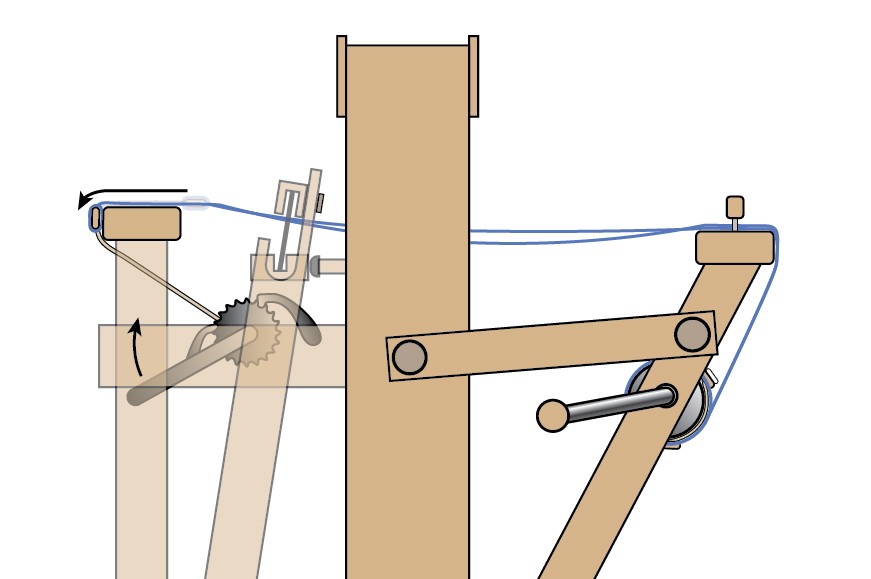
After tying off all the threads, while pressing down on the brake release, advance the warp by pulling up on the metal crank on the right side of the loom when seated. Lift and lower the crank a few times until the slat wraps around the edge of the frame.
Tie Up the Treadles
Each of the treadles (foot pedals) will need tied to operate one or more shafts when pressed. To the right of the warp threading draft, you’ll see another grid. This is known as the “tie-up grid” or “shaft combination”. Each column represents a treadle, while the rows, represent the shafts. For example, in the chart below, Treadle one is tied up to lift shafts 1 and 2. Treadle 2 is set up to lift shafts 2 and 3. The chart may show setup instructions for more treadles than your loom has.
The most important treadles to set up are the columns I’ve labeled as Treadles 5-8. Even if you have only these four treadles tied up, you will be able to lift every combination of strings by pressing multiple treadles at once.
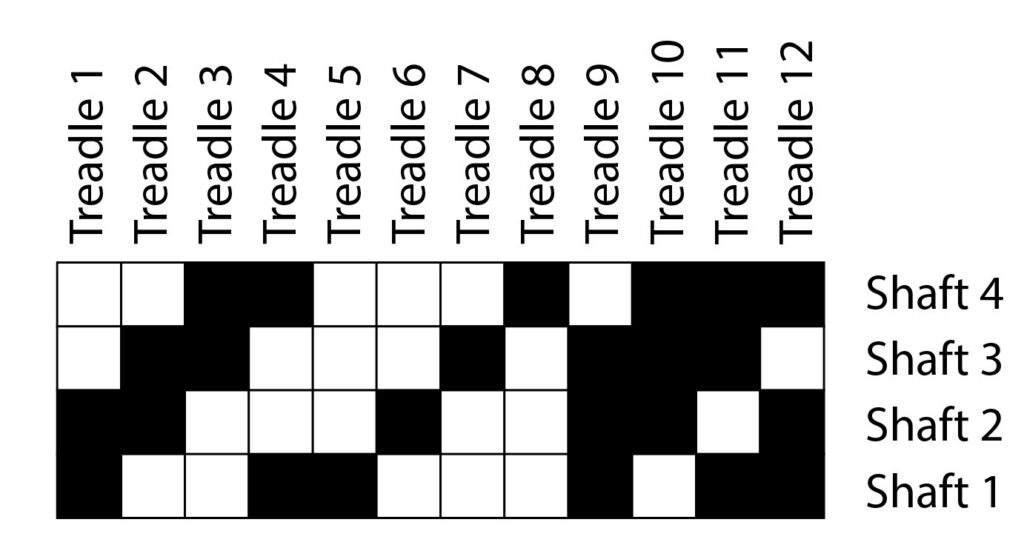
We have numbered our treadles 1 – 8.
1 – Shaft 1 & 2
2 – Shaft 2 & 3
3 – Shaft 3 &4
4 – Shaft 4 &1
5 – Shaft 1
6 – Shaft 2
7 – Shaft 3
8 – Shaft 4
We also have the two treadles to the left of “1” tied up.
One tied up to shafts 1 & 3
The other tied up to shafts 2 & 4
This is not shown in the above chart, but with many heddle patterns, this will lift every other string allowing for a basic twill pattern.
To connect a shaft to a treadle, find a string connected to the appropriate shaft and thread it through a hole on the treadle and plug it with a white peg. While you could thread it through any hole on the treadle and it would work, it is good practice to designate specific holes on the treadle for specific shafts. This will make it easier to read which treadles lift which shaft(s) at a quick glance.
With that finished, the setup is finally complete! We can now weave our 5 yards of fabric before we get to repeat this whole setup process.
Now that you know how to read the heddle setup and tie-up charts, it would only make sense for me to also explain how to read the weft patterns.
Reading the Weaving Draft
If you’re looking at a pattern, underneath the tie-up grid, you’ll see colored blocks known as the weaving draft. This is read in combination with the tie-up grid. The pattern is read from top-to-bottom and shows which treadles to press which may include more than one shaft at a time.
If you don’t have enough treadles to set up all 8 used in this pattern, you’ll want to pay close attention to which shafts are used in each column. For this pattern, the shafts used will follow this order:
4,3,2,1,4,1,2,3,4
(1&2),(2&3),(3&4),(4&1),(1&2),(4&1),(3&4),(2&3),(1&2)
Repeat
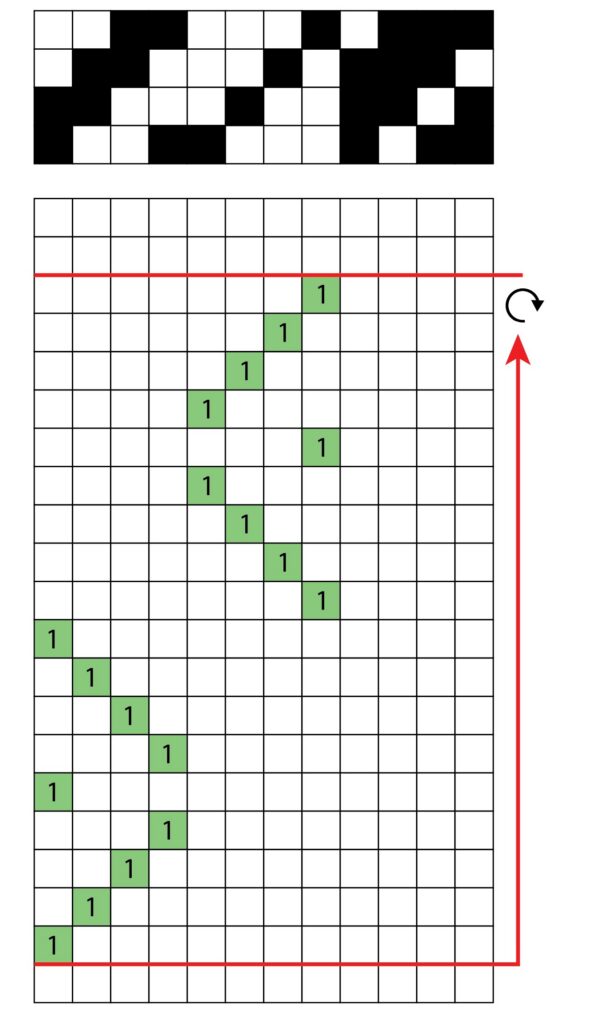
As you can probably see, the second half of this repeating pattern is more complicated because each weave uses two shafts instead of just one. That’s the benefit of having more treadles on your loom. If you have all 8 treadles used in this pattern, (assuming you have your treadles set up the way we do) you can simply read it as:
8,7,6,5,8,5,6,7,8
1,2,3,4,1,4,3,2,1
Repeat
If you’re in the space while the loom is set up, let a staff member know and we’ll show you the basics on how to weave some rows. If you’d like to work for a while and have a project to eventually take home, we’d advise making a reservation. If you don’t see the floor loom as an available piece of equipment, it is likely not set up and ready to go. After you’ve come in for your reservation and completed your project, we will advance the warp so patrons can continue to weave without affecting your project. Once the entire warp has been woven, we will remove it from the loom and notify you that your project is ready for pickup.
I hope you’ll find time to come in and weave while the loom is set up! Don’t forget to share your creations on the Ignite Community Discussion Board. Happy Weaving!