

by Cindy P.
Welcome to our Embroidery Machine in the Ignite Maker Lab in Noblesville!
You can embroider onto various items such as clothing, towels, tote bags, hats, etc. The possibilities are endless! You can use your own designs or premade designs.
Ignite Maker Lab BAI Embroidery Machine
Selecting a design
Our machine works with .dst files. For premade designs you can search online for “(design interest) dst embroidery file”. For example, a search could be: cat .dst embroidery file. There are many websites where you can download free or paid designs. Patrons may also create their own designs using the Embrilliance software available in the Maker Lab.
Machine Settings
There are 2 modes that are on the BAI touch screen, Ready Mode and Embroidery Mode.
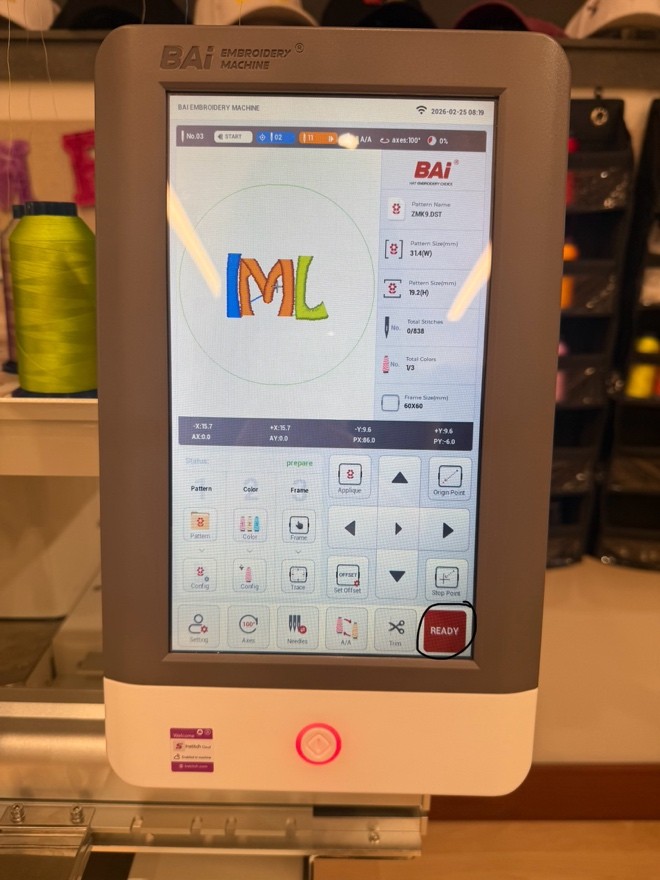
Ready mode.
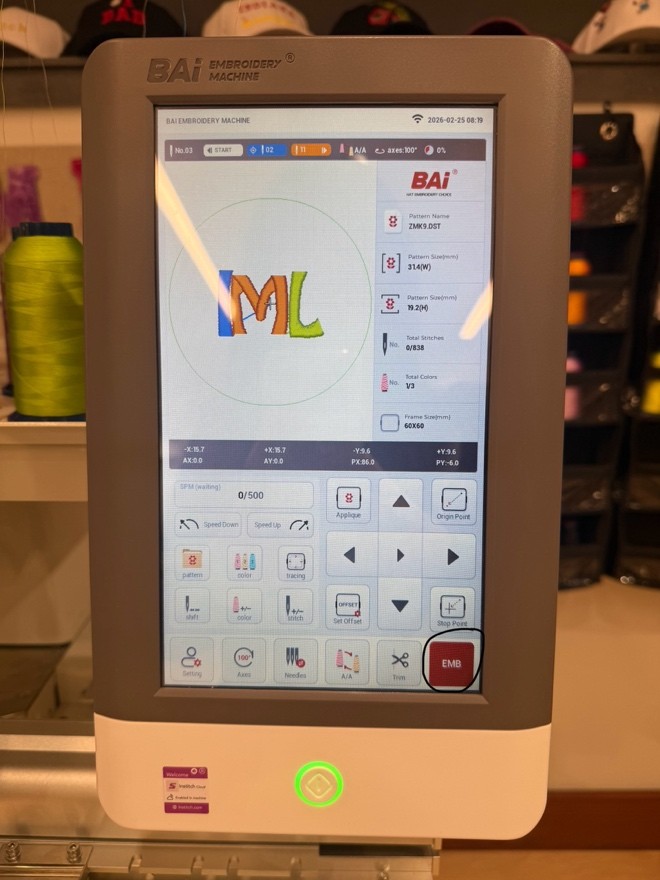
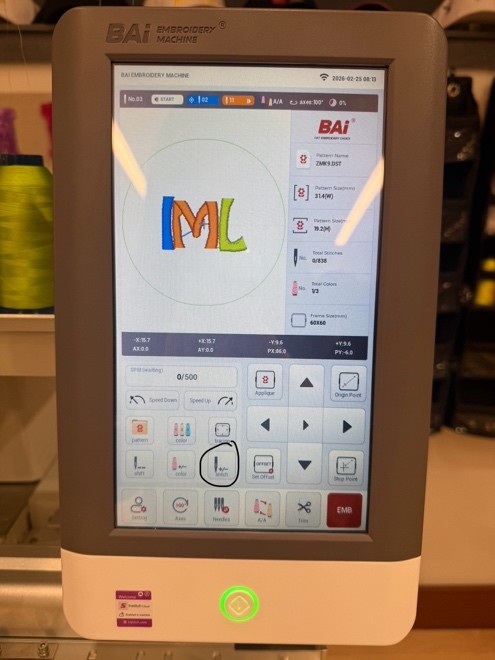
Embroidery Mode.
You will want to complete the whole setup process in Ready Mode. The steps are labeled 1 through 3. Step 1 (Pattern) is selecting a design. This is where you will import your design from the flash drive to the machine library. From there, you will select your design from the library. Step 2 (Color) is where you select the colors you want to use. The machine can use up to 15 colors at once.
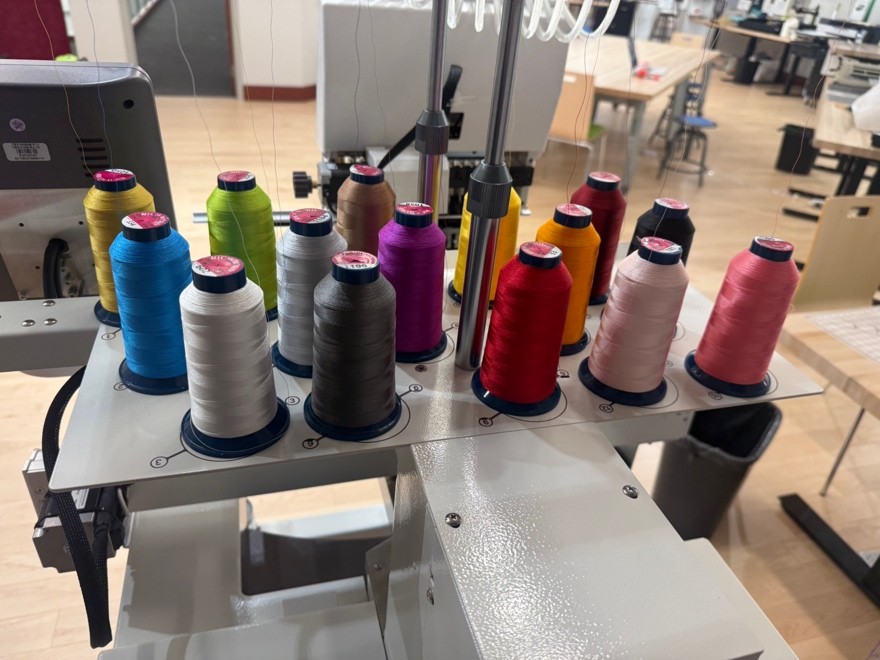
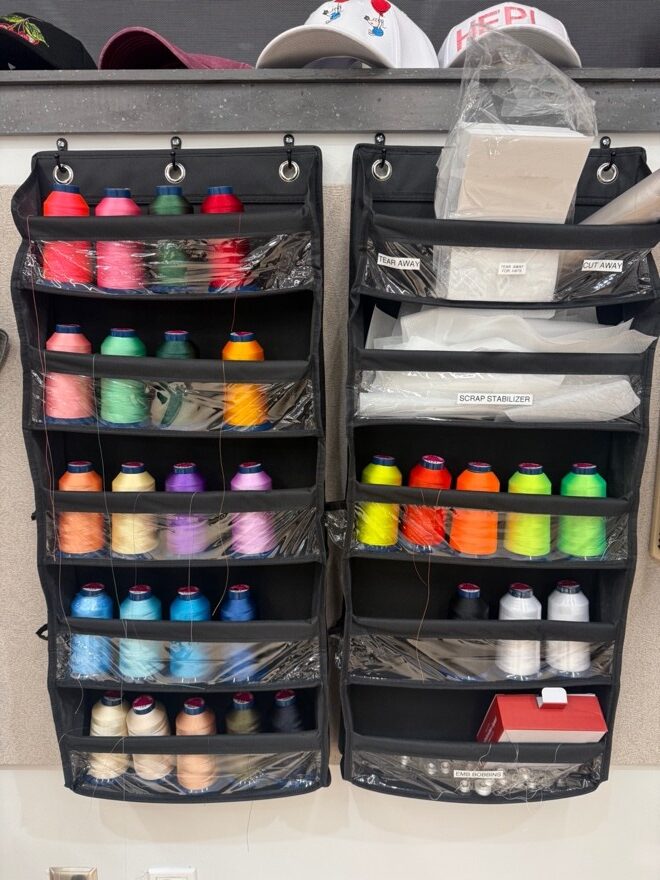
We have a large selection of threads that are free to use! Staff are happy to assist with changing thread colors to your preference.
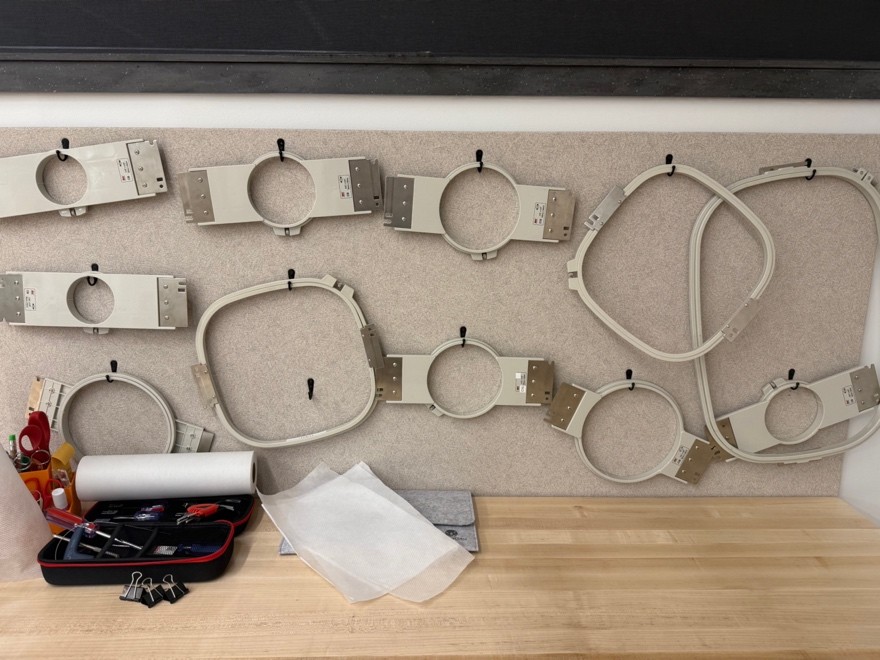
Step 3, Frame, is where you select what size frame you are using. You will position your material into the frame and load into the machine. On the touch screen, there is a Trace button where a red light will highlight, roughly, where the design will be stitched on your fabric. We recommend always tracing your design before starting to sew to ensure correct placement and space within the frame. After completing your configurations, you can then switch to the embroidery mode. Once in embroidery mode, if you want to change the stitches per minute (highlighted below), you can adjust in the upper left corner.
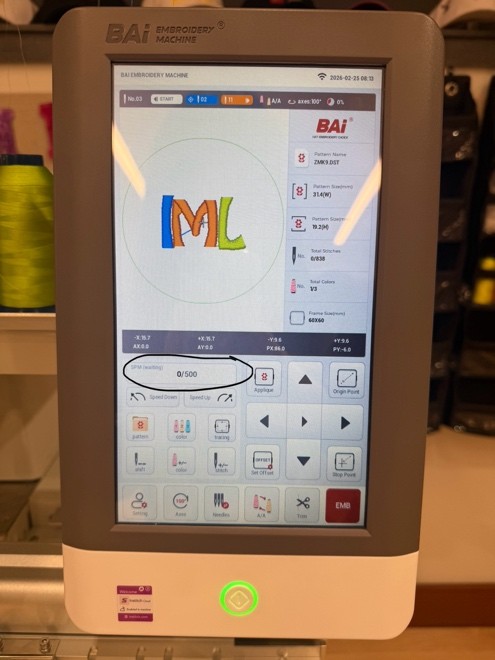
400 to 500 stitches per minute is the recommended speed to maintain design quality. When you are ready to start stitching, press the green lit button below the touch screen.

If the machine misses a stitch, you can use the stitch button to go forward or back stitches.
If there are any configurations you want to change, the machine must be switched into ready mode. When you are ready to stitch again, return embroidery mode. Your project will not start unless it is in embroidery mode.
Hats vs Flats
The embroidery process for flat projects and hats is the same. Flat projects will be anything that is loaded onto our hoop frames such as shirts, sweaters, jeans, etc.
Hats are loaded onto a hat hoop.
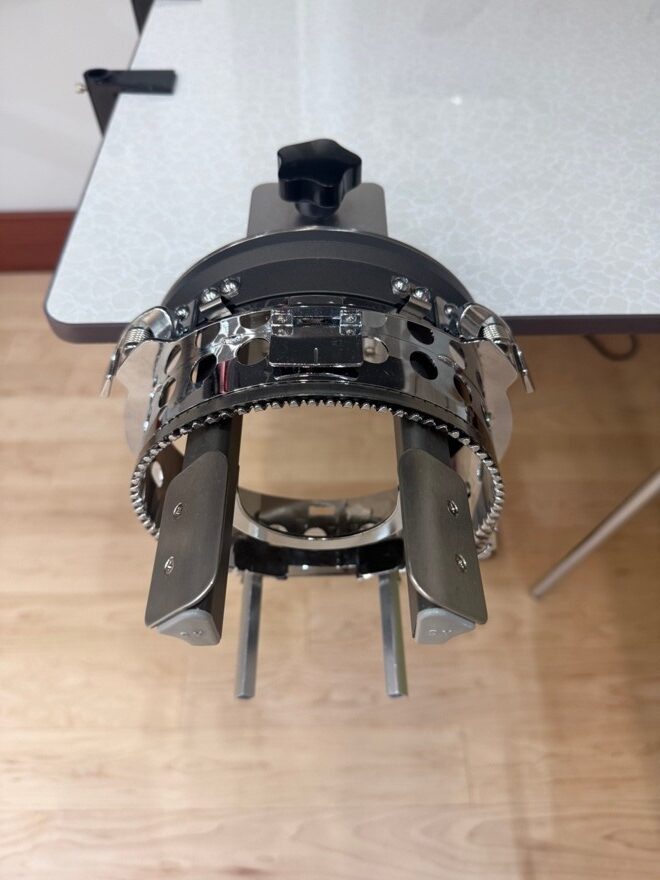
The housings for flat and hat projects are different. We ask that you request staff assistance before changing from one type of frame to another.
Tutorial Videos
To use our machine, please complete the online certification and then book a reservation with us for the in-person portion of the certification.
You may learn more about designing/digitizing files HERE.
Here is a tutorial video on how to use the Embrilliance software on our computers.
To use the machine, book a reservation with us at Noblesville! Happy Making!
