
")
by Wil C.
This is the second blog on how to use Orca-Flashforge, a slicer software for 3D printing. Part 1 focused on the basics of the program so be sure to read that one before you start this one! This blog will focus on a useful feature in this program that allows you make simple edits, or create simple models, directly in Orca-Flashforge.
Like mentioned in the first blog, these instructions assume you have already been certified to use Ignite’s 3D printers. If you are not certified, you can go through the first part of certification here before scheduling the second in-person certification part.
Single Model Vs. Assembly
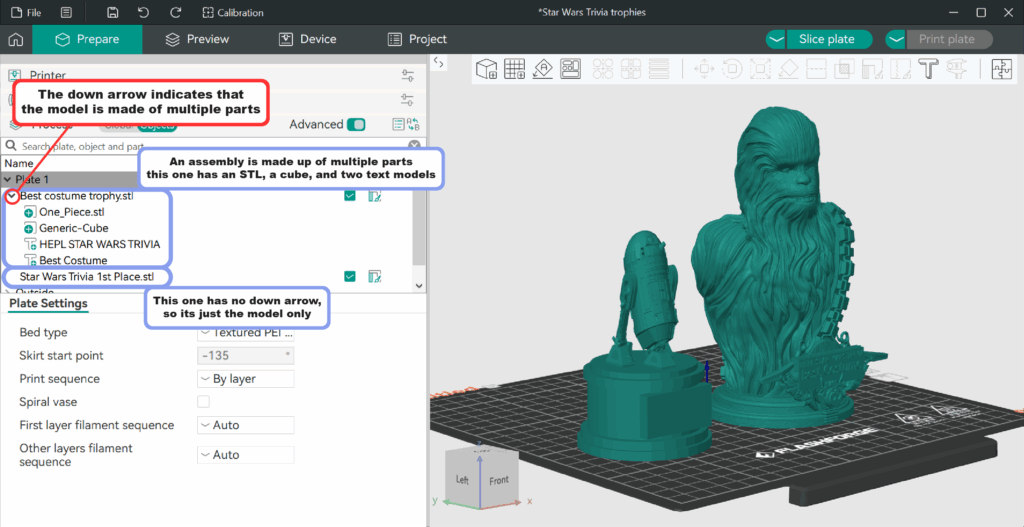
Before we start looking at changing a model or settings, we should define the difference between a “single model” and an “assembly.” When you import an .STL file into Orca, it is placed as a single positive model. A “single model” like this will print exactly as it looks. An “assembly” is multiple models that are put together as one when you slice the plate. A “primitive” is a 3D geometric shape that can be used as a building block for creating more complex models. Any assembly is multiple primitives placed together. The following image shows what an assembly looks like.
Adding Primitives
Now let’s get to adding some primitives! The directions in this blog will help you make a little keychain model that you can 3D print.
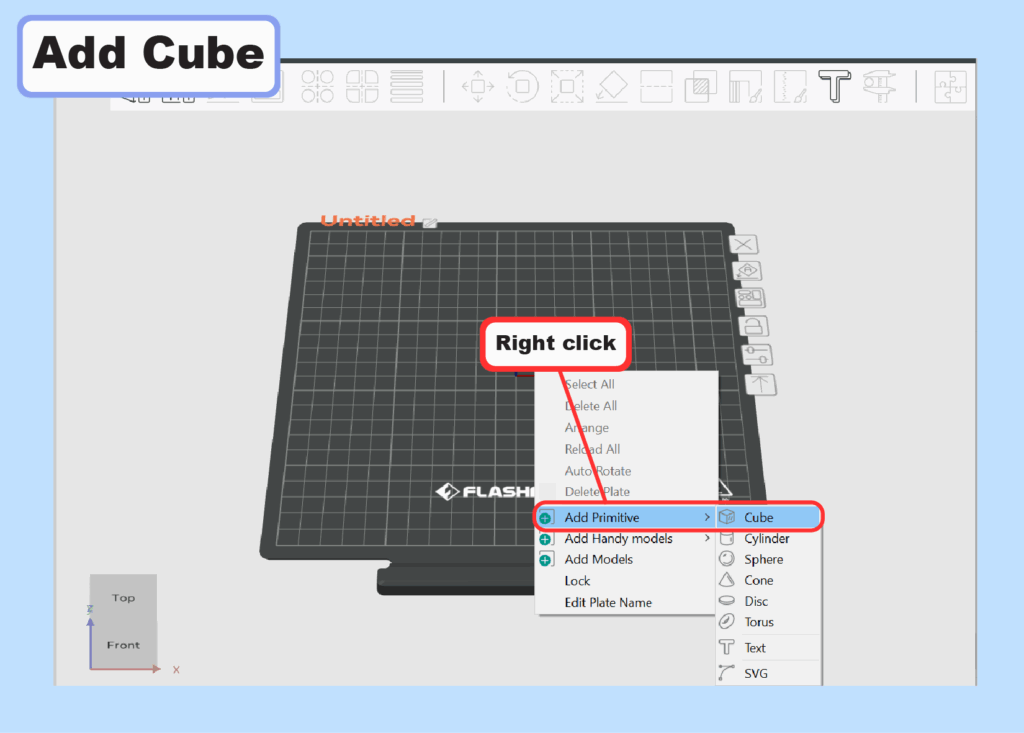
The first step to creating an object is to add a primitive. To add a primitive, simply right click on the workspace within the Orca-Flashforge software. If you already have a model, you can right click on the model to add a primitive to the model and create an assembly. When you add a primitive to an already existing model, you have many more choices for customization. Here is an overview of what each modifier choice means:
- Add Part: Adds a solid part to the assembly to print
- Add Negative Part: Adds a part to the assembly that will cut out of the model
- Add Modifier: Adds a shape within which you can change the print settings of how the model is printed inside that area.
- Add Support Blocker: Adds a shape that makes it so supports are not generated inside that area.
- Add Support Enforcer: Adds a shape that makes it so supports are generated inside that area.
- Height Range Modifier: Allows you to change the print settings of a model within a specific height range.
Now that you know the basics of primitives, let’s use these options to create our project.
Text Keychain
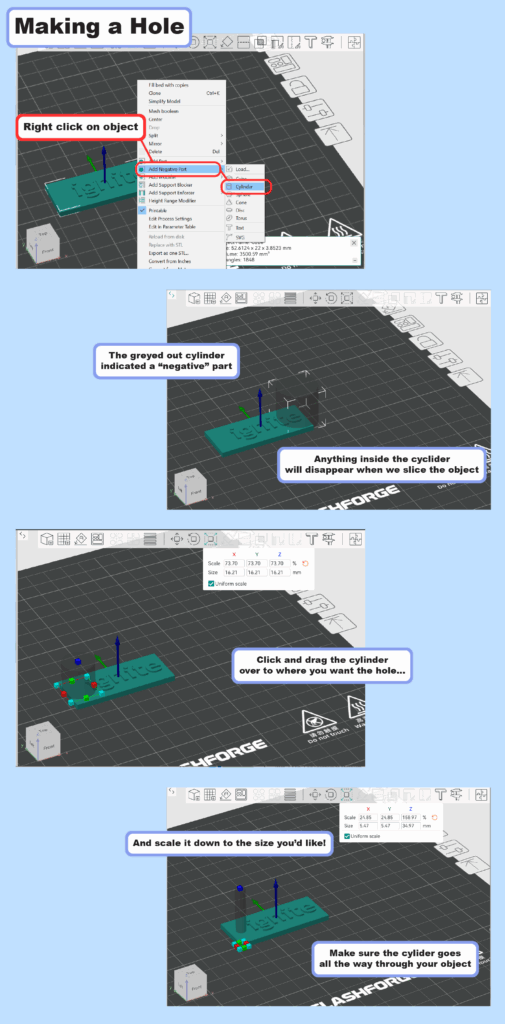
First, we will make a text keychain. Start by adding a cube primitive.
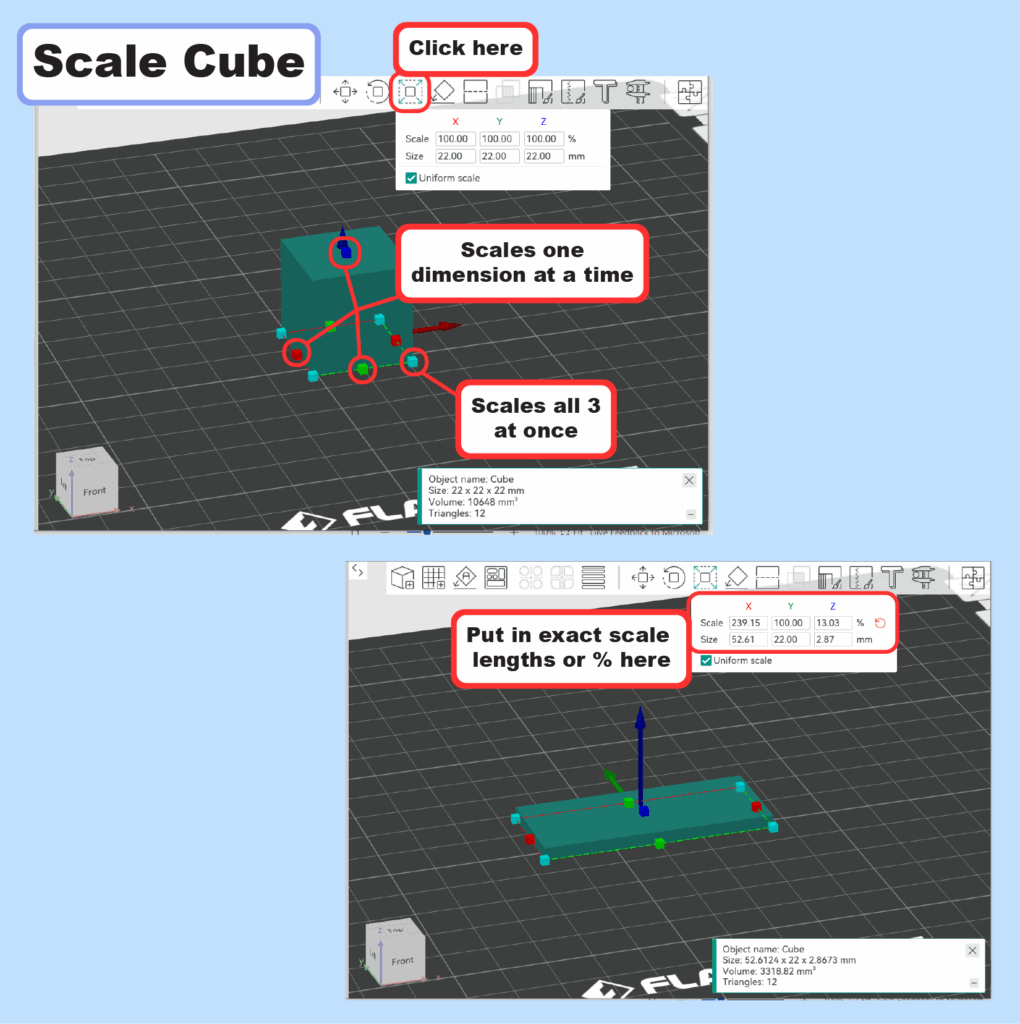
After right-clicking in the workspace and adding the primitive, we will reshape the cube to be longer and with a shorter height, so that it makes a better keychain!
Now that the cube is longer and shorter, we’ll now add text.
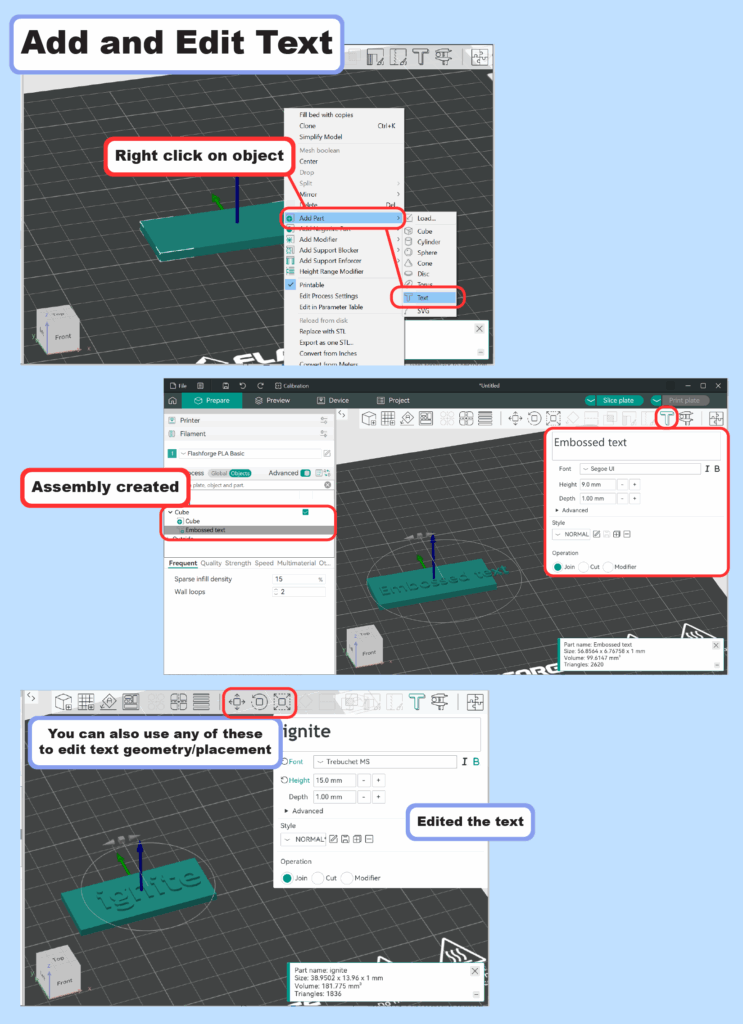
You can pick any text you’d like. If you find that your text isn’t fitting on your cube, you can edit the cube to make it longer so that it fits the text. You’ll also want to leave some space on one of the ends so that we can add a hole for our key ring. Let’s do that now!
Now that all your parts are together, we can slice the plate and make sure everything seems okay.
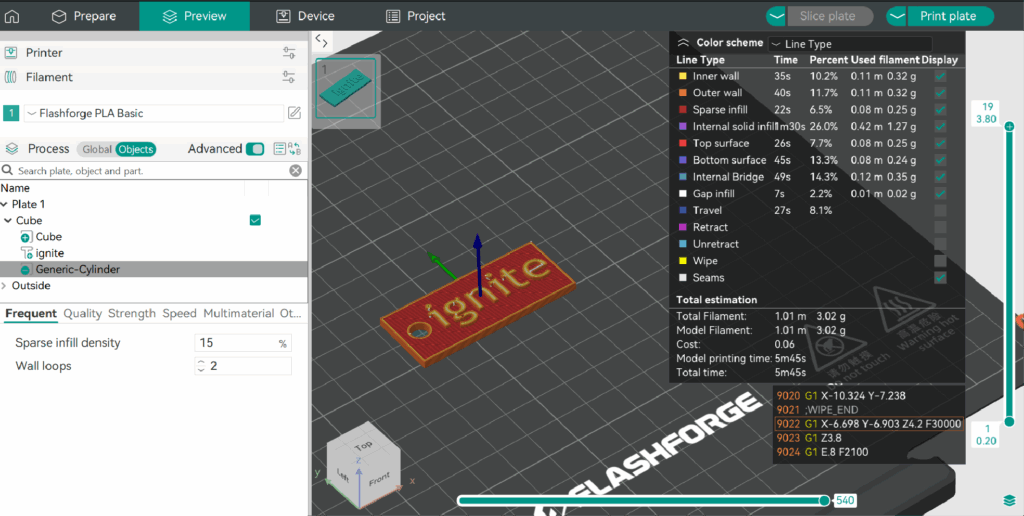
If the text and hole look good, all you need to do now is export the .Gcode file for printing!
SVG Keychain
If you want to 3D print of some kind of image, you can try using an SVG file (Scalable Vector Graphic). SVGs can be imported into Orca as a primitive. You can find SVGs online or create your own by using Adobe Illustrator or Inkscape. You can also turn some images into SVGs using this free Adobe tool. Note: Making SVGs this way works best with simple black and white images.
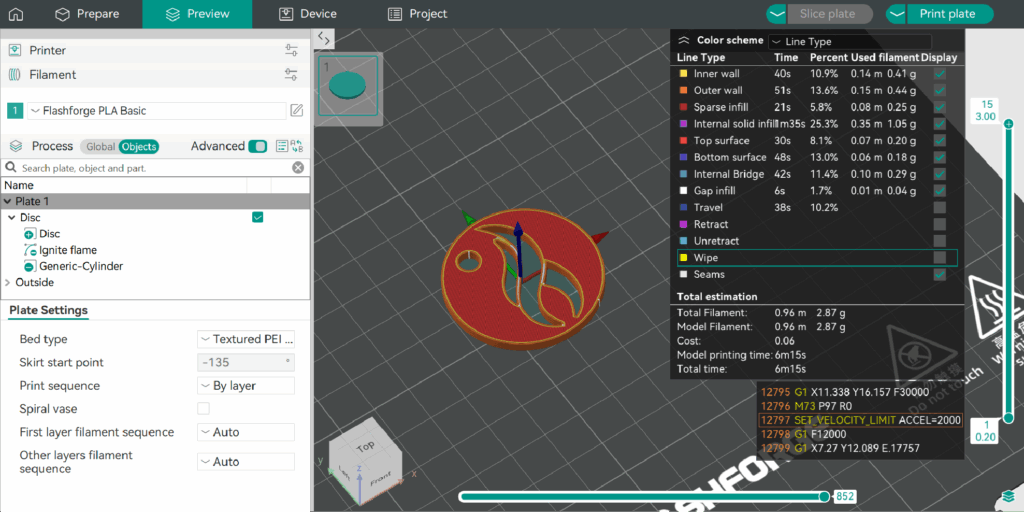
Now let’s practice making another keychain with an SVG instead! We’ll begin by making a disc shape as a base for the keychain.
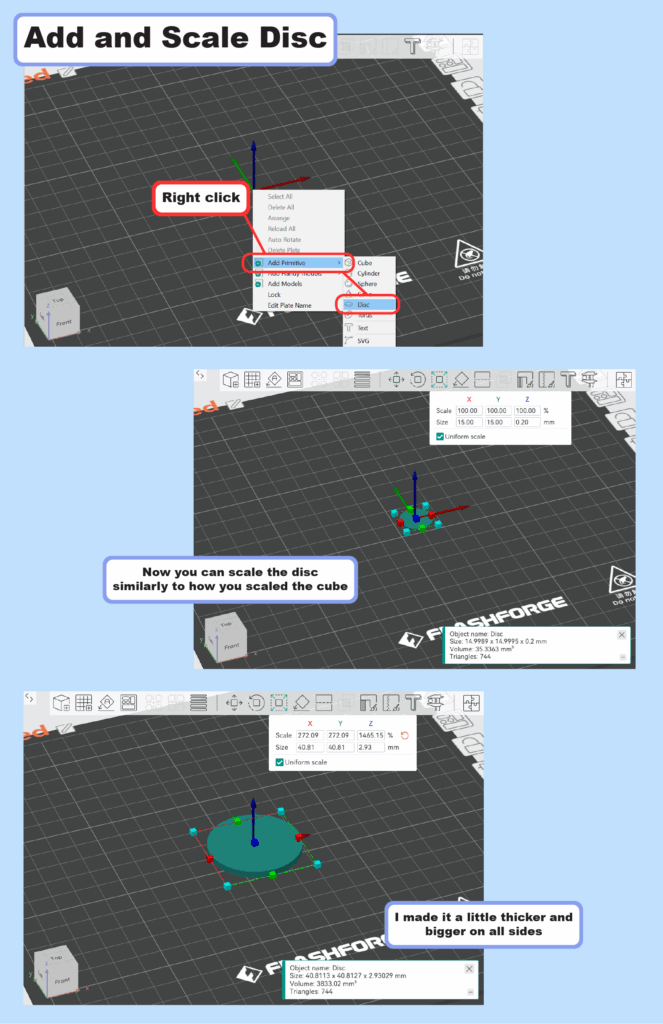
After adding and scaling a basic disc shape, we will add in our SVG. You can either add it as a part if you want it to stick out with some height from the disc like the text keychain did, or you can add it as a negative part if you want it to be cut out of the object. This example adds it as a negative part.
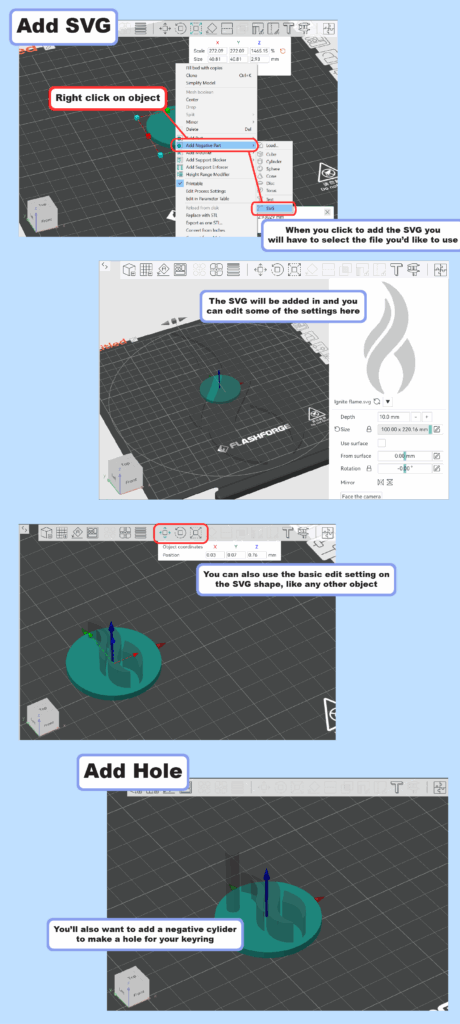
Now that we’ve added the SVG and the hole for the keyring, we can slice the plate to make sure it looks alright. If it does, you are ready to export and print!
I hope this guide helped you learn more about Orca-Flashforge and how to make your models better using primitives. Post your 3D printing questions and successful makes on our Ignite Community Discussion Board. Happy printing!
