by Jared Hart
Whether you want to create some fun shapes and characters, or add some extra customization to your projects, laser engraving can be a fun option to explore. I’m going to walk you through the steps of how to laser engrave your own rubber stamp using Ignite Studio’s Fab Lab.
The main thing you’ll need in order to get started is a rubber stamp sheet for a laser engraving machine.
NOTE: Make sure to order rubber that is laser engravable. Please bring a receipts or order form to show a staff member so we confirm it is okay. Not all rubber is safe to use in the laser engraver.
I will be sharing the settings I used on Ignite’s laser engraver with my stamp material (linked above). The settings you need may vary if you have a different material or are using a different engraving machine.
Prior to using Ignite’s laser engraver for the first time, we require that you take our short certification course. If you need to do that, you can get started on our website HERE.
How to Laser Engrave Your Own Rubber Stamp
Using everything you learned in the certification process, you can create your stamp design. Make sure your settings are set to scan. I’ve used this logo in the past to engrave on wood. To turn it into a stamp, I needed the text to be raised rather than engraved. To fix this, I simply drew a box around my logo on the same scan layer. This adjusted the results to engrave everything except for the text.
IMPORTANT NOTE: Before starting your engraving, make sure to mirror your design using the button on the left toolbar so it will appear correctly when stamped.

Once you have your Scan layer set up, you’ll want to add a cut layer to cut out your engraved stamp. I selected my rectangle, and copied (CTRL+C) then pasted (CTRL+V) another version. Switch the new rectangle to a new layer and designate it “Cut.” To align your two rectangles to be in the same position. Select the one that’s out of place, then SHIFT+Click the rectangle you’d like to align it to.
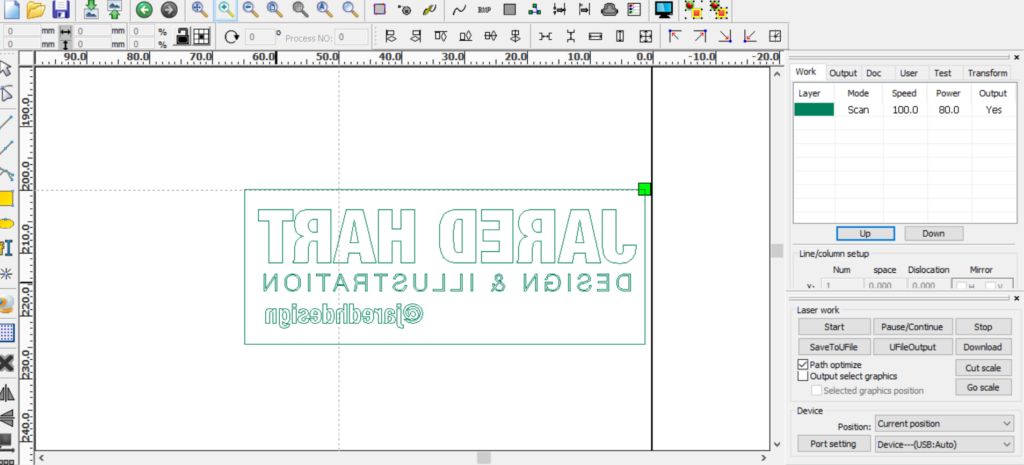
Then click both the Horizontal Align and Vertical Align tools in your top toolbar.

Now that all of the artwork is ready, we just need to adjust the machine settings before downloading it to the laser engraver. Here are the settings I used for my stamp:
Scan Layer – Speed: 100 / Power: 80
Cut Layer – Speed: 7 / Power: 70
Click the preview button ( ![]() ) in the top toolbar to make sure it will engrave how you intend it to. The areas you want to stamp should appear black while all other space around it should be green.
) in the top toolbar to make sure it will engrave how you intend it to. The areas you want to stamp should appear black while all other space around it should be green.
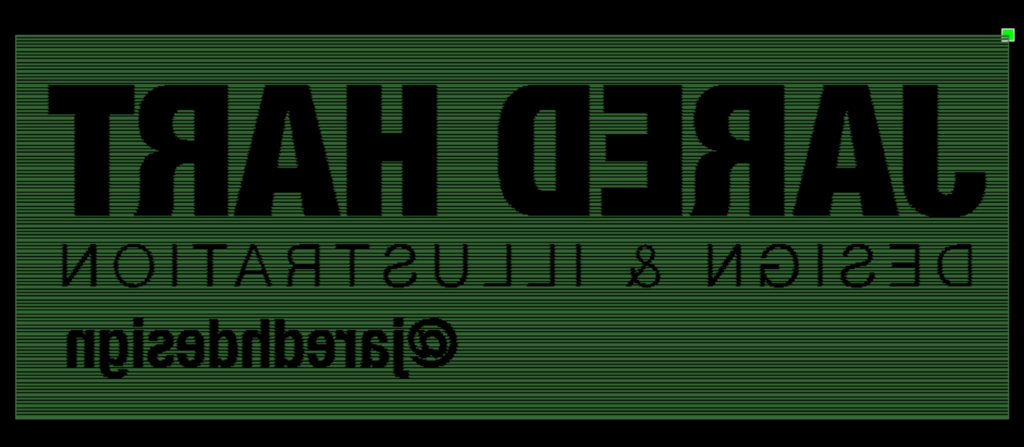
After confirming the preview, close the preview window and follow the procedures you learned in Ignite’s certification process to start your engraving project.
The stamping material is very thin, so I decided to use some of the scrap plywood to cut out a couple rectangles and build a block for the stamp.
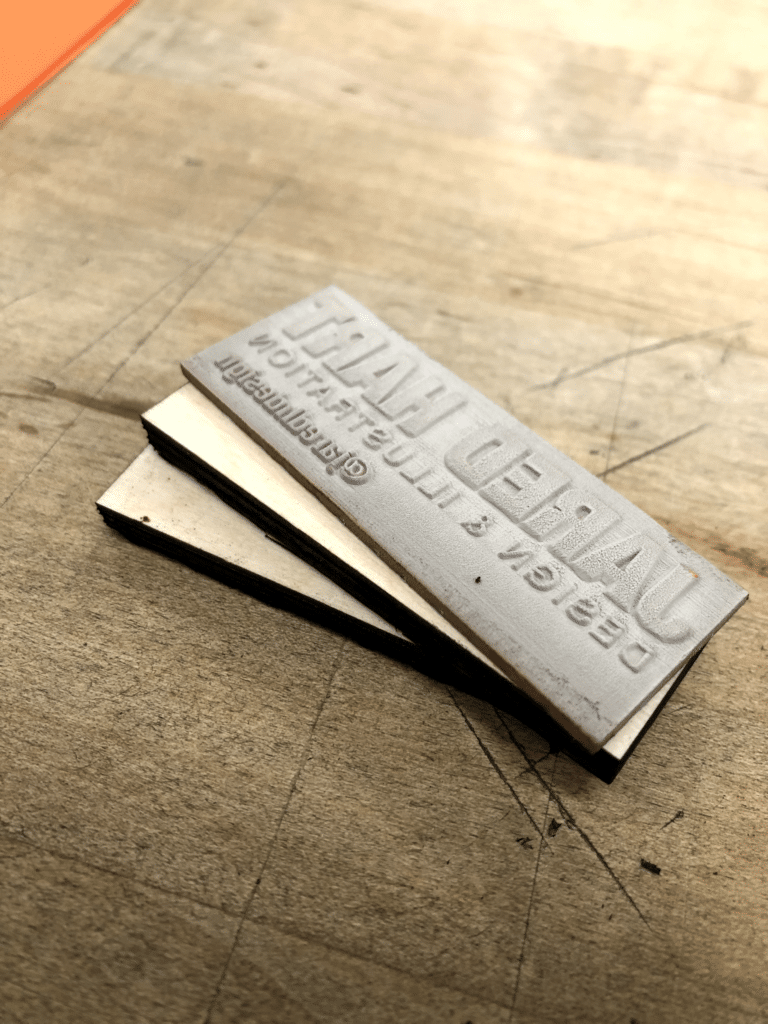
To assemble the three pieces, I glued the two plywood rectangles together using wood glue. Then, after gently washing the dust off of the stamp and letting it dry, I used super glue to adhere it to the wood block.
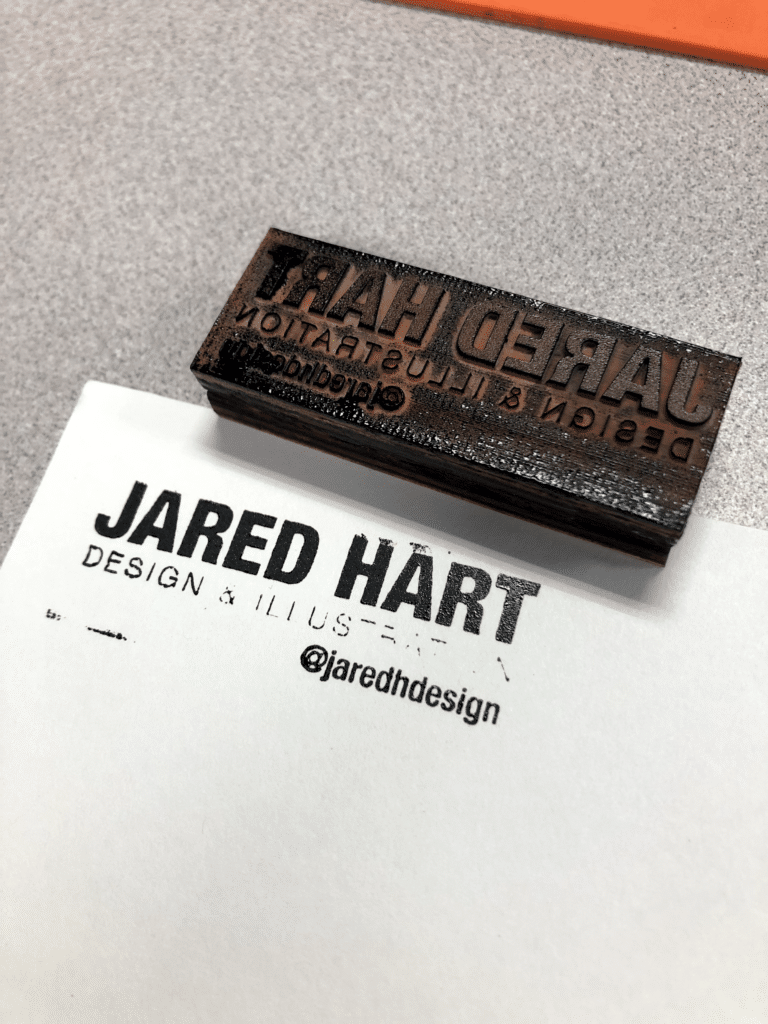
Just with those few steps, you can have your own custom stamp. Using the laser engraver, you can get a very high level of detail. With my first stamp, I may have pushed its limits just a little too far. The word “Illustration” in my logo isn’t showing up, but I think if I thicken up that text just a tiny bit the ink will transfer well.
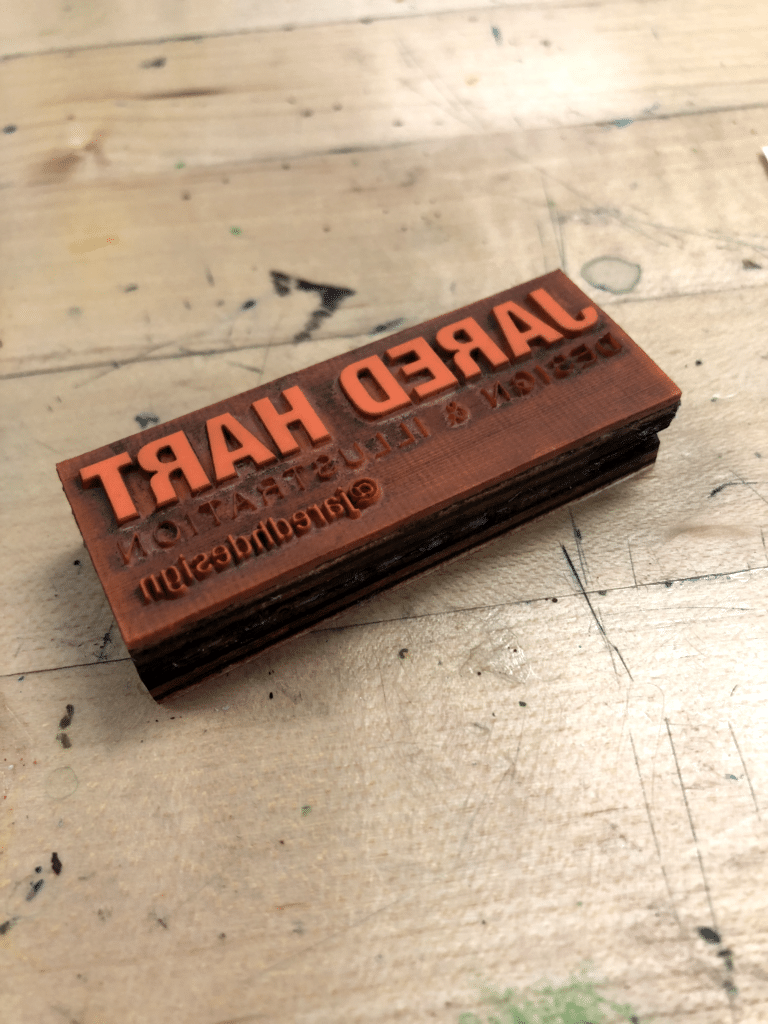
I hope this encourages you to try to create your own rubber stamps! Happy making!


