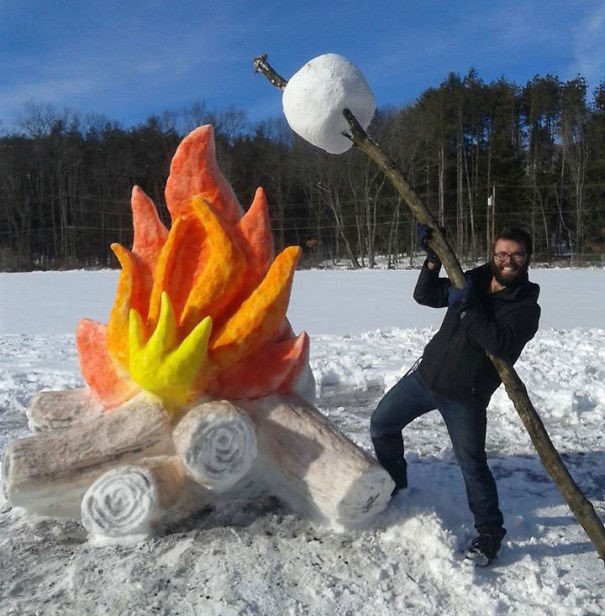
by Garen Robie
Creating snow art is a great way to beat the winter blues when mother nature hands you a bout of inclement weather. We do art everyday indoors at the Ignite Studio, but these projects will take you outside into a winter wonderland! Winter can be cumbersome with dreary, snowy weather; especially in Indiana where conditions can turn on a dime. However, sometimes, once in a blue moon, we get a steady, lasting accruement of snow. With the right attitude—turning lemons into lemonade—it can prove an excellent source of creative outlets that the whole family can enjoy. If we do happen to have a steady gathering of snow in the coming months, here are some ideas on how to tackle the snow with a sense of fun and adventure.
Creating Snow Art Paintings
One excellent way to adorn your snowy yard is to apply color. One of the easiest things to do is to take a little bit of food coloring and water, put it in a spray bottle, and sprits the snow. Try multiple colors to create a rainbow effect. What kinds of pictures can you draw with the colorful water?


Creating Snow Art Sculptures
Another way to create some wonder in your yard is through snow sculpture. Improvising a snow sculpture can end with many unintended results. Andrew Raven of Geico Living explains the process very well:
Before you get started, iron out exactly what it is you’ll be making. Once you begin, keep a visual reference of your subject—like a sketch or figurine—on hand. The ideal temperature for snow sculpting is between 20ºF and 25ºF. At that temperature, snow is supple; it will hold together and mold easily. If it’s much warmer than 25ºF, there’s a chance your sculpture will melt. Once the temperature drops below 20ºF, the snow becomes drier and more brittle, making it harder to work with.
Often times you don’t have to look very far for inspiration. Shoveling and snow plows create mounds that are often ideal for either carving a form or as a base to build snow in an additive process. Andrew Raven continues:
If you’re starting from scratch a highly compressed block of snow will work. There are a couple of ways you can make one. For a small project, try mashing snow into a cooler or a metal garbage can. Even sturdy cardboard boxes can work. If you’re more ambitious, you can build a frame—known by sculptors as a form—using plywood and 2x4s. Make sure you reinforce it though; a weak form will buckle under the weight of a lot of snow. Toss the snow into your form and stomp on it or pack with a shovel until it’s heavily compressed. Once that’s done, remove the form.
You can also use alcohol based markers that don’t freeze to mark and guide your carving process.

Snow Buildings
Aside from making forms, you can hollow out snow mounds, or stack multiple snow bricks to create forts and walls. Digging and tunneling can be an adventure that makes a warm cup of cocoa at the end quite worth it. To reinforce your structure, spray it with water before the temperature drops at night. This will create an ice shell to protect it. If you have the time to be really creative, you can combine sculpture and fort-making. I remember fondly the hollowed out snow mounds carved to look like a dragon’s head in which my brother and I used to wait for the bus. My dad would even add details such as pouring water to form icicle teeth. It’s really special when something so cold can melt your heart.
Thanks for reading and, should we accumulate enough snow to work with, feel free to share your creations with us on the Facebook Ignite Community Discussion Board, or #HamiltonEastPublicLibrary on Instagram.


